Monday, January 30, 2006
An ARF/5-A-Day Tuesday recipe (sort of, I guess)
Stir-Fried Chicken with Chinese Cabbage
Food and Wine Magazine’s Quick From Scratch Chicken Cookbook Copyright1997, 2001, 2004
1 1/3 pounds boneless, skinless chicken breasts (about 4) cut into 1-inch pieces I used tenders
1 tablespoon plus 4 teaspoons soy sauce
3 tablespoons dry sherry
¼ teaspoon cayenne
2 tablespoons cooking oil
1 teaspoon ground coriander
1 tablespoon wine vinegar
½ head Chinese cabbage (about 1 pound), sliced
¾ cup drained sliced water chestnuts (from one 8-ounce can)
2 teaspoons tomato paste
¼ teaspoon dried red-pepper flakes
3 tablespoons water
3 tablespoons chopped cilantro or scallion tops I used scallion tops
1/8 teaspoon salt
1. In a medium bowl, combine the chicken with the 1 tablespoon soy sauce, 1 tablespoon sherry, and the cayenne. Let marinate for 10 minutes.
2. In a wok or large frying pan, heat 1 tablespoon of the oil over moderately high heat. Add the chicken and cook, stirring, until almost done, 1 to 2 minutes. Remove.
3. Add the remaining 1 tablespoon oil to the pan. Add the onion, garlic and coriander. Cook, stirring, until the onions are golden, about 4 minutes. Add the remaining 2 tablespoons sherry and the vinegar. Cook, stirring, one minute or longer.
4. Add the cabbage, water chestnuts. the remaining 4 teaspoons soy sauce, the tomato paste, red-pepper flakes, and water and cook, stirring, for 3 minutes longer. Add the chicken and any accumulated juices, the cilantro, and the salt and cook, stirring, until the chicken is just done, 1 to 2 minutes longer.
Serves 4
I wasn't well-prepared for Sweetnick's ARF/5-A-Day Tuesdays this week and I didn't have a recipe with any of the top ARFs on the menu. This was the best veggie recipe I have to offer although I admit it doesn't seem like a nutritional powerhouse, maybe since it lacks the more colorful members of the vegetable family. It does have onion, garlic, Chinese cabbage, water chestnuts, scallions and even 2 teaspoons of tomato paste (and apparently Lycopene is more bioavailable from tomato paste than from fresh tomatoes) so maybe it isn't such a weak offering afterall.
I thought this was really good. Filling but not heavy. What I love about the recipes in this cookbook series is that they're not time consuming but they do have a bit of complexity. I would never have thrown these ingredients together on my own.
I'm loving this cookbook series and I highly recommend these books. So far I have the Chicken, Pasta, Italian, One-Dish Meals and Herbs and Spices versions from this series. Googling around, I think there are still a few more out there that I can look forward to.
In other news, I used my new bread machine last night. No pics yet - it was a rushed trial run since I forgot to buy hubby rolls for his sandwiches this week. I had set a goal of using the machine at least 6 times this year and I can tell you already that won't be a problem!
Sunday, January 29, 2006
Fresh peach pie in the middle of winter
Peach Crumble Tart
Better Homes and Gardens New Diabetic Cookbook Copyright 1999
1 recipe Lower-Fat Oil Pastry*
½ cup rolled oats
1/3 cup all-purpose flour
¼ cup packed brown sugar
½ teaspoon ground cinnamon
2 tablespoons butter or margarine, melted
¼ cup granulated sugar
2 tablespoons all-purpose flour
1 teaspoon ground cinnamon
6 medium peaches (2 pounds), peeled, pitted, and thinly sliced (about 6 cups)
¼ buttermilk
1. Prepare Lower-Fat Oil Pastry*. On a lightly floured surface, flatten pastry. Roll into a 12-inch circle. Wrap pastry circle around the rolling pin; unroll pastry into a 10-inch tart pan with removable bottom. Ease pastry into pan, being careful not to stretch pastry. Press the pastry into fluted sides of tart pan and trim edges. Do not prick pastry.
2. For crumble topping, combine the oats, the 1/3 cup flour, the brown sugar, and the ½ teaspoon cinnamon. Stir in the butter or margarine. Set aside.
3. For filling, in a large bowl stir together the granulated sugar, the 2 tablespoons of flour, and the 1 teaspoon of cinnamon. Add the peaches and buttermilk. Gently toss until coated.
4. Spread the filling evenly into pastry shell. Top with crumble topping. Bake in 375 degree oven 45 to 50 minutes, or until center of filling is bubbly. (My peaches never made enough juice to get 'bubbly'.) If necessary, to prevent overbrowning, cover loosely with foil the last 10 minutes of baking. Serve warm or at room temperature.
*Lower-Fat Oil Pastry
In a medium bowl stir together 1 ¼ cups all-purpose flour and ¼ teaspoon salt. Combine ¼ cup fat-free milk and 3 tablespoons cooking oil; add all at once to flour mixture. Stir with a fork until dough forms. If necessary, add 1 to 2 teaspoons additional milk. Shape the dough into a ball.
Makes 10 servings. Per serving: 210 calories, 7 g fat (2 g sat fat), 6 mg cholesterol, 87 mg sodium, 35 g carbs, 3 g fiber, 4 g protein (This is without the ice cream, of course!)
While shopping this weekend, I came across some surprisingly good peaches for this time of year. I would have liked to have made a peaches-and-cream pie or something equally decadent but my expanding waistline told me to look for something a little lighter. Even though this cookbook burned me with the strata recipe last time (partially my fault), I gave it another chance.
While I doubt this crust would win any blue ribbons at the county fair, it was passable. It did it's job of holding in the peaches. It was easy to work with. (I think - I don't remember the last time I made my own crust - I usually use the one in the red box - so I don't have much to compare it to but I had no problems rolling this out.) I don't think you could really expect a lower-fat pastry to be as good as a full-fat one since fat is what makes pastry tastes so good, after all.
Overall, this was a good pie, something I would make again. Maybe it wasn't as rich as a full-fat pie with more sugar but it didn't leave you with the guilt that a richer dessert would. It had just enough fat and sugar to make it work.
Oh, and BTW, I used my tart pan for this. That means that my Culinary New Year's Resolution #2 has been satisfied.
In case you missed these the first time
Sometimes I do repeat a recipe. Last night I made Hot Muffulettas again. This time I used whole wheat kaiser rolls. Hubby ate three of them so that tells you something.
Well, I made my first cookbook purchase of the year yesterday. I couldn't resist the urge any longer and I headed to Ollie's Bargain outlet. I picked up a copy of 500 Low-Carb Recipes ($4.99) that I have checked out of the library right now. I also picked up 500 More Low-Carb Recipes ($4.99), Food and Wine Magazine's Quick From Scratch Italian Cookbook ($3.99), Food and Wine Magazine's Quick From Scratch Herbs and Spices Cookbook ($3.99) and Favorite Brand Names 100 Ways to Cook Hamburger ($4.99). So it's still only January and I've spent about 1/4 of my cookbook budget for the year. Oh well.
Saturday, January 28, 2006
Power breakfast
Mushroom Scramble
500 Low-Carb Recipes Copyright 2002
1 to 2 teaspoons butter
1 tablespoon minced onion
¼ cup sliced mushrooms
3 eggs, beaten (I only use 2 eggs)
1. Melt butter in a heavy skillet over medium heat, and sauté the onion and mushrooms for 4 to 5 minutes, or until the mushrooms are tender.
2. Add the eggs and scramble until set, and serve.
1 serving, 3 grams carbs, trace fiber, 17 grams protein
Not much of a recipe, huh? I sometimes concentrate so much on our dinner menu that I neglect to buy foods for breakfast and lunch. I was coming up empty while looking for my usual breakfast foods one morning and I had some eggs and some extra mushrooms, and as always, onion, so I made this. It was a Monday morning and I'm usually tired on Mondays (after staying up to watch Grey's Anatomy) but I wasn't as tired that day. Nor was I about to chew my own arm off well before lunchtime, as usual. I ended up having a lower-carb lunch that day too and I didn't spend the afternoon feeling exhausted, which is quite a difference.
I'm never going to go very low-carb but this was a bit of motivation to start going lower-carb. I just can't pile on the fat - due to our family histories, that's a risk I'm not willing to take no matter how hard any low-carb believer tries to tell me the fat won't hurt me if I avoid the carbs. Instead I have to look for low-carb, not very high fat recipes. There are more of those types of recipes than I would have expected in this cookbook, a library selection.
I have to rely on my own knowledge of nutrition to figure out which recipes in this book are high in fat and which ones aren't, since they only give you info on carbs and protein, which is probably all that low-carbers need to know. But since many diabetics also like to watch carbs, it would be nice for low-carb cookbooks to include full nutrtional information, just for the heck of it. But that would probably be pretty scary for some low-carb recipes!
Thursday, January 26, 2006
Unattractive but tasty
Balsamic Chicken
Cooking and Canning With Mamma D’Amato
Copyright 1997
¼ cup flour
salt and pepper
4 boneless, skinless chicken breasts, halved, totaling about 2 lbs I used tenders
4 tablespoons olive or vegetable oil
1 clove garlic, minced
1 teaspoon oregano
6 tablespoons balsamic vinegar
Season flour with salt and pepper and dredge chicken breasts in seasoned flour. Heat oil in a large heavy skillet and brown on both sides over medium heat. Add minced garlic, oregano, and vinegar, then cover and cook over low heat until chicken is tender, about 15 minutes. (I cooked this just about through before adding the vinegar which was a good thing because the vinegar reduced quickly and the chicken started getting very dark and sticky almost immediately.)
Serves 4 to 6
This was a very tasty dish. The chicken was really tender and as Mama D'Amato said in the book, the vinegar gave this a 'piquant taste similar to wine'. Unfortunately, the appearance of the chicken wasn't that great - it was very dark and sticky and not very photogenic at all. I probably wouldn't serve this to company but I would make it again for ourselves. It was so fast and simple to prepare. I've had to shop around for an affordable balsamic vinegar that I liked to cook with - some just aren't very good, I've found. I actually buy a not-too-expensive store brand, but they package it in a fancy bottle just like the more expensive vinegars.
This really is a great cookbook. It's a simple book lacking pictures of the food and including only brief comments with the recipes but you really feel as if you're standing in her kitchen cooking with Mama D'Amato. I bet it was very hard for her to sit down and write out these recipes because I'm guessing she doesn't use recipes to cook.
For the boy
Cheeseburger Macaroni
Passport to Flavor Copyright 1993
1 pound ground beef
1 cup chopped onion
1 can (14 ½ ounces) stewed tomatoes
1 cup elbow macaroni
1 ½ cups shredded Longhorn or sharp Cheddar cheese I used Longhorn
In a large skillet, brown meat and onion over medium-high heat; drain. Season with salt and pepper, if desired. Add 1 cup water and tomatoes; bring to boil. Stir in macaroni. Cover and simmer 10 minutes or until macaroni is tender. Stir in cheese. (This really needs to sit for a few minutes at this point - it will look watery but turn creamy.) Garnish with sour cream, if desired.
5 to 6 servings.
I'm trying to make more Nicholas-friendly recipes and that's why I chose this recipe. It was a little too 'simple' for me - very good as it was but I'm sure it could easily be jazzed up any number of ways - but Nicholas really enjoyed it.
I will admit that in my younger years, I really enjoyed Hamburger Helper Cheeseburger Macaroni but it's not something I want my son to get used to (and frankly none of the convenience foods I grew up on taste as good anymore and I don't think it's just my evolving taste buds - I think formulas have been tweaked over the years, removing almost all traces of 'real' food and replacing it with sodium and corn syrup.) This wasn't exactly a clone but it was basically the same thing, with tomatoes. And it was just as easy to prepare as Hamburger Helper from a box, just a small amount of chopping and shredding which can even be avoided now that you can buy pre-chopped onion and pre-shredded cheese.
This cookbook is from Del Monte, one of those you might find at the supermarket checkout counter or one that might be offered (in groups of threes) in the Sunday coupon supplement. I bought it all Ollie's for 99 cents and it's always been one of my favorites. It's hard to explain why or what that means since I've only cooked from it a few times but I would definitely call it a favorite. It's small and spiral bound with lots of pictures. This recipe is probably the most basic one in the entire cookbook - there are plenty of 'company-worthy' recipes in this book. Don't be scared by the Del Monte connection - these are all recipes using their canned tomato products and even a purist will admit that canned tomatoes are an acceptable product.
This book emphasizes international dishes - Mexican, French, Asian, Greek and others. I don't think it's in print anymore and that's a shame. If you see it at a yard sale - grab it!
Tuesday, January 24, 2006
Something from Giada
Brussels Sprouts With Pancetta
Everyday Italian Copyright 2005
1 pound fresh Brussels sprouts, trimmed
2 tablespoons olive oil
3 ounces paper-thin slices of pancetta, coarsely chopped
2 garlic cloves, minced
3/4 cup reduced-sodium chicken broth
½ teaspoon freshly ground black pepper, plus more to taste
¼ teaspoon salt. plus more to taste
Bring a large pot of salted water to boil. Add the Brussels sprouts and cook until crisp-tender, about 10 minutes. Drain. Place the Brussels sprouts in a large bowl of ice water to cool completely. Drain again. (The Brussels sprouts can be prepared up to this point 8 hours ahead. Dry thoroughly and refrigerate in a resealable plastic bag.)
Meanwhile, in a large, heavy skillet, heat the oil over a medium flame. Add the pancetta and sauté until it begins to crisp, about 5 minutes. Add the garlic and sauté until pale golden, about 2 minutes. Using a slotted spoon, transfer the pancetta mixture to a large serving bowl. Add the Brussels sprouts to the same skillet and sauté until heated through and beginning to brown, about 5 minutes. Add the broth, ½ teaspoon of pepper, and ¼ teaspoon of salt, and simmer until the broth reduces just enough to coat the Brussels sprouts, about 3 minutes.
Transfer the Brussels sprout mixture to the pancetta mixture, and toss to combine. Season with more salt and pepper to taste and serve.
I should have gone with my gut instincts on this one. I really prefer to cut my brussels sprouts in half, so that the flavor of the meat (I usually use bacon) really penetrates the brussels sprouts. I should have browned these more too. And I thought the 3/4 cup of chicken broth was too much. That step really killed the pretty green color my sprouts were holding onto up to that point.
But, even though they could have been better, these were still pretty good. There was pancetta in there, right? My two-year old even sat next to me and begged for mouthfuls. I only gave him the flavorful outer leaves. I'll never understand why brussels sprouts have such a bad reputation - they're one of my favorite veggies. I'm not sure why I don't eat them more often.
I got this book from the local library, which carries a unusual amount of cookbooks from chefs who appear on the Food Network. This is the second time I've checked this out but last time I never got around to cooking anything from it. I wasn't crazy about Giada DeLaurentiis when she first showed up on the Food Network but I've grown to like her cooking and I really like this cookbook and plan on buying it when I find it at a good price. It's just what it says it is - Everyday Italian. The recipes aren't complicated yet they use fresh ingredients and I swear I want to make each and every one of them.
Potatoes - they ARE good for you!
Chicken Provençal
Food and Wine Magazine’s Quick From Scratch Chicken Cookbook Copyright 1997, 2001, 2004
1 tablespoon cooking oil
1 chicken (about 3 to 3 ½ pounds), cut into eight pieces I used thighs and drumsticks
¾ teaspoon salt
½ teaspoon fresh ground black pepper
1 small onion, chopped
4 cloves garlic, minced
½ cup red wine
1 ½ cups canned crushed tomatoes with their juice
½ teaspoon dried rosemary
½ teaspoon dried thyme
1/3 cup black olives such as Niçoise or Kalamata, halved and pitted I used Kalamata
1 teaspoon anchovy paste
1. In a large, deep frying pan, heat the oil over moderately high heat. Season the chicken with ¼ teaspoon each of the salt and pepper and put it into the pan. Cook the chicken until browned, turning, about 8 minutes in all. Remove the chicken from the pan. Pour off all but 1 tablespoon fat from the pan.
2. Reduce the heat to moderately low. Add the onion and the garlic and cook, stirring occasionally, until the onion starts to soften, about 3 minutes. Add the wine to the pan and simmer until reduced to about ¼ cup, 1 to 2 minutes. Add the tomatoes, rosemary, thyme, olives, anchovy paste, and the remaining salt and simmer for 5 minutes.
3. Add the chicken thighs and drumsticks and any accumulated juices. Reduce the heat to low and simmer, covered, for 10 minutes. Add the breasts and cook until the chicken is just done, about 10 minutes more. Add the remaining ¼ teaspoon pepper.
I cooked this a bit longer since I like my bone-in chicken thoroughly cooked.
Grilled Potatoes with Olive Oil and Thyme
The Ultimate Diabetes Cookbook Copyright 2003
1 large baking potato (12 ounces)
1 tablespoon olive oil
¼ teaspoon paprika
¼ teaspoon dried thyme
1 clove garlic, minced
1/8 teaspoon ground black pepper
salt to taste
1. Preheat grill, oven or broiler.
2. Peel or thoroughly scrub the potato; cut into ¼-inch thick slices. In a saucepan, cook potato in boiling water for 5 minutes over medium-high heat; drain thoroughly.
3. In a medium bowl, stir together the oil, paprika, thyme, garlic, and black pepper. Brush potatoes on both sides with the oil mixture.
4. Cook on grill about 5 to 6 minutes per side until tender when pierced with a fork. Season with salt, if desired. I used my GF Grill, which is what the cookbook author said that she always uses.
Serves 4; Diabetic exchange 1 bread; ¾ fat
(ha ha ha! I made 3 small potatoes for two people - I guess the small portions is what makes this a diabetic recipe.)
I was surprised to see Russet potatoes on the Top 20 Antioxidant Rich Food List since they seem to get such a bad rap these days, when carbs are the enemy to so many people, but there they were. So this is my contribution to Sweetnicks ARF/5-a-Day Tuesdays this week. The potatoes were tasty and smelled divine while cooking.
But this chicken, oh this chicken, was the star of the show. Or I should say, the sauce. I've said it before, I'm a sucker for anything with anchovy paste and this was no exception. This recipe was so flavorful. I love, no I LOVE, these Food and Wine Magazine Quick From Scratch Cookbooks.
I picked up this diabetic cookbook in the library and I really can't judge it on one potato recipe but the other recipes do look promising. I hope to try something else from this book before returning it to the library.
I was jonesing for new cookbooks this past weekend but I opted for a trip to the library. They have a great selection but it's just not the same as buying cookbooks for some reason.
Monday, January 23, 2006
A Meme in 7's
Michele tagged me for a meme!
Seven Culinary Things to do Before I Die:
I have a list of things I want to do this year:
2006 Culinary Resolutions
I haven't thought further than that.
Seven Things I Can't do in the Kitchen:
1. Anything that requires a lot of patience or detail work.
2. Keep things organized.
3. Keep things clean while I'm cooking.
4. Make coffee without getting grounds all over the place.
5. Resist opening the refrigerator when I'm bored.
6. Find what I need from my pots and pans cupboard without a flashlight and a lot of cussing.
7. Speak fluent French (but I can't do that anywhere).
Seven Things that Attract me to Food Blogging:
1. Inspires me to use my cookbooks.
2. Excuse to buy more cookbooks.
3. It was a fun way to turn my love of food into a hobby.
4. People leave comments and I feel loved.
5. People don't leave comments and I feel unloved but I get over it and it makes me a stronger person.
Seven Things I Say Most Often While Cooking:
1. Crap! Where the hell is the _______? (Fill in blank with whatever I am frantically searching the cupboards for.)
2. Go play with your father.
3. PLEASE go play with your father.
4. Sorry Ernie, but if you're going to sit in the middle of the floor, your tail is going to get stepped on.
5. Yes, I'm going to take a picture of this. You kill and stuff dead animals as a hobby. Don't look at me as if I'm strange.
6. Not now honey, Nicholas might walk in.
7. Okay, but make it fast.
Seven Cookbooks I Love:
This is like asking me to pick out my favorite child. Okay, I only have one child but you know what I mean. I have no favorites but these are seven that I really like at the moment.
1. Food and Wine Magazine's Quick From Scratch One-Dish Meals Cookbook
2. Food and Wine Magazine's Quick From Scratch Pasta Cookbook
3. Food and Wine Magazine's Quick From Scratch Chicken Cookbook
4. Heck, I'm a sucker for any cookbook with lots of pictures and recipes I can actually make.
Seven Cooking Shows I can Watch Over & Over Again:
The only two I really like right now are the Barefoot Contessa and Everyday Italian but I'm a sucker for any cooking show, or even the shopping networks when they're cooking.
Sunday, January 22, 2006
I agree
The Best Fried Rice
The Chinese Cookbook Copyright 1972
5 cups cold cooked rice (cooked at least one day in advance)
1 cup small raw shrimps, shelled, deveined, and split in half lengthwise I used large shrimp
1 teaspoon baking soda
1 teaspoon salt
5 tablespoons peanut, vegetable or corn oil
2/3 cup cubed Chinese sausages or cooked ham I used ham
3 eggs
½ cup cooked fresh or frozen peas
1 tablespoon salt, approximately
2 tablespoons oyster sauce
1 cup fresh bean sprouts (you can pluck the heads and tails off or not, I did)
½ cup chopped scallions, green part included
1. Flake the rice so that the grains do not stick together. Set aside.
2. Combine the shrimps with the soda and salt and let stand 15 minutes or longer. Rinse thoroughly in cold water and pat dry on paper toweling. (Does anyone know what this step does?)
3. Heat the oil in a wok or skillet until it is almost smoking and add the shrimps. Cook, stirring quickly, and turning them in the oil until they turn pink, about 30 seconds. Remove them to a sieve fitted over a mixing bowl and let them drain well. Return the oil from the drained shrimps to the pan.
4. Add the sausages or ham to the pan and cook just to heat through, stirring. Add the rice, stirring rapidly, and cook until thoroughly heated without browning.
5. So the following quickly: Make a well in the center of the rice and add the eggs, stirring constantly. When the have a soft-scrambled consistency, start incorporating the rice, stirring in a circular fashion. (I messed this up and wish I had cooked the eggs separately and added them back in like I usually do.)
6. When all the rice and eggs are blended, add the peas and the tablespoon of salt, stirring. Stir in the oyster sauce and the cooked shrimps, tossing the rice over and over to blend everything. Stir in the bean sprouts and cook, stirring and tossing, about 30 seconds. Add the scallions and serve immediately.
Yield: 8 to 12 servings.
When I got my first apartment, the first one that was mine, all mine, the very first night I ran home to make shrimp fried rice. They served a great version of it in the cafeteria at the hospital where I worked and I was trying to duplicate it (seriously this cafeteria had great food). I felt so free to finally have my own kitchen to experiment in. Not that I didn't cook when I had roommates, but there was something about being able to cook alone that was very appealing to me. I still prefer to cook after the rest of the house goes to sleep.
My attempt to duplicate the cafeteria version of shrimp fried rice was a failure but since then I have made passable fried rice. At least I thought so until I tasted this recipe. Even though I mucked this up when I added the eggs, ending up with a creamy finished product, this was still the tastiest fried rice I've ever made. I would probably leave the sprouts out next time since I just don't care all that much for them but that would be the only change I would make (besides cooking the eggs separately). I've always added soy sauce but oyster sauce seems to be the proper ingredient for good fried rice. I'm probably the last person to know this but at least I know now.
This is my third Craig Claiborne cookbook (I've also cooked from The New York Times Cookbook and Cooking With Herbs and Spices). Not that I'm a huge fan of his, it's just that he showed up alot in the return bin at the book warehouse where I worked during the summer in college. I haven't had a loser recipe from him yet. He had a co-author for this book - Virginia Lee. These recipes claim to be authentic but since I've only eaten your typical American-style Chinese food, I can't vouch for that. For the most part, these recipes do seem very 'doable', probably more so than in 1972 when this was written. I doubt Asian ingredients were as widely available at that time.
Satisfying an urge
Sweet Potato Brownies
The Ugly Binder, clipped from Women’s Health and Fitness Magazine
1 stick trans-free margarine
1 cup sugar
½ cup Splenda
5 egg whites
½ Tbsp. vanilla extract
¾ cup all-purpose flour
½ cup oatmeal
½ cup baking cocoa
½ teaspoon baking powder
1 cup mashed, cooked sweet potato without skin I used canned
¼ cup chopped pecans (I omitted these)
Preheat the oven to 350 degrees F. Lightly grease a 9x12 inch baking pan. (I used a 9 x 13-inch pan.) Cream the margarine, sugar and Splenda. Add the egg whites one by one. Scrape the bowl well. Add the rest of the ingredients except the pecans. Mix well. Spread batter in pan. Top with pecans and bake until the brownies are firm in the center, about 30 minutes.
Make 16 servings. Calories 169, Fat 7 grams, Sat Fat, 1 gram, Total Carbs 23 grams, Fiber 1.5 grams, Sugar 13 grams, Cholesterol 0mg, Sodium 99 mg, Protein 3 grams.
I've been craving something sweet, probably going through withdrawal after all the leftover birthday cake I ate last week. I was planning on making a cheesecake but the scale unkindly informed me that probably wasn't a good idea.
So I pulled out this recipe that I had clipped out of a fitness magazine. Was it the best brownie I ever had? No, of course not. But it was pretty good for a healthy alternative and it was very chocolately and satisfied my urges without making me feel guilty. The sweet potato keeps these very moist and they actually seem to get better with age. I opted to refrigerate them.
Thursday, January 19, 2006
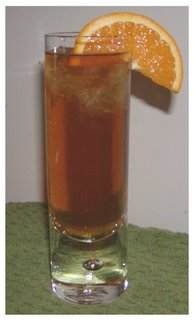
A cocktail
Granada
The American Bar and Cocktail Book Copyright 1998
2 oz dry sherry
2 oz brandy
1 oz orange curaçao I used Grand Marnier
Top up with chilled tonic water
slice of orange
Stir with ice in a mixing glass then pour into a highball glass. Top with chilled tonic water and decorate with orange slice.
Okay, so I'm a little behind on recipes since I was busy planning that party last week. So last night I pulled out a cocktail 'cookbook' and saw what I could come up with, working with my measley liquor selection. I think this was the only recipe in the book I had the ingredients for and it was actually good. But, I haven't had much more than a few sips of wine in years so I really couldn't handle this drink so I only had a taste of it. Okay, a couple of 'tastes'. If I didn't have to come to work today I might have had a little bit more but I didn't want to come to work stinking of alcohol. Drinks like this have way of coming through your pores the next day (or at least that's how they make me feel.) This drink reminds me of a long island iced tea - strong and and citrusy.
Wednesday, January 18, 2006
Family friendly fare (and cookbook # 50!)
Pizza Chicken Bake
Favorite Brand Name 365 Pasta Recipes Copyright 1997
3 ½ cups uncooked bow tie pasta
1 tablespoon vegetable oil
1 cup sliced mushrooms
1 jar (26 ounces) herb-flavored spaghetti sauce
1 teaspoon pizza seasoning blend
3 boneless skinless chicken breast halves (about ¾ pound) cut into quarters I used tenders
1 cup (4 ounces) shredded mozzarella cheese I used a mozzarella and provolone blend
Preheat oven to 350 degrees F. Spray 2-quart round casserole with nonstick cooking spray. (I'm a rebel - I used a rectangular dish!) Cook pasta according to package directions until al dente. Drain and place in prepared dish.
Meanwhile, heat oil in large skillet over medium-high heat until hot. Add mushrooms; cook and stir 2 minutes. Remove from heat. Stir in spaghetti sauce and pizza seasoning. Pour half the spaghetti sauce mixture into casserole; stir until pasta is well coated. Arrange chicken on top of pasta. Pour remaining spaghetti sauce mixture evenly over chicken.
Bake, covered, 50 minutes or until chicken is no longer pink in centers. Remove from oven; sprinkle with cheese. Cover and let stand 5 minutes before serving.
To save time I actually cooked the mushrooms longer and then I fully cooked the chicken on the stove top. I put it all together and melted the cheese in the oven.
I chose this recipe because I thought it was something my son would like and he liked it quite a bit. I also needed something fast so I tweaked the recipe a bit. I really don't see the advantage of cooking it as the recipe suggested. The point of boneless chicken is that you can make a quick meal of it. I think the pasta would dry out after 50 minutes in a 350 degree oven but if anyone tries following the recipe as it was written, let me know how it turns out.
This cookbook is another one from the Favorite Brand Name collection that I love for family-friendly meals. These books are just loaded with recipes. This was also the 50th cookbook that I've cooked from since starting this blog. I've made over 100 recipes from 50 cookbooks and my Ugly Binder since September. Whew! That's a lot of cooking!
That probably puts me about halfway through my collection, maybe a third of the way, although the collection is still growing. I realize that really isn't a lot of cookbooks compared to many collections but considering I was rarely using any of my cookbooks before starting this blog, that's a lot of them to just have lying around the house.
Tuesday, January 17, 2006
A recipe from Marlen
Picadillo a la Marlen
The Ugly Binder, a recipe from an online friend
1 pound lean ground beef, browned
1/2 medium yellow onion, chopped
1/2 medium green pepper, chopped
1 small can tomato sauce (NOT paste)
Olive oil as needed
3 garlic gloves, minced
1 small box raisins
1 small jar pimento stuffed olives
1/4 cup golden cooking wine*
Salt, pepper, oregano to taste I don't add salt since the cooking wine and olives add enough salt
Brown ground beef in a little olive oil in a large frying pan (I season it with a bit of salt, pepper and oregano). Don't over cook it. Just saute until the meat no longer pink. Set aside.
In a bit of olive oil, saute onion, green pepper and garlic until softened. Add tomato sauce, golden cooking wine*, a bit more pepper and oregano, and cooked ground beef. Add raisins and olives. Mix well. Reduce heat to low, cover and simmer 15 minutes. Uncover, stir and cover again. Simmer for 15 minutes more or until meat is done. Taste and correct seasonings. Serve over white rice.
*per Marlen, this is a peasant dish and good wine just doesn't do it in this recipe
I've actually been making this recipe for years. It was given to me by an online friend who has since passed away. Marlen was a very proud woman, and I mean that in the most positive sense. She was proud of her Cuban heritage, very proud to have become an American citizen (and to have helped many, many others become citizens) and she was quite proud of her recipes. She would probably come back and kick my butt if I didn't give props to her here for this recipe, which I have no problem doing. What I love about this recipe is that it didn't come out of a cookbook - Marlen probably ate this dish her entire life and she sent me the instructions in her own words, with her own notes.
Besides all that, this is just a great blend of flavors. I love the sweetness of the raisins against the saltiness of the olives. I apologize to the olive haters out there. I suppose you could leave them out but I don't think you would be left with as good of a dish if you did. Of course, the olives are the best part around our house. This isn't the most photogenic recipe, since it is a peasant dish after all, but trust me, there are never any leftovers. In the rare case that you make this and do have leftovers, Marlen suggested that this also makes a good sandwich filling or stuffing for crescent rolls.
Oh yeah, I also tried a new (to me) way of cooking rice. I boiled it in salted water, then drained it. This is so much easier than cooking it per the directions on the box. I wish I had tried cooking it this way years ago.
Monday, January 16, 2006
A happy coincidence
Confetti Orzo Salad
365 Ways To Cook Pasta Copyright 1988
1 ½ cups orzo or other small solid pasta such as acini di pepe
1/3 cup light olive oil
3 tablespoons fresh lemon juice
½ teaspoon grated lemon zest
½ teaspoon salt
1/8 teaspoon coarsely ground black pepper
1 garlic clove, crushed
1 medium carrot, cut into 1/8-inch dice
1 ¼ cups finely diced red, green and/or yellow bell pepper
½ cup peeled, seeded and finely diced cucumber
¼ cup finely chopped scallions
¼ cup finely chopped red onion
¼ cup finely chopped Italian flat-leaf parsley I used curly
1. Cook orzo in plenty of boiling, salted water until tender, 10 to 12 minutes. Drain (in wire mesh strainer); rinse under cool water.
2. Whisk oil, lemon juice, lemon zest, salt, pepper and garlic until blended. Toss diced and chopped vegetables, orzo and dressing together. Serve warm or at room temperature. I think they meant cold or at room temp.
I chose this recipe only because I happened to have almost all of the ingredients, minus the orzo and lemon. It was odd that I had all of these veggies on hand at the same time. I really didn't expect to like this salad so much. I'm not a huge fan of raw veggies but I like them diced up small like this. I really liked the lemon dressing on this. I wouldn't plan to serve this for a hot dinner date though - between the garlic, onions and peppers you won't be forgetting you ate this anytime soon.
The other part of this happy coincidence is that I've been wanting to get in on Sweetnicks ARF/5-A-Day Tuesdays but I never remember in time to make a submission. I made this salad right in time to participate this week. However, when I looked back at the original 'challenge' nothing in this recipe was on her list of the Top 20 ARFs. Since everything in this except the orzo and the cucumbers is on this list of Top 100 Foods, and I believe the challenge includes all fruits and veggies, I hope this recipe is still acceptable. After all, we still need to look at the big picture when we eat and not concentrate on the latest and greatest nutrtional discovery.
Oh yes, this cookbook is from my days working in the book warehouse. I believe there's an entire collection of these '365 Ways...' books but this is the only one I own. It does have good recipes but no pictures and a poor design (ring-bound and the 'rings' tear the pages unless you're super careful) so I don't often take it off the shelf but I'll be giving it a closer look after this successful recipe.
Sunday, January 15, 2006
The cake that fought me all the way
Sour Cream Cake
The Ugly Binder, from the internet, Recipezaar
NOTE: This cake was actually called White Almond Sour Cream Wedding Cake and called for white cake, 8 egg whites instead of 6 whole eggs and instead of 3 teaspoons of vanilla, use 2 teaspoons vanilla and 2 teaspoons almond extract. This is the way I made it. I used Duncan Hines Yellow Cake mix for the yellow layer and Duncan Hines Fudge Cake mix for the chocolate layer.
2 18-ounce boxes of cake mix
2 cups flour
2 cups sugar
1 1/2 teaspoons salt
2 2/3 cups water
1/4 cup vegetable oil
2 cups sour cream
3 teaspoons vanilla
6 eggs
Place all dry ingredients in a large mixing bowl and stir together with a wire whisk. (I sifted the cake mix first.) Add the remaining ingredients and beat on medium speed for 2 minutes. Pour into greased and floured cake pans, filling each pan about half full. Lightly tap cake pans on counter to bring air bubbles to top. Cut through batter with a toothpick or tip of a knife to break large bubbles. Bake in preheated 325° F oven until cake tests done. Baking time varies according to the size and depth of pans being used.
This recipe makes: One 14" round and one 6" round or One 16" round or One 12" round and one 10" round or One 12 X 18" sheet cake or One 12" round and one 8" round and one 6" round Two 9" squares. Half the recipe makes: Two 8" rounds or Two 6" rounds and 6 cupcakes. I made two 11x15" layers and I had a lot of extra batter with each layer yet I think if I had only made half the recipe for each layer, they might have been too thin.
Easy Buttercream
The King Arthur Flour Baker’s Companion Copyright 2003
5 1/3 tablespoons butter
1/3 cup vegetable shortening
1/8 teaspoon salt
4 to 5 cups confectioners’ sugar, sifted
2 teaspoons vanilla extract
¼ to 1/3 cup milk or cream
In a large mixing bowl, beat together the butter, shortening, and salt until fluffy. Add about half the confectioners’ sugar and beat slowly until well blended. Add the vanilla and milk alternately until they’ve been completely incorporated, and beat until the frosting is light and fluffy. To increase the yield, if you want some frosting left over to use in decorating, change the ingredient amounts to ½ cup butter, ½ cup shortening, approximately 6 cups of sugar, and up to ½ cup milk or cream.
Yield: enough frosting for an 8 or 9-inch layer cake, a 9x13 inch cake or 24 cupcakes. I tripled the recipe for my 11x15" 2 layers cake.
This cake did not want to happen. First, my oven died the first time I tried to bake the yellow layer. All I got was a pan of broiled cake batter. Into the trash that went. Then after my oven was fixed and both layers were baked, only two days before the party, I was rushed to decorate it. I wanted something different between the layers than just frosting so I tried a recipe from my Hershey's cookbook for Cocoa Cream Filling. There was no description and no other recipe referenced it but I thought it might be what I wanted. It had butter, cocoa, light cream, granulated sugar, vanilla and powdered sugar in it. I don't know what I expected and maybe I did something wrong but what I ended up with was a pot of chocolate syrup basically. I added softened butter and lots more powdered sugar and ended up with a tasty chocolate buttercream filling. I have no idea how much butter and sugar I added so I didn't add the recipe here.
Then I was going to try Hershey's recipe for Fluffy White Frosting, a variation of the frosting that starts with a milk and flour paste that I usually like but this one called for light cream and the paste was so lumpy I decided to ditch it and use the recipe I used on my Halloween cupcakes and I just didn't like it this time. I thought I cooked the paste thoroughly but it tasted flour-y. Sooooooooo, I tossed that and I ended up making the Easy Buttercream from King Arthur's. It turned out delicious but I was rushed to decorate the cake and my lettering was way off.
Let me tell you how I feel about baking birthday cakes. It's all about the taste for me. I have limited artistic talent so I don't attempt fancy designs. I could have done a gorgeous Elmo, freehand or I could have used an Elmo cake pan but red coloring (or any dark coloring) just isn't something that tastes good on a cake, in my opinion. I know they make a supposedly flavorless red dye but I just won't go there. And those edible pictures you can put on a cake are only edible in the sense that they won't kill you. This cake was actually light blue but it didn't show up very well in the picture. And you can't see that it said 'Happy 2nd Birthday' . Elmo is standing in the way.
And yes, I use cake mix when I make large cakes. Why? Because it's easier to doctor up cake mixes or seems that way anyway. Most people who make large cakes professionally use the mixes and I want a tried and true recipe when I'm tackling a larger cake. Last year I did use a scratch recipe from Epicurious.com for the chocolate layer and it was great but it was a lot more work. What I liked about this recipe is that I was more likely to end up with two similar layers, texture wise, even with two different flavors. This is a dense cake and that's what I like. I know some people prefer light and fluffy and light and fluffy cake is great but I prefer moist and dense myself.
So, in the end, it turned out great (my widening butt is proof of that - I can't stop eating the leftovers) but what a PITA the process was this time.
Another good potato salad
THE Potato Salad
The Ugly Binder, from Russell Johnson’s website
5 lbs. russet potatoes
1 large sweet onion, minced very fine (Walla Walla Sweets in their short season are the best, but off-season, use whatever sweet onion you prefer.)
1 dozen hard cooked eggs I only used 6 eggs
2 bunches green onions, thinly sliced (use some of the green too) I used finely chopped celery
One-minute Wesson Dressing (recipe below)
Mayonnaise - and plenty of it: Best Foods (Hellman's to you on the east coast) is preferred.
One minute Wesson dressing (make this ahead if you like. Use it for other things too)
(This is for 10 lbs of potatoes so you’ll need to cut everything in half if you only make 5 lbs of potatoes like I did.)
Mix together well:
2 tsp. salt
1 tsp. sugar
1/2 tsp. ground pepper
1 tsp. paprika
1 tsp. dry mustard
1/2 Cup cider vinegar
1&1/2 Cup Wesson oil
Simmer the potatoes in their jackets in salted water just until done.
In the meantime, make the One Minute Wesson dressing and mince the onion very fine. If you use a food processor and it gets a little watery, that's okay. I used the mini-chopper that attaches to my stick blender.
Peel and cube the potatoes while they are still hot. As you proceed, mix in the onion, a generous amount of One Minute Wesson and salt to taste. Let this come to room temperature, mixing occasionally, then refrigerate overnight or, at least, several hours. Mix it gently a few more times. This marinating process is primarily what gives the salad its special taste and color. The fine onion melts its flavors and texture into the hot potatoes.
Before serving, gently mix in the green onions, cubed hard boiled eggs, mayonnaise, then salt and pepper to taste. The potatoes will break up some and add to the creaminess of this salad, which only makes it more wonderful.
Okay, I alread did a potato salad from The Gourmet Cookbook but I was still wanting to try this recipe which I had tucked away in my ugly binder not too before I started this blog. I found this recipe on Russell Johnson’s website (www.russell-johnson.com). Russell was the Professor on Gilligan’s Island. This is a recipe he found and proclaimed ‘THE’ Potato Salad, even better than his own. I didn’t post it word for word so if you want to check out the full-version, check out the ‘Cookin’ with the Prof’ section of his website.
This was another really good potato salad. I think it's hard to mess up potato salad as long as you stick to the basic ingredients and marinate the hot potatoes in some type of vinegar (which I now know is the secret to good potato salad). I wish I had cooked the potatoes longer because I prefer mushy potatoes in my potato salad. I know that picture isn't particularly attractive but trust me it was good. I was going to add the green onion for more color but I just never got around to it.
I served this at my son’s birthday party. He turned two this week. This was just family, I think two years old is too young for kid’s parties. I can’t imagine trying to coordinate the schedules of a roomful of small children. As it was, my son got cranky, threw a bowl of pretzels on the floor and fell asleep on the couch about 15 minutes before the party started and probably would have slept through it if my husband’s grandmother didn’t force him to wake up. She’s very lucky he woke up somewhat pleasant.
You might think I would have a slew of recipes for you, from this party, but that’s not the case. When it comes to cooking for this crowd, I stick to the basics. Along with this potato salad. I made breaded chicken tenders, pan fried then baked off and I drizzle them with a bit of melted butter in which I steeped several cloves of garlic. I made hot and sweet Italian sausage cooked with peppers and tomato sauce. I also served a green salad, rolls and butter. And, of course, the cake and ice cream. (I’ll post about the cake next.) I didn’t use recipes for anything but the potato salad and the cake.
Friday, January 13, 2006
Taking a little break
I'm having a party for my son's second birthday tomorrow so no time for blogging today - too much to do! - but I will post about the potato salad and the cake later this weekend. In the meantime, I have a few random thoughts.
I'm so happy that the part for my oven came! Tell me, how did people maintain their homes before the internet? If I didn't have the internet, I probably would have gone out and purchased a new oven. But instead, I powered up the computer and a few googles later I knew exactly which part I needed, where to get it, how to install it and now my oven is fixed. I've fixed my dryer using the internet too .
The other thing I wanted to mention was the difference in my eating since starting this blog. You think I would have fattened up but I haven't. Last night I wasn't working with a recipe - I put together a dish of cheese tortellini, jarred sauce, preshredded cheese and ground beef. That's how I used to cook - I'd use the drive home to think of what I could throw together for dinner. Now, don't get me wrong, it was delicious but it was way too rich and I ate way too much of it. When I put effort into following a recipe, I don't tend to eat as much, no matter how good it is. And I don't think anyone would have written a recipe adding as much cheese as I did!
Wednesday, January 11, 2006
A great chicken marinade
Grilled Chicken Marinade
A Little Byte of DISA (Fundraiser cookbook) Copyright 2000
4 whole boneless chicken breasts, halved I used tenders
4 Tbsp. oil
4 Tbsp. soy sauce I always use low-sodium soy sauce
2 Tbsp. lemon juice
2 Tbsp. brown sugar
2 cloves garlic, minced or pressed
1 tsp. dried thyme or basil leaves I used thyme
3 whole cloves I omitted this
dash of pepper
Place chicken in a glass baking dish. Sprinkle with garlic, pepper, thyme or basil and cloves. Combine oil, soy sauce, lemon juice and brown sugar. Pour over chicken. (I threw everything in a ziploc bag.) Marinate in refrigerator for at least 4 hours, turning chicken from time to time. (I marinated it about 12 hours.)
Cook on preheated grill or on the stove top in a skillet over medium-high heat. Cook for 5 minutes, skin side down. Turn and cook another 5 to 9 minutes until chicken is fork tender, juices run clear when pierced with a fork, and chicken is lightly browned. Don’t overcook. (I used my George Foreman grill.)
Before my Cookbook Junkie days, we ate a lot of grilled chicken, usually with a packaged marinade. I've tried other chicken marinade recipes but most of the time they weren't any better than the packaged ones. I really liked this one, though. The chicken was so tender and the marinade added just enough flavor. I liked the color it gave the chicken too. Even with the soy sauce, the flavor is pretty neutral. I like a neutral flavor because that gives me more leeway in picking out side dishes.
This cookbook was given to me by on online friend several years ago. It's a fundraiser cookbook from her place of employment so it's fun to read through it and wonder how well she knows the contributers. Marsha, if you're reading this, tell Ladonna P. that I really liked her recipe!
Tuesday, January 10, 2006
Tasty ham and a broken oven
Ham Steak With Spicy Mustard Sauce
Minutemeals 3 Ways to Dinner Copyright 2002
1 fully-cooked reduced-sodium ham steak (16 ounces) I used turkey ham
½ cup peach or apricot preserves I used apricot
½ cup Dijon mustard
2 tablespoons white wine vinegar I used red wine vinegar
1/8 to ¼ teaspoon cayenne pepper or hot pepper sauce I used hot sauce
1. Preheat the broiler. Line a broiler pan with aluminum foil.
2. Trim the ham steak, cut it into 4 pieces, and pat them dry with paper towels. Place the pieces on the broiler pan rack.
3. In a small bowl, stir together the apricot preserves, mustard, vinegar and cayenne. Brush one quarter of the sauce over the ham pieces. Broil 4 to 6 inches from the heat for 4 minutes. Turn the pieces and brush with some of the sauce. Broil for 4 minutes, until the ham is heated, browned and glazed. Serve the remaining sauce in a small bowl along side the ham. I didn't find it necessary to serve it with the extra sauce.
I had some turkey ham left over after making the broccoli-ham soup and I was going to freeze it but I happened to come across this recipe. Easy as pie and much better than just plain ham. It was a nice balance of sweet and spicy. I only had 4 or 5 pieces of ham so I cut this recipe in half (the full recipe is printed above) and still had a lot of sauce left over so I should have quartered it.
This cookbook walks you through an entire menu to get dinner on the table in a short amount of time. I only made the ham and to be honest, I can't remember what they served it - squash and broccoli I think - but I made an impromptu pasta salad to go along with it here.
Nothing fancy on the menu this week since I've been preparing for my son's second birthday party on Saturday. And wouldn't you know it, the bake element in my oven crapped out so I'm waiting impatiently for it to arrive in time for me to make the cake or (horrors!!!) I'll have to serve a store-bought cake. Until the oven is fixed, I have to work around it. It doesn't seem like that would be too difficult with a stovetop, microwave, toaster oven, George Foreman grill, a deep fryer and a crockpot to cook my food with (and, a gas grill outside too) but I miss my oven.
Good soup
Broccoli-Ham Soup
Better Homes and Gardens Eating Light Copyright 1985
¼ cup chopped onion
3 tablespoons butter or margarine
¼ cup all-purpose flour
1 ½ teaspoons instant chicken bouillon granules
1 teaspoon dry mustard
½ teaspoon dried thyme, crushed
1/8 teaspoon pepper
2 cups milk
2 cups water
2 cups broccoli flowerets or frozen cut broccoli I used frozen
1 ½ cups cubed fully cooked ham I used turkey ham
In a 3-quart saucepan cook the chopped onion in butter or margarine till tender but not brown. Stir in flour, chicken bouillon granules, mustard, thyme and pepper. Add milk and water all at once. Cook and stir over medium-high heat till thickened and bubbly.
Stir in fresh broccoli flowerets or frozen cut broccoli and cubed ham into saucepan. Return to boiling. Reduce heat, simmer for 4 to 6 minutes more or till broccoli is tender and the soup is heated through, stirring occasionally.
Makes 4 servings.
This soup wins for great taste and ease of preparation. I made it ahead of time, so I could take it for lunch, and it worked out very well. It had a good consistency and surprisingly good flavor. I liked that this is basically a pantry recipe - the ingredients are usually on hand, at least in my house. Even ham freezes great and I usually have some in the freezer.
'Light' isn't very well defined in this cookbook. It does discuss poaching, steaming, broiling and other less caloric cooking methods but it doesn't include nutritional information. 'Light' cookbooks usually disappoint me but because this one wasn't working under the constraints of calories or fat grams, it might have a few more recipes worth trying in there. I'll have to take a closer look.
Sunday, January 08, 2006
Something different (for me) with mushrooms
Mushrooms Paprikash
Cooking With Herbs and Spices Copyright 1963,1970,1984
1 tablespoon finely chopped shallot or onion I used onion
2 tablespoons butter
1 pound fresh mushrooms, sliced
1 teaspoon lemon juice
1 teaspoon flour
½ teaspoon salt, if desired
2 teaspoons paprika, or to taste
dash of ground red pepper
¼ cup sour cream
1. Sauté the shallot in the butter three minutes. Add the mushrooms and lemon juice and cook five or six minutes, or until the mushrooms are tender.
2. Combine the flour, salt, paprika and red pepper. Add to the mushrooms and cook, stirring, one minute. Add the sour cream and heat, but do not boil.
I had some mushrooms that I needed to use up and this seemed like an easy but tasty recipe to try. It was a nice change from sautéed mushrooms, which is what I would usually do with sliced mushrooms for a side dish. I ate this on it's own, on a night my husband was working late, but it would be a nice side with simply prepared meats. My end product ended up with a good kick of heat - I gave it a nice dose of cayenne.
This book is one of the earliest in my collection, acquired in my warehouse days. It was written by Craig Claiborne, the former New York Times food editor, who wrote the New York Times Cookbook, and many other cookbooks. I think I might have one more cookbook of his in my collection, one on Chinese cooking. His cookbooks aren't fancy but I haven't been disappointed by any of his recipes yet.
I try, I really do
Mushroom-Fontina Strata
Better Homes and Gardens New Diabetic Cookbook Copyright 1999
3 cups assorted sliced fresh mushrooms, such as shitake, button, white, and/or cremini I used all button mushrooms
½ cup chopped onion
1 clove garlic, minced
2 ounces Canadian-style bacon, finely chopped
8 ½-inch-thick slices French bread
½ cup shredded Fontina cheese I added more
2 tablespoons assorted snipped fresh herbs (such as basil, oregano, marjoram, or thyme) or 2 teaspoons assorted dried herbs, crushed I used dried
1 cup fat-free cottage cheese
1 cup evaporated fat-free milk
3 egg whites
1 egg
1 tablespoon Dijon-style mustard
1/8 teaspoon pepper
1 small tomato, seeded and chopped I omitted this
1. Spray a medium skillet with nonstick coating. Cook the mushrooms, onion, and garlic in a skillet until tender. Drain off any liquid. Stir in the Canadian-style bacon.
2. Spray a 2-quart rectangular baking dish with nonstick coating. Arrange the bread slices in the prepared baking dish, cutting as necessary to fit. Sprinkle mushroom mixture over bread. In a small bowl toss together fontina cheese and desired herbs. Sprinkle over mushroom mixture.
3. In a blender container or food processor bowl combine cottage cheese, evaporated milk, egg whites, egg, mustard, and pepper. Cover and blend or process until smooth; pour evenly over other ingredients in baking dish. Lightly press bread down with the back of a spoon. Cover; chill for 4 to 24 hours.
4. Bake, uncovered, in a 350 degree oven about 35 minutes or until a knife inserted near the center comes out clean. Sprinkle with chopped tomato. Let stand for 5 minutes before serving.
Makes 6 servings
I hate when I screw up a recipe, denying it a fair review. When I went to throw some dried herbs onto the cheese, I accidentally grabbed a bottle of garam marsala. I thought I got most of it out of the cheese before I moved on but I couldn't get past the idea that the flavor was still there. And if there's one combination of flavors that turns me off right now, it's cumin and cinammon (after that crab enchilada disaster, the week I ended up getting a stomach bug - I never ate it but the smell was enough). Personally I think this would have been better without any dried herbs, just salt and pepper would have been fine.
This just didn't 'wow' me. I must have rich tastes because almost every time I try a diabetic or other 'light' recipe, I'm not impressed. I think if you added the fat back into this, and took out the herbs, it would be pretty good so this might be something someone can play around with.
Saturday, January 07, 2006
Soup and salad
Tomato French Dressing
A Campbell Cookbook Most-For-The-Money Main Dishes Copyright 1975
1 can ( 10 ¾ ounces) condensed tomato soup
¼ cup vinegar
½ cup salad oil
1 tablespoon finely chopped onion
2 tablespoons sugar
2 teaspoons dry mustard
1 teaspoon salt
¼ teaspoon pepper
In a covered jar or shaker, combine ingredients. Shake well before using. Serve on crisp salad greens.
Makes about 2 cups.
I acquired this cookbook more as a novelty than anything else. I don't have a problem using canned soups in recipes but there is something about seeing recipe after recipe using canned soup that is quite unappealing. Most of the recipes probably aren't that bad, but after reading through a few of them, I usually lose interest in this cookbook, and food in general.
However, I recently purchased more cans of tomato soup than I needed. I don't know why I thought I needed even one can, but I'm sure a sale price had something to do with it. I'm getting a bit tired of dodging falling soup cans every time I open the cupboard. So, I had a vague recollection of a french dressing recipe using tomato soup and I had a bag of salad in the refrigerator and that's how I arrived at this recipe. I knew right where to find a salad dressing recipe that used canned soup - if it wasn't in this book it didn't exist. I'm actually strangely thrilled to have made a recipe from this cookbook, one I thought might be a challenge.
And you know what? I really like this stuff. I've always had a soft spot for the 'red' dressings, Catalina being one of the earliest dressings I remember enjoying on a salad. I liked this stuff a bit too much - I found myself dipping a cracker into it, everytime I came into the kitchen.
Friday, January 06, 2006
You can't go wrong with pepperoni
Cavatappi with Pepperoni
Food and Wine Magazine’s Quick From Scratch Pasta Cookbook Copyright 1996,2001,2002,2004
4 ounces thin-sliced pepperoni, slices cut in half
2 tablespoons olive oil
1 large onion, chopped
1 red or green bell pepper, chopped
2 cloves garlic, minced
1 ½ cups canned tomatoes with their juices (one 16-ounce can)
¼ teaspoon salt
¾ pound cavatappi
3 tablespoons chopped flat-leaf parsley
1. In a large frying pan, sauté the pepperoni over moderate heat until lightly browned, about 3 minutes. Transfer to paper towels to drain. Pour off the fat from the pan and wipe the pan clean.
2. In the same pan, heat the oil over moderately low heat. Add the onion and pepper and cook, stirring occasionally, until soft, about 10 minutes. Add the garlic and cook, stirring, for 30 seconds. Stir in the tomatoes with their juice, breaking them up. Add the salt, cover and simmer over low heat for 10 minutes.
3. In a large pot of boiling, salted water, cook the cavatappi until just done, about 13 minutes. Drain and toss with the sauce, the pepperoni and the parsley.
Serves 4.
*tap*tap*tap* Is this thing on??? Comments have all but dried up around here since I finished my Christmas baking. Oh well, that doesn't stop me. I know someone is probably reading this. That's what I tell myself anyway.
This dish was a winner in our house. All three of us scarfed it down, but my son just ate the noodles. It was economical too, if you can get pepperoni at a good sale price like I did. I only used a dollar's worth of pepperoni in this dish. The pepperoni packs so much flavor (and sodium) that I resisted the urge I had to sprinkle Parmesan on top of this and it really was fine on it's own, better than fine. I liked having a 'light' sauce on the pasta, it didn't feel too rich but it was very satisfying. I ate the leftovers for breakfast the next day. Cold. It was still yummy.
Thursday, January 05, 2006
My first risotto
Mushroom and Chicken Risotto
Food and Wine Magazine’s Quick From Scratch Chicken Cookbook Copyright 1997, 2001, 2004
2 tablespoons butter
½ pound mushrooms, cut into thin slices
2/3 pound boneless, skinless chicken breasts (about 2) cut into ½-inch pieces
1 teaspoon salt
5 ½ cups canned low-sodium chicken broth or homemade stock, more if needed
1 tablespoon cooking oil
½ cup chopped onion
1 ½ cups aborio rice
½ cup dry white wine
½ cup grated Parmesan cheese, plus more for serving
2 tablespoons chopped fresh parsley
1. In a large pot, heat the butter over moderate heat. Add the mushrooms. Cook, stirring frequently, until the mushrooms are browned, about 5 minutes. Add the chicken, ¼ teaspoon of the salt and the pepper. Cook until the chicken is just done, 3 to 4 minutes. Remove the mixture from the pan. In a medium saucepan, bring the broth to a simmer.
2. In a large pot, heat the oil over moderately low heat. Add the onion and cook, stirring occasionally, until translucent, about 5 minutes. Add the rice and stir until it begins to turn opaque, about 2 minutes.
3. Add the wine and the remaining ¾ teaspoon salt to the rice. Cook, stirring frequently, until all the wine has been absorbed. Add about ½ cup of the simmering broth and cook, stirring frequently, until it has been absorbed. The rice and broth should bubble gently; adjust the heat as needed. Continue cooking the rice, adding broth ½ cup at a time, allowing the rice to absorb it before adding the next ½ cup. Cook the rice in this way until tender, 25 to 30 minutes in all. The broth that hasn’t been absorbed should be thickened by the starch from the rice. You may not need to use all the liquid or you may need to add more broth or some water. I used almost all of a large can of chicken broth.
4. Stir in the chicken and mushrooms, the Parmesan, and the parsley and heat through. Serve the risotto with additional Parmesan.
I've never made risotto before and when I thought about it, I realized that I've never eaten risotto before now. How did I miss it? It's been quite popular for years but it's just not served in the fine restaurants my husband and I frequent (Applebee's, TGIF, Red Robin, etc). I wondered beforehand if it was going to be worth the effort and, yes, I think it was worth the effort. Even my two-year old scarfed this down. This is good stuff.
These cookbooks from Food and Wine Magazine are some of my favorites, out of my entire collection. After enjoying the first one (one-dish meals), I went looking for others in this series, in the same bookstore I bought the first one, discounted. Unfortunately the others weren't discounted and I hesitated on paying $14.95 for a cookbook. What do you know? Next time I went to Ollie's Bargain Outlet they had the chicken, pasta and Italian versions for only $3.99 each. I bought the pasta and chicken ones - I guess I wasn't in the mood for Italian that day but I'm going back to look for that one.
Wednesday, January 04, 2006
The last of the New Year's Eve Nibbles
Baked Cheddar Olives
The Gourmet Cookbook Copyright 2004
1 cup coarsely grated sharp Cheddar (about 4 ounces)
½ cup all-purpose flour
1/8 teaspoon cayenne
2 tablespoons unsalted butter, softened
20 small pimiento-stuffed green olives (from a 3-ounce jar), drained and patted dry
Put a rack in the middle of oven and preheat oven to 400 degrees F.
Stir together cheese, flour, and cayenne in a bowl. Blend in butter with your fingertips until a dough forms. I had to add water for this to become a 'dough'.
Drop tablespoons of dough onto a sheet of wax paper and place 1 olive on each piece of dough. Lightly flour your hands and wrap dough around olives, enclosing each one completely. I just grabbed some dough and wrapped it around an olive, a tablespoon is probably too much, IMO. Transfer olives to a baking sheet with sides and bake until pastry is golden, about 15 minutes. Serve warm.
Cook’s Note: The dough-wrapped olives can be prepared up to 2 hours ahead and refrigerated on the baking sheet, covered with plastic wrap. Bring to room temperature before baking. I did refrigerate them for a couple of hours, and let them sit out a few minutes, but I didn't bring them back to room temp.
These were kind of a last minute decision for me. We like cheese. We like stuffed olives. It seemed like a nice, simple addition to the menu. I was satisfied with the end result and my husband and I finished them off pretty quickly. Even my two year old nibbled on one. I don't know if I would ever bother making these for a crowd, as I didn't think they were that 'special', to sit there and wrap olive after olive. But that's not to say they weren't very good, just not a showstopper.
Monday, January 02, 2006
Learning to listen to the kitchen gods
Glazed Chicken Wings
The Essential Appetizers Cookbook Copyright 1999
4 lb chicken wings
½ cup barbecue sauce
½ cup apricot jam
2 tablespoons white vinegar
2 tablespoons soy sauce
2 tablespoons tomato sauce
1 tablespoon sesame oil
2 cloves garlic, crushed
1. Trim the excess far from the wings. Stir the barbecue sauce, jam, vinegar, soy sauce, tomato sauce, oil and garlic in a small pan over low heat until just combined. Cool slightly, pour over chicken wings and mix well. Cover and marinate in the refrigerator at least 2 hours.
2. Preheat the over to 350 degrees F. Drain the excess marinade from the wings and reserve. Bake the wings in a lightly greased baking dish for 45 minutes. To prevent sticking, you can add a little water. Turn halfway through the cooking time, brushing occasionally with the reserved marinade.
This recipe has been calling to me for years. Yes, they're just chicken wings but they look so nice in the picture in the cookbook. I thought they would be fruity, sweet and sticky. But I don't think this recipe was meant to be and I should have listened to the kitchen gods who tried to stop it from happening.
All was going well, except seeing 'barbecue sauce' in a recipe always makes me pause. (Do they mean sweet and spicy barbecue sauce? Sweet and tangy? Smokey? There are so many different barbecue sauces.) But I chose my most neutral barbecue sauce, whipped up the marinade in no time and set the wings to marinate for several hours. Then I put the wings in the oven and not long afterwards I heard the sound I knew I would someday hear. Glass breaking. Yes, my Pyrex dish exploded. It happened to my sister on Easter once and I've heard of it happening to others so I knew exactly what was happening without opening the oven door (good thing because the glass continued to 'pop'.
So here is was, New Year's Eve, and this was the main nibble we were having. So I sent hubby out for more chicken wings, a feat only slightly less daunting to this man than asking him to find Jimmy Hoffa. Two phone calls and a screaming match later, I had more chicken wings but there was no time to marinate them.
So maybe that was why these wings were lackluster but I don't think so. These were just chicken wings with sweet barbecue sauce. Edible but nothing special. I wanted the apricot jam to stand out but it didn't.
I hate that I was disappointed by the first recipe I've tried from this cookbook. This is from the same series as The Essential Pasta Cookbook and I've been drooling over the gorgeous pictures in this book for years, dreaming of the fancy cocktail parties I could have, if I was the type of person to throw cocktail parties, which I'm not. But I won't give up on this cookbook after just one so-so recipe. I'll give it another chance.
A New Year's Eve nibble
Sherried Shrimp
The New York Times Cookbook Copyright 1961
24 medium shrimp, shelled and deveined I used large shrimp
¼ cup soy sauce
¼ cup sherry
¼ cup salad oil
1 teaspoon powdered ginger or 1 tablespoon fresh ginger root, ground I used 1 tbsp of jarred, grated ginger
1 clove garlic, finely chopped
1. Marinate the raw shrimp in the remaining ingredients one hour or less.
2. Place the shrimp with a little of the marinade in a skillet and cook three or four minutes, until shrimp are done. If possible, use an electric skillet. I used my George Foreman grill and they were done almost instantaneously.
4 servings
On New Year’s Eve, I usually make a few different nibbles instead of a meal. This was one of the nibbles I made this year. It was easy to prepare and very good. It added flavor to the shrimp without overpowering it. (Excuse the blurry-looking pic - that's steam rising off the shrimp.)
This is probably the cookbook I've owned the longest. I picked it up the summer I worked in the warehouse of a book publisher and we could purchase returns for $1 (hardcover) or 50 cents (paperback). That was the summer I started my cookbook collection. This is a classic cookbook yet I haven't tried too many recipes from it but this one was so good (and so is the Butterscotch pie I made from this book), it has me thinking that I really need to take a closer look at this cookbook.