
I didn't even get any pictures of my Christmas cookies this year. I did think of it, but I'm so out of the habit of taking pictures of food, that it was just a passing thought.
What did I make this year? I made a few oldies:
Spritz
Gingerbread Men
Welsh Cookies
South Seas Cookies
Chocolate Chip Brownies
Snickerdoodles
Chocolate and caramel covered Lorna Doones (like Twix), chocolate and caramel covered pretzels, roasted salted almonds topped with caramel and dipped in chocolate, marshmallows and caramel dipped in chocolate, all from this caramel recipe, which has a horrible picture (the caramel looks so dark and hard) but I love this caramel recipe. It was too firm that first time I made it. Another year I had to toss everything (after dipping!) and start over, it came out so hard. Once I ditched the candy thermometer and used ice water to figure out when it was done just right (I like it soft), I've never had a problem with this recipe.
I made a batch of Five-Minute Fudge with mini marshmallows too but I didn't like the way it came out this year, maybe it was the brand of chocolate chips. I usually love this.
Fortunately all of the new recipes I tried were recipes I found online so even though I didn't get pictures, I can still tell you about them and direct you to the recipes. I was happy with all of them but noted any changed I might make next time.
Hershey Kiss Macaroons - I used lemon juice instead of orange which was fine but I would use less or leave it out next time. I would use less almond extract or use vanilla next time. I used the extra creamy Hershey Kisses that I've only found at Hersheypark. I think they taste better than regular Hershey Kisses but they melt so easily I almost had puddles of chocolate instead of Kisses!
Chocolate Chip - I've made chocolate chip cookie with vanilla pudding before, maybe the same recipe, but I found this recipe online when I was in a hurry, bookmarked it on my phone and I've used it several times since. I don't think I'll ever settle for one chocolate chip cookie recipe but this is one I will keep in rotation.
Double Chocolate Chip - I used this recipe from Nosh With Me - she used peanut butter chips, I used milk chocolate chips.
I added Hershey-ets to the tops of the chocolate chip and double chocolate chip. These seem to be safe for my peanut-allergic son - I don't know why I am just discovering these this year.
Frosted Sugar Cookies - This is a Lofthouse copycat recipe I found online. I haven't had the real ones in so long I don't know if it's a good copycat but I liked that the cookie wasn't very sweet on it's own since the frosting and sprinkles are so sweet. I also like the texture. I used Easy Buttercream to frost them.
Schnecken - I once had a roommate who worked at a bakery that made Schnecken, a simple Rugelach-type cookie with cinnamon and sugar. We loved those cookies! This is their recipe for chocolate chip Schnecken, I just left out the chocolate chips. I think I would make the dough just a tad bit sweeter next time. Just an itty bitty bit. It's been a long, long time since I had a bakery Schnecken, but as much as I liked these, I am sure the ones from the bakery were better. I've made something similar, Butter Horns, but I like the cream cheese dough better.
Saturday, December 29, 2012
Wednesday, October 03, 2012
This blog is not dead. It's just in a coma.
I missed my seven year blogiversary last month. Seven years of trying new recipes and I still can't cook! I knew I was not a 'natural' when it comes to cooking but I thought that with a lot of practice that I would see more successes than failures. And I was, when I was cooking regularly, but it seems that it didn't take long for me to lose whatever skills I had picked up these past seven years. Lately I feel like I'm a worse cook than when I started!
I have left ingredients behind, I have made the wrong call and added the 'wrong' ingredient (a few white chocolate chips were all it took to turn my son's nose away from one batch of chocolate chip brownies), I've overcooked and undercooked things. Even recipes I've made several times before are not turning out right (Dan's disaster of a birthday cake!) I can't even make a salad for myself that hits the mark. I can't make anything that doesn't come out of a box or package that my kids will eat, and sometimes I can't even get the packaged stuff right.
So it's been hard to revive my desire to blog. Blogging certainly hasn't been replaced with anything - I still have the time to do it (I have more time than ever to do it). I was still buying cookbooks until recently when I decided that madness has to stop, at least until I start using them again. Will that happen? I honestly don't know.
Wednesday, July 11, 2012
Ah, finally! Chorizo Carbonara

Chorizo Carbonara
River Cottage Every Day Copyright 2009
5 ounces spaghetti, linguine, or other long pasta
1 tablespoon canola or olive oil
1 cup Tupperware Mexican Chorizo, crumbled (or Spanish chorizo, diced quite small)
2 large egg yolks
1/2 cup heavy cream
Sea salt and freshly ground black pepper
Add the pasta to a large saucepan of well-salted boiling water and cook until al dente. Meanwhile, heat the oil in a frying pan. Add the chorizo and fry briskly for about 10 minutes, until crisp and cooked through. If you’re using the soft Tupperware chorizo, you can start with a bit of a lump and break it up with a spatula as it fries, so it forms lots of succulent little nuggets and crumbs, thereby maximizing the surface area available for crisping.
Beat the egg yolks and cream together and season lightly (since the chorizo is already highly seasoned). When the pasta is done, drain thoroughly and immediately return it to the hot pan. Tip in the crisp chorizo, followed by the egg mixture. Use 2 forks to mix the eggy cream into the hot pasta. It will cook in the heat of the pasta, coating each strand in a light, creamy sauce. Serve right away, with a final grinding of black pepper on top.
Tupperware Mexican Chorizo
1 1/2 pounds pork shoulder, coarsely minced
1 tbsp sweet smoked paprika
2 tsp hot smoked paprika
2 garlic cloves, finely chopped
2 tsp fine sea salt
1½ tsp fennel seeds
¼ tsp cayenne pepper
1/2 cup red wine
Freshly ground black pepper
A little rapeseed or olive oil for frying
Put all the ingredients except the oil into a bowl and mix thoroughly with your hands, squishing the mix through your fingers to distribute the seasonings evenly.
Heat a little oil in a frying pan, break off a small piece of the mixture, shape into a tiny patty and fry for a few minutes on each side, until cooked through. Taste to check the seasoning, remembering that the flavours will develop further as the mixture matures. If you're a heat fiend, you can add more cayenne and black pepper.
Cover the mixture and store in the fridge for at least 24 hours before using; this will allow the flavours time to develop. It will keep for about a week.
_______________________________________________
While I obviously often come across recipes that I want to make, less often I come across a recipe that I really want to make, one that won't leave my brain. I may not jump up and make the recipe immediately. In fact, sometimes it may take me years to get to it, but I won't forget about it.
It didn't take me years to make this recipe, just months, but I would have made it sooner if not for one thing - finding hot smoked paprika proved to be a bit of a challenge. I tried my usual hard-to-find-ingredient go-to place - Wegman's. I checked every grocery store I stepped in. I couldn't even find it on Penzey's site although I have to believe it was there somewhere. I did find another online source but it seemed ridiculous to pay shipping to buy a spice for one untested recipe. I gave up. I took this book back to the library.
Then, lo and behold, I was in a TJ Maxx (or Marshall's or one of those stores that are basically all the same store) and there was a can of hot smoked paprika for $3 or $4 in the gourmet food section. Jackpot! I checked out this cookbook the next time I went to the library and made this recipe.
Now, one thing about these recipes that I can't get out of my mind - sometimes they are a big disappointment. This one was not, I'm glad to say. The sausage was a tad too salty, my fault probably since I used regular table salt, not 'fine sea salt' (I have since picked up some fine sea salt) and I used cooking wine which I usually don't have a problem with but I should have known better than to not adjust the salt. Keeping raw meat in the fridge for a week seems like a long time - maybe all that salt helps it last longer. (I did eat some of this at a week old and lived to write this blog post.)
It wasn't terribly hot. It could have been a touch hotter. I was too lazy to cook up a little and check the seasonings. I might add more cayenne or some chili flakes next time. This is definitely something I want to make again.
I made the carbonara 2 or 3 times (a half recipe at a time, a very healthy portion for one person). I loved it. I made chorizo and scrambled eggs, with a touch of havarti cheese. It was delicious. I wanted to make little meatballs (the suggested preparation of the sausage in the cookbook) but I didn't get to them. Oh, I also fried up a patty of this and made a little sandwich for a quick dinner one night. It was very good on it's own. I froze what was left of the sausage mixture.
As you can see, I'm still here. I'm still cooking but when I look at my backlog of recipes, it all looks quite boring. I'm starting to believe I will never be a regular blogger again but at the same time, I'm not ready to say my final farewell either. I think when the heat subsides I will start getting a bit more aggressive about finding new recipes the boys might like. This blog has fallen towards the bottom of my to-do list right now.
Oh, here's Dan's 4th birthday cake.

It was made under-the-gun and I thought it was cute but it went straight in the trash. I made the cake layers ahead of time and froze it since I had time constraints to deal with. Something went wrong - maybe the baking powder had lost it's spark. The layers looked okay on the top half but the bottoms were dense and looked uncooked. They passed the toothpick test. Thank God this cake was only for the three of us. WTH? I've never messed up a cake like that before. Oh well, the cupcakes were good (they were from a box !)

Wednesday, June 06, 2012
Chasing memories: Peanut Butter Sunbutter Kisses

Recipe Favorites of "ole Shawnee" Copyright 1968-1982
2 c. dry milk
1 c. peanut butter I used Sunbutter
1/2 c. honey
1/4 c. coconut (I omitted this)
In a 2-quart bowl, mix dry milk, peanut butter and honey. Roll dough into balls, then roll balls in the coconut. I scooped the mixture and drizzled them with melted chocolate. Makes approximately 25 balls.
______________________________________
I ate the cafeteria lunch most of my way through school. I didn't really have a choice but I don't remember ever complaining about it. Funny that I can't remember very many of the meals I was served in all those years - pork patty on bread with gravy, chicken croquettes (my favorite), salisbury steak, burgers, pizza, pizza burgers (probably what I was least happy to eat). Surely there were a few other meals served but those are the only ones that I remember.
I seem to recall that dessert was served daily but maybe not. The dessert I was most happy to see was something called peanut butter kisses. They were little scoops of a creamy peanut butter concoction, drizzled with chocolate (chocolate syrup, I think). I remember you could buy them a la carte for 15 cents, one peanut butter kiss on a square of waxed paper. They were a regular thing throughout my schooling. It never occurred to me that they would be out of my life someday. By the time I thought about reproducing them it was years later. Then came my son's peanut allergy. I thought my dream of finding a copycat for these treats was over but then Sunbutter came into my life. Would that work?
Unfortunately I have not been able to find regular Sunbutter anywhere lately, just the natural variety, which I don't really care for. The consistency and flavor is just not right for using in most peanut butter recipes. I tried it anyway. These did not duplicate my beloved peanut butter kisses from school. They weren't creamy enough, the flavor wasn't right. I am thinking the powdered milk might be right but not the honey. Maybe corn syrup instead of honey? Of course, without peanut butter it won't ever be exactly the same. Almond butter might be a better substitute but that's crazy expensive (as in powdered milk!).
I will probably try again. Since it's been over 25 years since I last tasted what I'm trying to duplicate, it's really not possible to duplicate it but I think I could come up with something equally enjoyable.
Thursday, May 24, 2012
Major Guilt Trip

Pioneer Woman, Ree Drummond, released her second cookbook, The Pioneer Woman Cooks Food From My Frontier, a while ago. I received a copy to review and life got in the way and I never blogged about it. I feel terribly guilty about that. I rarely accept books because of how my life goes but I couldn't resist this one of course and then I dropped the ball. I'm going to tell you about it anyway and hopefully I will learn to love myself again. It's not too late to pick up a copy. It's never too late! That's the one good thing about cookbooks is that you'll never see the movie before you read the book.
I don't think you should mess with a winning formula when you have one so I was happy to see that Ree's second book was similar to the first. I find with popular cookbook authors that sometimes the cookbooks become a little less authentic as they crank them out but this one is still just what you would expect from The Pioneer Woman. I pulled both books out and put them side by side.

This book has the same gorgeous photography with step-by-step pictures of each recipe. You won't ever find yourself wondering if Ree tested all of these recipes because the proof is there right in front of you. If you read the Pioneer Woman blog, you know what to expect. These are recipes that are mostly directly from the blog. If you don't read her blog, why the heck aren't you reading her blog???
I think a lot of what I said when I reviewed the first Pioneer Woman cookbook could be said again. I think she has a nice mix of recipes - some that are nothing new, some with a twist but you do not necessarily buy Ree's books for the recipes. They are fantastic recipes but she freely gives those on her blog. In her books she gives you a gorgeous photographs, stories and humor to go along with the recipes. Wait, she gives you those on the blog too. If you don't understand the benefit of feeling a book in your hands, I feel sorry for you. Okay, maybe not that sorry. You probably have more living space than I do.
Anyway, if you like cookbooks full of solid recipes, beautiful and abundant color-photography, humor and heart, both Pioneer Woman cookbooks are a must-have.
I made the Restaurant-Style Salsa and I may never buy salsa again. So easy! So good! So pound-adding since I know there are a million ways to eat salsa but none compare to eating it with fried tortilla chips.

Okay, I feel better now.
Wednesday, May 23, 2012
Cupcakes? Cupcookies?: Quick and Easy Cupcakes

Mom and Me Cookbook 2005
2 large eggs
1 tsp vanilla
2/3 cup superfine sugar
1/2 cup soft butter
1 cup self-rising flour
1. Preheat the oven to 350 degrees F. Put all the ingredients in a bowl and beat together until the mixture is smooth and slightly lighter in color.
2. Line a muffin pan with muffin papers and half-fill each paper with the cupcake batter.
3. Bake the cakes for 18 to 20 minutes. You can tell they are done when they have risen up, are golden in color, and spring back into shape when pressed. Makes 12 cupcakes.
________________________________
This was definitely a quick and easy cupcake recipe. However, they came out more like soft cookies. I would expect a bit more liquid in a cake recipe. From the reviews I am sensing the recipes in this cookbook can't be trusted 100%. That annoys me in any cookbook but I especially dislike it in a children's cookbook. I hate to see children disappointed.
I wouldn't call these cupcakes a disappointment (unlike one of Nick's previous kid's cookbook experiences). They were a hit with the kids and I liked that the recipe only made 12 cupcakes. These were on the small side which is nice since these were for around the house and small is good when it comes to sweet snacks for the boys. Cookie, cupcake - doesn't really matter here - the flavor was good, the texture was just not what one would expect in a cupcake.
They have a copy of this cookbook in the kitchen play area at Dan's preschool and I thought it was cute so I bought a copy for our home. I have a soft spot for kid's cookbooks. Some are mainly for reading, looking at the pictures and education (healthy eating being the main thrust of most kid's cookbooks these days). Others have more potential to actually make it into the kitchen (but, mostly we just look at them).
This particular recipe caught my eye due to using self-rising flour and I had picked up a bag of it off the clearance rack. I find a lot of cookbooks that were originally published overseas (specifically the UK where this book originates) tend to call for self-rising flour. Yes, yes, I know you can always substitute but I too lazy to do that.
I am still searching for cupcake recipes, both yellow and chocolate, that satisfy me. I probably never will - I am not an 'edge' cake eater and cupcakes are mostly edge. But boxed mixes produce such lovely soft cupcakes, through and through. Why is that so hard to duplicate at home???
Tuesday, May 08, 2012
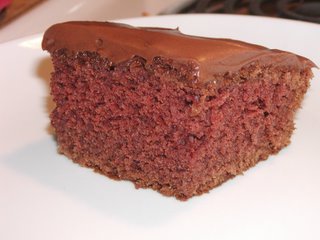
Worth the fuss: Macaroon Marble Cake

1989 Hometown Collection America's Best Recipes Copyright 1989
1/2 cup shortening
1/4 cup sugar
4 eggs, separated and divided
1/4 cup cocoa
1 teaspoon instant coffee granules
3/4 cup hot water
2 cups all-purpose flour
1/2 cup commercial sour cream
1 teaspoon vanilla extract
1 teaspoon baking soda
1/2 teaspoon salt
1 cup sugar, divided
1 teaspoon vanilla extract
1 (7-ounce) package flaked coconut
1 tablespoon all-purpose flour
Chocolate Glaze
Cream shortening; gradually add 1/4 cup sugar, beating well at medium speed of an electric mixer. Add egg yolks, one at a time, beating well after each addition. Dissolve cocoa and instant coffee granules in hot water; add half of cocoa mixture to egg yolk mixture alternately with 2 cups flour, beginning and ending with flour. Combine sour cream, 1 teaspoon vanilla, baking soda and salt in a small mixing bowl, stirring well; add to batter with remaining half of cocoa mixture.
Beat 3 egg whites (at room temperature) in a large bowl at high speed of an electric mixer 1 minute or until soft peaks form. Gradually add 1/2 cup sugar, 1 tablespoon at a time, beating until stiff peaks form and sugar dissolves (2 to 4 minutes). Gently fold meringue mixture into batter.
Beat 1 egg white (at room temperature) in a medium bowl at high speed 1 minute or until soft peaks form. Gradually add remaining 1/2 cup sugar, 1 tablespoon at time, beating until stiff peaks form and sugar dissolves. Gently stir in 1 teaspoon vanilla, coconut, and 1 tablespoon flour.
Spoon half of batter into a greased 10-inch tube pan. Sprinkle with coconut mixture. Top with remaining batter. Bake at 350 degrees for 1 hour to 1 hour and 10 minutes. Cook in pan 10 minutes; remove from pan, and let cool completely on a wire rack.
Drizzle Chocolate Glaze over top of cake.
Chocolate Glaze 1 (6-ounce) package semi-sweet chocolate morsels 1 tablespoon shortening 1/2 teaspoon vanilla extract Combine all ingredients in top of a double boiler; bring water to a boil. Reduce heat to low; cook until chocolate melts. Use immediately.
_________________________________________
I made this cake a while ago so the details are fuzzy but I seem to recall things going wrong - the egg whites did not want to form stiff peaks and the glaze, which I tried to take a short-cut with and used the microwave, was too thick to drizzle so I just spread it over the top. It was a fussy recipe and I wasn't confident that the results were going to be worth it.
This did turn out to be a very good cake. The recipe is well conceived - the cake itself is not very sweet, which is a nice contrast to the sweet filling. The only problem with this cake is that it doesn't hold up to time very well. It's best immediately and the day after but then it gets a bit dry.
I give up on ever thinking I will blog regularly again. Whenever I feel I might, something happens. This last time I had a break-in during the night, with the kids here. Thankfully the neighbors heard him but he still got away with my purse. What a pain in the you-know-what it was to replace all my credit cards, license, checks, etc. Fortunately he didn't take my Kitchen Aid Mixer!
Monday, April 30, 2012
A classic: White Dropped Amish Church Sugar Cookies

New Recipes from Quilt Country Copyright 1997
1 1/2 cups (3 sticks) margarine (not butter or they will be crispy, not soft, according to the author - I always bake with Land-O-Lakes margarine)
2 cups sugar
2 eggs
1 teaspoon vanilla extract
1 teaspoon almond extract
3 1/2 cups all-purpose flour
1 teaspoon baking powder
1 teaspoon baking soda
1 teaspoon grated nutmeg
1 teaspoon salt
1 cup sour cream
sugar and raisins for garnish
Preheat the oven to 375 degrees F. In a large mixer bowl, cream together the margarine and sugar for 3 minutes. Add the eggs and extracts and beat until well combined. In a large mixing bowl, whisk together the flour, baking powder, baking soda, nutmeg and salt. Add to the creamed mixture and combine until the mixture is moistened. Stir in the sour cream by hand and blend well.
Using a 1 1/2-inch cookie scoop or a tablespoon, drop the dough onto a parchment-lined or nonstick baking sheet, then top each one with sugar and a raisin or two or three. Bake for 10 to 12 minutes or until the bottoms are lightly browned. (I used a larger cookie scoop so I used 5 raisins for the cookies I made with raisins and I might have baked them a little longer.) Remove the cookies to a rack to cool. Store in airtight containers or freeze.
_________________________________________________
Annie from Haphazard Homestead very generously passed some of her unwanted cookbooks to me. This gem was among them. I love Amish recipes and this book is very well done. I remember watching Marcia Adams on PBS years ago. This book is more than just recipes - it has lots of information about the Amish. It's a very good read.
This recipe was one of the best recipes I've made, honestly. Nothing fancy but everyone loved them, including my picky older son. I started making them without raisins because I thought I was out of raisins but then I realized I did have raisins. They were good both ways. They were soft and tender and very flavorful. I will definitely make these again!
Thursday, April 26, 2012
A lamb (or Kacey) cake

The Ugly Binder, from the internet
1 cup butter
2 cups sugar
4 eggs, separated
1 cup milk
3 cups sifted cake flour
1/4 teaspoon salt
3 teaspoons baking powder
1 teaspoon vanilla
Cream shortening and sugar until fluffy; add egg yolks one at a time, beating thoroughly after each one is added. Sift dry ingredients together 3 times and add alternately with milk and vanilla to creamed mixture, beating until smooth after each addition. Fold in stiffly beaten egg whites. Grease cake mold thoroughly; fill face part of mold full of batter; cover with other half of mold and place in hot oven, face down, baking for 45 minutes. Cover with pans while baking to prevent burning. I didn't do this. I secured it with silicon baking bands. Bake at 450 degrees for first 15 minutes; finish baking at 350 degrees. I checked mine 11 minutes early and it was done. Remove from oven; lay on back of mold for 15 minutes before loosening to take out. I let it cool completely before trying to sit it upright. This recipe makes sufficient batter for extra cupcakes.
_________________________________________________
I've picked up many (many, many, many) kitchen items from yard sales over the years. Unfortunately most of them get stored away someplace where I can't see them, and I forget about them. This is especially a problem with holiday items - from yard sales or not - I forget that I had them until the holiday passed. By some miracle, when I was thinking about what to make for Easter, I remembered I had picked up this cake pan last summer.
This isn't one of the original cast iron molds, it's a Wilton. It has the advantage of not having the pointy ears that are prone to falling off. It's head is a bit sturdier too. I did use a recipe from one of the older model molds. Wilton didn't provide a recipe. It suggested boxed cake mix (which I feel might not be sturdier enough to support the lamb's head but I can't say for sure) or any sturdy cake recipe, like a pound cake. This recipe is definitely similar to a pound cake. It blew me away, to be honest. It was moist, it had a great crumb, it had that simple yet wonderful flavor you would expect from these ingredients.
I used my Easy Buttercream Frosting recipe, with white food coloring (the bomb!) to frost the lamb. You could use coconut but no one seemed too keen on that idea. I colored some coconut for the 'grass'. I also added some Cadbury mini chocolate eggs when I got to my sister's house on Easter.
I did the decorating at 10pm so it was shakey. I used my Pampered Chef cake decorator and just made little swirls. I was not as neat and attentive as I might have been had it not been 10pm. The ears were supposed to be pink but I forgot before I cleaning up all the frosting. I was going to make up a small bit of pink frosting but decided to leave well enough alone.
When I started looking at lamb cakes, I thought they looked like my sister's dog Kacey, a bichon frise. We started joking that this was a Kacey cake. Some people who came to Easter dinner, who were not familiar with lamb cakes, assumed it was a Kacey cake (my dad thought it was a butter sculpture lol). At one point, I came through the dining room door into the kitchen, catching a glimpse of the cake on the kitchen table and for a moment I thought Kacey (the real dog) had climbed onto the table. That's pretty funny since he's 15 and he was never much of a climber, not even when he was a puppy - the dog has been carried up and down steps, up and down from furniture, etc all of his life!
Monday, April 23, 2012
I'm not dead!
I've been cooking but I need to catch up on my blogging! I thought I would at least share some pictures with you:


Thursday, March 15, 2012
Something different: Fried Plantain & Spinach

Fried Plantain & Spinach
The Book of Caribbean Cooking Copyright 2000
1 large plantain
1 tablespoon butter
1 tablespoon oil
4 scallions, roughly chopped
8 oz small spinach leaves I only used about half this
Freshly grated nutmeg, to taste
Salt and freshly ground black pepper
Red chili slices, to garnish I omitted these
Cut ends off plantain. Slit skin lengthwise in several places then peel off the strips of skin. Cut plantain into cubes.
In a skillet, heat butter and oil. Add plantain cubes and fry for 3-4 minutes, turning frequently, until golden brown and cooked. Add scallions and cook for 1 more minutes.
Add spinach and cook for 1 minute until just wilted. Sprinkle with nutmeg and seasoning. Garnish with slices of red chili.
Serves 4.
________________________________
I am trying to break my habit of picking up ingredients without first having a use for them. Having come of age at a time when unique ingredients were not easily available, anytime I see anything the least bit rare or different I feel I have to grab it. I've come to realize that almost everything is pretty easy to obtain these days. I have a new rule that if I don't have a particular recipe in mind for something, I don't buy it. I try to just make a mental note that the ingredient is available instead of throwing it in my cart these days.
Plantains caught my eye in Walmart the other day. I've seen them before in stores but they looked particularly good. I was going to walk on by but then I noticed a plantain was only 48 cents. So why not break my new rule and bring one home?
This is the first cookbook I looked in and as soon as I saw this recipe, I knew it was the one. The plantain in the picture in the cookbook was ripe (not overly ripe) and mine was green so I had to wait a few days. When I finally made it I was not disappointed. It was simple but delicious. I could definitely see myself making this again. Sometimes it pays to break the rules!
Sunday, March 11, 2012
More fun with ground chicken: Chicken Cakes with Teriyaki Sauce

Around The World in 450 Recipes Copyright 2005, 2006
For the chicken cakes:
1 pound ground chicken
1 large egg
¼ cup grated onion
1 ½ teaspoons sugar
1 ½ teaspoons soy sauce
Cornstarch, for coating
½ bunch scallion, finely shredded, to garnish
1 tablespoon oil
For the teriyaki sauce:
2 tablespoons sake or dry white wine
2 tablespoons sugar
2 tablespoons mirin
2 tablespoons soy sauce
1. Mix the ground chicken with the egg, grated onion, sugar and soy sauce until the ingredients are thoroughly combined and well bound. This process takes about 3 minutes, until the mixture is quite sticky, which makes for good texture. (I didn't quite go 3 minutes but I did get it pretty sticky.) Shape the mixture into 12 small, flat, round cakes and dust them lightly all over with cornstarch. (The mixture is very sticky. I dropped it into the cornstarch and then I was able to pat it out, once it was covered in cornstarch.)
2. Soak the scallions in cold water for 5 minutes and drain well. (They used the white part and the water curls it - I just sliced the green part and skipped the soak.)
3. Heat the oil in a frying pan. Place the chicken cakes in a single layer, and cook over medium heat for 3 minutes. Turn the cakes and cook for 3 minutes longer. (Mine took much longer - make sure they are cooked before adding the glaze.)
4. Mix the ingredients for the sauce and pour it into the pan. Turn the chicken cakes occasionally until they are evenly glazed. Move or gently shake the pan constantly to prevent the sauce from burning.
5. Arrange the chicken cakes on a plate and top with the scallions. Serve immediately.
____________________________________
I was perusing through this cookbook on Saturday night and as soon as I saw this recipe I knew I was going to make it the next day. Honestly, I never go wrong with ground chicken! It's like magic LOL.
It was a bit tricky - the mixture was super sticky. I think I set a record for washing my hands while making a recipe with this one. The cornstarch is key here. You won't get them shaped without it. You could just drop the mixture in the pan and smoosh it down I guess if you don't have cornstarch but I don't know if they would brown as well.
This is a Japanese recipe. These little chicken meatballs in a soy glaze are called Tsukune.
I'd say this is one of my favorite ground chicken recipes but they are all my favorites! Check out all of my ground chicken recipes.
Wednesday, March 07, 2012
No bake, peanut-free cookies

Almost Instant Chocolate Cookies
Class Treats Take-To-School Goodies For Every Occasion Copyright 2003
1 ½ cups sugar
½ cup butter or margarine
½ cup milk
½ cup cocoa powder
1 teaspoon vanilla
3 ½ cups quick-cooking oats
1 cup shredded coconut
Line several baking sheets with wax paper or just place several long sheets on countertop.
Combine sugar, butter, milk and cocoa in saucepan over medium heat.
Cook, stirring constantly, until mixture begins to boil.
Remove from heat and stir in vanilla, oats and coconut.
Working quickly, drop rounded teaspoonsfuls of mixture onto wax paper. Let cool and enjoy.
_________________________________________
These no-bake cookies aren't pretty but don't let that fool you. The peanut butter version of these are a favorite of many and quite popular but we don't do peanut butter in our house. I've been looking for a good version without peanut butter for some time. I've made a version with butterscotch pudding which were good but a little bit over-the-top sweet and I know many people are not a fan of that fake butterscotch flavor.
This recipe was a winner. Most of my coworkers love coconut and so do I. They were fudgy and delicious and I would definitely make these again. Of course I said that about the butterscotch version and I've yet to make another batch but now that I've been reminded of that recipe, I just might.
I didn't even realize it when I picked this book up but all of the recipes are nut-free. This is a photo-less book but I was still drawn to it. It seems to have a lot of recipes I haven't seen before (not very usual anymore).
Sunday, March 04, 2012
Almost forgotten: Spicy Chicken (or Beef) In Lettuce Cups

Spicy
Quick and Easy Chinese Copyright 2008
3 tablespoons soy sauce I used low-sodium soy sauce
2 tablespoons dry sherry, white wine of Shaoxing wine
2 teaspoons cornstarch
½ teaspoon sugar
½ teaspoon salt
½ pound ground beef I used ground chicken
2 tablespoons vegetable oil
2 tablespoons chopped fresh ginger I used jarred
1 tablespoon chopped garlic
½ teaspoon red pepper flakes
3 tablespoons chopped green onion
1 tablespoon sesame oil
About 20 cup-shaped lettuce leaves, such as Bibb, Boston, or iceberg I couldn't find a good lettuce that day. I used a green leaf lettuce.
In a small bowl, combine the soy sauce, sherry, cornstarch, sugar and salt, and stir well to dissolve the cornstarch and combine everything into a smooth sauce.
Place the ground beef in a medium bowl and use a spoon to separate it into five or six big clumps. Add about half the soy sauce mixture, and gently mix the seasonings into the ground beef, using your hands or a large spoon. Set aside for 10 to 15 minutes.
To cook, heat a wok or a large, deep skillet over medium-high heat until very hot. Add the vegetable oil; swirl to coat the pan, and them toss in the ginger and the garlic. Cook for about 1 minute, tossing once, until fragrant but not browned.
Crumble in the seasoned ground beef, and use your spatula or a big slotted spoon to break it up and spread the meat out over the hot pan to help it cook evenly. Let it cook until it changes color on one side, 1 to 2 minutes.
Toss the meat just enough to turn the uncooked side onto the hot pan, and let it cook another minute undisturbed. Then toss well, using your spatula to break up any large chunks. When the meat is cooked, add the red pepper flakes and green onion, and toss well, Add the sesame oil and remove from the heat, tossing once more to mix everything well.
Transfer to a serving plate and serve hot, warm or at room temperature. Arrange lettuce cups on a serving platter, and fill each one with a spoonful or two of the cooked beef. Or provide lettuce cups and the serving plate of beef and invite guests to make up lettuce packets themselves.
___________________________________
I almost forgot to tell you about these. On my ground chicken post, someone suggested using ground chicken for lettuce wraps. What a great idea! I adapted this beef recipe.
The filling was very good but I wasn't happy with the lettuce I used. I forget which variety it was but it wasn't what I wanted. I had waited until the last minute to buy the lettuce and it turned out not to be a good day for lettuce in the supermarket. I have since remade them with a proper lettuce but I didn't have light for a picture at the time.
This was rather spicy but you can adjust the seasonings however you wish. I would definitely keep an eye on salt. I had a pound of meat defrosted and I tried to double the recipe the first time so that could have been why they were too salty,even though I used low-sodium soy sauce. The second time I made them I sort of winged it, leaving out the salt and basically using the original amounts for a pound of meat. Since I never did try the recipe exactly as it's written, I don't know how that would work out for you. Definitely leave out that salt.
I obviously enjoyed these since I made them twice but this is something I still need to perfect. Any suggestions?
I am adding this recipe to my ground chicken recipe list.
Tuesday, February 28, 2012
Here's the weird thing (or things)
I am still buying cookbooks. I am still picking out recipes. I am still cooking, just not new recipes. Why I can't seem to make something to post on this blog, I can't figure out.
Tuesday, February 07, 2012
A tale of two cauliflower recipes

Roasted Cauliflower
Cooking Light Annual Recipes 2003 Copyright 2002
2 teaspoons olive oil
2 medium onions, quartered I used a sweet onion
5 garlic cloves, halved
4 cups cauliflower florets (about 1 1/2 pounds)
Cooking spray
1 tablespoon water
1 tablespoon Dijon mustard
1/2 teaspoon salt
1/4 teaspoon freshly ground black pepper
1 tablespoon chopped fresh flat-leaf parsley I left this out
Preheat oven to 500 degrees.
Heat oil in a large skillet over medium heat. Add onions and garlic; cook 5 minutes or until browned, stirring frequently. Remove from heat.
Place onion mixture and cauliflower in a roasting pan coated with cooking spray. Combine water and mustard; pour over vegetable mixture. Toss to coat; sprinkle with salt and pepper. Bake at 500� for 20 minutes or until golden brown, stirring occasionally. Sprinkle with parsley.
Yield: 4 servings (serving size: 1 cup)
NUTRITION PER SERVING: CALORIES 94(30% from fat); FAT 3.1g (sat 0.4g,mono 1.8g,poly 0.5g); PROTEIN 4.5g; CHOLESTEROL 0.0mg; CALCIUM 63mg; SODIUM 408mg; FIBER 5.4g; IRON 1.1mg; CARBOHYDRATE 15.4g

Cauliflower and Green Onion Mash
Cooking Light Annual Recipes 2006 Copyright 2005
1 teaspoon olive oil
3 pounds fresh cauliflower, cut into florets (about 8 1/2 cups)
3 garlic cloves, thinly sliced
1 cup chopped green onions
1 cup 1% low-fat milk
2 tablespoons butter
3/4 teaspoon ground black pepper
1/2 teaspoon salt
Preheat oven to 500°.
Toss oil, cauliflower, and garlic on a jelly-roll pan. Bake at 500° for 20 minutes or until lightly browned, stirring occasionally. Place cauliflower mixture in a large bowl. Add onions and remaining ingredients to cauliflower mixture; mash with a potato masher.
Nutritional per serving: Calories: 93 Calories from fat: 38% Fat: 3.9g Saturated fat: 2.1g Monounsaturated fat: 1.3g Polyunsaturated fat: 0.3g Protein: 4.5g Carbohydrate: 12g Fiber: 4.8g Cholesterol: 9mg Iron: 0.8mg Sodium: 215mg Calcium: 79mg
________________________________________
I don't know why it took me so long to realize cauliflower is one of my favorite vegetables. I picked up two heads in a buy one get one free deal and decided to try these two recipes. Since they both required the same roasting time and temp, I made them at the same time. They both had a few flaws but with a few tweaks I think they're both winners.
The Roasted Cauliflower had a sweet flavor and the mustard was not overpowering. It had a surprising amount of flavor for something that looked so basic. However, the garlic was too bitter. I think the roasting temperature needs to be lowered and while I would probably sauté the onions again next time, I wouldn't sauté the garlic. It got rather browned during that step and the roasting just killed it. Alternatively, I might experiment with cutting out the sauté step altogether and just cutting the onion and garlic small enough to roast completely along with the cauliflower.
The Cauliflower and Green Onion Mash was delicious (I love green onions) but liquidy and not creamy. Roasting didn't soften the cauliflower as much as steaming it or boiling it would. I couldn't get it mashed very well. The milk just puddled in the bottom of the dish. I did halve the recipe but I don't think that affected the outcome. I would leave the milk out next time, maybe add a touch of cream instead. The roasting temperature needs to be lowered for this one too. At a lower temp, I might be able to get it a little bit softer and it might mash a bit better. I don't think it necessarily needs to look like mashed potatoes though - I liked the texture of this the way it turned out.
Neither of these dishes had a lot of eye appeal. I left the parsley out of the Roasted Cauliflower which would help but not much.
And, as usual, I ate every bit of these cauliflower dishes faster than I care to admit. There is something about cauliflower that once I start, I just can't stop eating it.
Monday, January 30, 2012
These will get a second chance

Chocolate Chip Cookies
Nigella Kitchen Copyright 2010
1¼ sticks (10 tablespoons) soft unsalted butter
2/3 cup (packed) light brown sugar
½ cup superfine sugar
2 teaspoons vanilla extract
1 egg, refrigerator cold
1 egg yolk, refrigerator cold
2 cups all-purpose flour
½ teaspoon baking soda
1 x 11.5-ounce bag milk chocolate morsels or chips I used semi-sweet
Preheat oven to 325 degrees F. Line a cookie sheet with parchment paper.
Melt the butter and let it cool a bit. Put the brown and white sugars into a bowl, pour the slightly cooled, melted butter over them and beat together.
Beat in the vanilla, the cold egg, the cold egg yolk, until your mixture is light and creamy.
Slowing mix in the flour and the baking soda until just blended, then fold in the chocolate chips.
Scoop the cookie dough into a quarter-cup measure or a ¼ cup round ice-cream scoop and drop onto the prepared cookie sheet, plopping then cookies down about 3 inches apart. You will need to make these in 2-3 batches, keeping the bowl of cookie dough in the refrigerator between batches.
Bake for 15-17 minutes in the preheated oven, or until the edges are lightly toasted. Let cool on the cookie sheet for 5 minutes before transferring to wire racks and cool completely.
_____________________________
This recipe might be the one I've been looking for but I overbaked them. They were crunchy in a pleasant way but I'm not really into crunchy chocolate chip cookies. It actually worked out well because they didn't tempt me after I brought them to work. Something tells me if I had heeded the baking times given, I would have had a winner. I second-guessed Nigella and paid the price. I'm going to have to try this recipe again.
Just when I was getting back into blogging, I stopped feeling it. That is actually a good thing - my blog is a bit of an escape I think. It's time to face the real world a bit more. Also, swim suit season in on the way and I sort of made a promise to my son at the end of last summer about joining the community pool, breaking my long-standing rule of not being seen in a bathing suit unless I'm at least 20 miles from home. I do best when I take as much focus off food as possible. Expect it to be slow around here. Sorry.
Tuesday, January 17, 2012
Kale - not bad at all

Cheese Tortellini Soup with Cannellini, Kielbasa, and Kale
The Bon Appétit Cookbook Copyright 2006
2 tablespoons olive oil
12 ounces fully cooked smoked kielbasa sausage, thinly sliced I used a smoked chicken sausage
1 onion, chopped
1 cup chopped fresh fennel bulb I used celery
4 garlic cloves minced
1 ½ tablespoons chopped fresh thyme I used some dried
½ teaspoon dried crushed red pepper
10 cups low-salt chicken broth
4 cups chopped kale (about ½ bunch)
1 15-ounce can cannellini (white kidney beans), rinsed, drained
1 9-ounce package cheese tortellini I used dried so I cooked them most of the way first
1 cup grated Asiago cheese or Parmesan cheese I forgot this
Heat oil in heavy large pot over medium-high heat. Add next 6 ingredients and sauté until vegetables are soft and kielbasa is brown, about 12 minutes. Add broth and bring to boil. Stir in kale and cannellini . Reduce heat to low and simmer until kale is wilted, about 4 minutes. (Can be prepared 1 day ahead. Cool slightly. Refrigerate uncovered until cold, then cover and keep refrigerated. Bring to simmer before continuing.)
Add tortellini to soup. Simmer until pasta is tender but still firm to bite, about 5 minutes.
Ladle soup into bowls. Serve, passing grated cheese separately.
_________________________________________________
I bought a HUGE bag of kale to make baked kale and I was left with a ton of kale. I happened to have some smoked sausage and cheese tortellini too so I decided to make this soup and I'm glad I did.
Why does kale get such bad press? I guess all the greens used to get maligned but I hope everyone has figured out that they can be pretty darn good. I loved the peppery taste of this soup and the kale was completely inoffensive and actually delicious. I added too many tortellini because I just wanted to use them up. Next time I will add more kale and less tortellini. The dried tortellini worked really well here. They have a nice sharp cheesy flavor.
As much as I love kale, I still can't figure out that huge bag. I didn't find that it shrinks down as much as spinach but maybe I'm wrong. Heck, they don't even sell spinach in bags that large. What's the deal?
Something a little different with cauliflower

Fresh Cauliflower Gratin
American Dietetic Association Cooking Healthy Across America Copyright 2005
Vegetable oil cooking spray
2 teaspoons salt
1 whole head cauliflower, trimmed and washed
3 tablespoons reduced fat mayonnaise I used regular
4 tablespoons honey mustard or stone ground mustard I used half Dijon and half honey mustard
¼ teaspoon cayenne pepper
1 cup shredded sharp Cheddar cheese (4 ounces)
Preheat oven to 350 degrees F. Coat a 2-quart ovenproof casserole dish with the cooking spray.
Bring 3 quarts water to a boil; add the salt and the cauliflower. Reduce heat to medium and simmer about 10 minutes or until the cauliflower is fork tender.
Combine the mayonnaise, mustard and cayenne pepper in a small bowl; set aside.
Remove the cauliflower with a large slotted spoon. Place in the prepared casserole dish and separate the cauliflower florets slightly. Cover with the mustard mixture and top with shredded cheese.
Bake, uncovered, for 10 to 15 minutes, or until lightly browned on top.
_______________________________
This was a great cauliflower recipe, if you like mustard. It is the predominant flavor. There are so many mustards available that you can really picked and choose what you like. Yellow mustard is too harsh. I misread the recipe and started with Dijon mustard but I only had a couple of tablespoons so I rounded it out with honey mustard. Then I saw that it was supposed to be all honey mustard. I think the mixture was better because I only had some store-brand generic honey mustard. I did have some better hot honey mustard that I might try next time.
Cauliflower is one of my trigger foods. I don't want to stop eating it once I start (unless it's raw - yuck!) I made this as a side but I decided to make it the main course. I ended up that little dish you see pictures several times.
Sorry, that's it. I can barely get a post up these days, never mind make it interesting.
Friday, January 13, 2012
Mushrooms and birthday pie

Best of the Best from America Cookbook Copyright 2005
20-25 medium-size mushrooms (approximately ½ pound)
2 tablespoons butter
1 small onion, minced
1 garlic clove, minced (I added this ingredient)
1 tablespoon Worcestershire
1/3 cup soft, fine bread crumbs
1/3 cup shredded sharp Cheddar cheese
Salt and pepper to taste
Parsley
2 tablespoons water
Select mushrooms with closed caps. Pull stems from mushrooms and chop finely. Melt butter in skillet and add stems and onion. Sauté until tender and translucent. Stir in remaining ingredients except water. If preferred, parsley may be sprinkled on top instead of mixed in with the other ingredients. Fill mushroom caps with mixture, mounding over top. Arrange mushrooms in oven-proof serving dish. At this point mushrooms can be refrigerated for up to 24 hours. Before serving, add 2 tablespoons of water to dish. Bake at 350 degrees for 20 minutes. Serve hot.
_________________________________
I had more of those baby bellas from Costco to use up so I made a half-recipe of these stuffed mushrooms. I've free-styled stuffed mushrooms a few times and I can never get them quite right. There is always something lacking. For a simple version (no crab, sausage, etc), these were very good. They were cooked perfectly and the filling had good flavor. I did add a clove of garlic just because I felt like it. They only required a bit of bread crumbs and a bit of cheese so I didn't feel guilty eating them.
Nick turned 8 this week and this is the first time in 8 years that I didn't plan him a party or make him a cake. He was okay with that (or a party and cake would have happened!) He got to pick out a present, I bought him a steak lunch (they have steak on the kids menu at Applebees!), I made him birthday treats for school and then I made the pie he requested (Truffle Pie).

I won't lie - I did enjoy a break from the usual insanity of trying to plan a birthday party just a few weeks after Christmas. I was able to use things I had already - sprinkles, decorations, food coloring, cupcake rings. His birthday treat was Heidi's Sweet and Crunchy Popcorn. I made it in black and gold, his school colors. I packed it in treat bags and added a football cupcake ring (I had a ton of extras from last year since there was a mix up). It felt good to use up some of my surplus.
Monday, January 09, 2012
Keeping it light to start the new year

Rachael Ray 30-Minute Get Real Meals Copyright 2005
1/4 lb cooked deli ham , sliced 1/4 inch thick and finely diced
1 celery rib , finely chopped
2 tablespoons pimento-stuffed green olives , drained and finely chopped
2 tablespoons flat leaf parsley , chopped I omitted this
2 tablespoons mayonnaise (just enough to bind the salad)
1 tablespoon prepared yellow mustard
1 large dill pickles , finely chopped
1/4 small red onion , finely chopped I used sweet onion
1 English cucumber (seedless)
salt
fresh ground pepper
In a bowl combine the ham, celery, olives, parsley, mayonnaise, mustard, pickle, red onion, and salt and pepper to taste. Reserve.
Cut the cucumber into 1 1/2 inch-thick disks. With a melon baller scoop out a little bit of the center of each cucumber disk to create a cup.
Fill each cup with a heaping tablespoon of the ham salad. Serve cold.
___________________________________
I picked up this cookbook because I spied a couple of ground chicken recipes in it (Rachael Ray is always good for ground chicken recipes). It wasn't until I got it home that I noticed it had a low-carb slant which is perfect since I am trying to watch my carbs. However, these recipes aren't necessarily healthy. I am not doing a meat, bacon and cream type of low-carb thing. This book isn't that far out there but many recipes in this book are still quite caloric and fat-filled. This particular recipe fit my personal eating plan but many of them don't. One Cobb salad recipe calls for 2 pounds of meat, 4 chicken breasts, an avocado and 5 strips of bacon (among other ingredients) and it's only supposed to serve 4 people! Her burgers are still 1/2 pound burgers as usual (I always halve her burger recipes and still make 4 burgers).
My usual basic ham salad is ham, mayo and relish whirled in a mini-chopper. I remember making it in a blender when I was very young. I had tried the deli version and I don't know how I ended up making it myself (I didn't read it on the internet LOL). It was one of my first realizations that you could actually make the same food at home that you bought in a store - duh!
This was a much more flavorful version. I went very light on the mayo - there is so much flavor from the rest of the ingredients, you really just need a touch. I lightened up on the mustard too so it wouldn't overpower the salad. I'll definitely make it like this again. More important than the recipe here was the idea of using cucumbers instead of crackers, a simple trick I'll be sure to remember. The cucumber is bland but the salad has enough flavor to balance it out. Hollowing out the cucumber slices is a simple thing to do but kind of tedious and wasteful though so after these initial snackers, I switched to just spreading the ham salad on cucumber slices.
Let's hope I can at least get through January keeping things light!
Friday, January 06, 2012
For Mushroom Lover's: Mushroom Pâté

Mushroom Pâté
New Creative Cuisine Copyright 1993
4 tbsp butter
3/4 pound brown mushrooms, sliced I used baby bellas
1 small onion, chopped
1 garlic clove, crushed
pinch of dried thyme
5 tbsp butter, diced
5 tsp soy sauce
1/4 cup sweet sherry
ground black pepper
pinch of sugar
Melt the butter and sauté the mushrooms, onion, garlic and thyme. When brown and soft, reduce heat to low and add diced butter and remaining ingredients except sugar. Stir until melted, them remove from heat, Add sugar, cool slightly, then purée, leaving mixture somewhat chunky. Pot, cover with plastic wrap and chill for 24 hours.
_________________________________
It's hard to make brown food (besides chocolate) look appetizing but to be fair I think my photograph is just as good, maybe even better, than the one in the cookbook. This recipe isn't about looks, it's about taste. If you love mushrooms, I think you will love this rich spread. It's a great make-ahead recipe too.
I'm not sure how often mushroom pâté is still being made but it's been around for a while. I've seen recipes for it in several (mostly older) cookbooks. I know I've had one that I copied from a library book in my Ugly Binder since the 1990s. Oh, that poor recipe has been waiting for so many years to be made and it got trumped by this one since it was the first mushroom recipe I saw after I bought baby bella mushrooms in Costco on whim.
I know this had a lot of butter but I'm sure some of you have been known to put something on top of a block of cream cheese and serve it. Is this much different? The butter is really the only 'bad' ingredient. The rest is pretty low in carbs but of course it's best served on some sort of carb.
I'm pleased to be starting the year with a recipe I loved.
Wednesday, January 04, 2012
Best Thing I Made in 2011: Porketta

I'm not offering a detailed recipe today. This post is really for my own benefit. I want to document what I did, so I could do it again. I didn't measure anything. This was the best thing I made all year but I'm biased - porketta has been a long time favorite food of mine.
Porketta (or porchetta) has become quite popular recently. I grew up eating porketta - I'm not sure why it took so long to take off. It was popular in NE PA, where I grew up, as a hot roast or sliced cold for sandwiches. You could buy the uncooked roast preseasoned from the meat department of the local supermarket or you could buy it cooked and sliced from the deli deparment. It was sold at church picnics. Huge platters of porketta sandwiches would come out at family gatherings. Now, you can find restaurants in NYC devoted to it. Smart people, the ones who thought of that!
I took it for granted early in life but then I moved away from home and - no porketta. Of course, I know now that I could have found it in Philly, had I known where to look but it wasn't in the grocery stores in Center City. I could at least find pork in the deli, seasoned more lightly but somewhat of a substitute good for sandwiches but then I moved again and I couldn't even get that any longer.
So making my own porketta roast had been on my mind for years. An old friend I had recently reconnected with on Facebook had posted her porketta recipe which really fired me up but I couldn't find her recipe when I went to make it. I decided to completely wing it and try to recreated it from memory. It came out perfect. It's been too long to say if it's the same as the porketta I grew up on but it hit all the right notes. This was definitely one of those 'why-the-hell-didn't-I-do-this-sooner' things. Hopefully I can do it again.
It was just before New Year's so pork roasts were abundant at the supermarket. This recipe needs a bit of fat so I chose a bone-in loin roast but I removed the bones. Lean boneless roast don't have enough fat. Pork butt or shoulder would be better than anything lean but I though this cut was the perfect medium.
(Note: You can get a decent gravy from just the roast drippings but the bones removed from the bone-in roast can be used to make an even richer pork gravy if you are going all out. I wasn't that ambitious this time and gravy isn't absolutely necessary to enjoy this roast.)
I flattened it out to make a rolled roast. I rubbed the inside with crushed fresh garlic. Then I pulled out a grinder and made a spice blend using dried dill weed, black peppercorns, fennel, rosemary, oregano, marjoram and salt. I wanted dill, garlic and pepper to be the dominant flavors - the other spices were added more sparingly.
I generously covered the inside of the roast with this mixture, then I rolled it and secured it with silicone cooking bands. I rubbed the outside of the roast with the spice mixture (but not fresh garlic - that was only on the inside). I wrapped it in plastic wrap and let it sit overnight in the fridge.
Then I unwrapped it, added more dried dill and garlic pepper all over the outside (the garlic pepper had additional seasoning in it including salt - I only used it because I had no plain garlic powder but it worked so well, I will probably use it again).
I baked it at 325 for 2, maybe 3 hours. I don't know exactly how big the roast was but it was standard. It started out as about a 6 chop roast. I made sure it was at least 160 degrees.
(WARNING: This smells delicious. My son made about 40 comments while this cooked. He couldn't get over how good it smelled.)
When you first cut it hot, it's kind of sloppy and hard to get a neat slice but it's still delicious.

If you chill it and then slice it, it's prettier. You can either reheat it or eat it cold.
Now this isn't what porketta is to everyone. Porketta is a seasoned roast pork but there are variations. The spices can be whatever you like. Some people like it fattier, even adding an extra layer of fat to the roast. It doesn't have to be a rolled roast. Some people like to serve it shredded. Let's face it, if you take a nice piece of pork and season it well and cook it slowly until it's tender, you can't really go wrong.
(P.S. I am trying to figure out Pinterest. I can't get this 'Pin it' button to work for me but I don't know why. If anyone tries it and it works (or doesn't), please let me know. For me, it looks like it worked but then I can't see it on my boards, just a red X.)
Pin It
Sunday, January 01, 2012
Let me just wrap up Christmas
I did a lot of baking and candy making this year. I really hate dragging Christmas out past the new year but I need to document the new recipes I tried since I plan on making them again.

Polish Honey Cookies
from the internet (filed into the Ugly Binder)
2 eggs
1 cup sugar
4 ½ cups flour
1 cup honey
1 teaspoon baking soda
1 teaspoon ginger
½ teaspoon cinnamon
¼ teaspoon ground cloves
¼ teaspoon pepper
Cream eggs with sugar until white. Combine with flour, honey and baking soda, dissolved in 3 tablespoons water. Sprinkle in ginger, cinnamon, ground cloves, and pepper, and work ingredients by hand into a dough. (I mixed the spices with the flour first.) Knead on floured board, sprinkle with a little flour and roll out to ¼-inch thickness. My dough was super sticky. I added a lot of flour. I might try chilling the dough next time.
Preheat oven to 400 degrees with biscuit cutter cut dough into circles (or other shapes) and bake on greased cookie sheet for about 10 minutes. Remove from oven and allow to cool. The cookies can be glazed with white or chocolate icing. I made a white icing with powdered sugar, water and white food coloring. Store in air-tight tin, preferably for at least a week.
________________________________
My dad had mentioned honey cookies that his mother made. I did a little research and determined that I could probably not reproduce them - she could have used any variety of spices, some recipes leave out the ginger, some use nutmeg, etc. Still, I was interested in making a version. They were a pain - the dough was sticky, they were more suited to simple shapes (circles, squares, diamonds) than reindeer (yep, those are reindeer). I should have piped on the icing. But boy these were good. They were a light gingerbread cookie. Even my almost 8-year old liked these. They had an interesting texture. The recipe suggested letting them age but I thought they were better when they were fresher.

Chocolate Covered Cherry Cookies
from the internet (filed into the Ugly Binder)
½ cup butter
1 cup sugar
1 egg
1 ½ teaspoons vanilla
1 ½ cups all-purpose flour
½ cup baking cocoa
¼ teaspoon salt
¼ teaspoon baking powder
¼ teaspoon baking soda
48 maraschino cherries, blotted dry
Frosting:
1 cup (6 oz) semisweet chocolate chips
½ cup sweetened condensed milk
1 o 3 teaspoons maraschino cherry juice
In a bowl, cream together butter and sugar until fluffy; beat in egg and vanilla. Combine the dry ingredients; gradually add to creamed mixture (batter will be very firm).
Shape into 48 balls, about 1 inch round, and place on ungreased baking sheets. Push one cherry halfway into each ball.
For frosting, melt chocolate chips in milk in a small saucepan over low heat, stirring constantly. Remove from the heat; add cherry juice and stir until smooth. Spoon one teaspoon frosting over each cherry (the frosting will spread over cookie during baking LIE!).
Bake at 350 degrees for 10-12 minutes. Cool on wire racks.
Yield: 4 dozen
_____________________________________
These were a bit of trouble. The first batch the cherries went wonky and the frosting never covered them. Only two or three cookies from the first batch were presentable. I started using a wooden spoon handle to make the hole for the cherry so it was in deep. The frosting thickened while I was putting these together but that allowed me to form in around the cherry firmly. I got good coverage but the icing wasn't smooth. I didn't think of it but I could have added more cherry juice to thin it out. Also, don't be too generous with the frosting since it is just enough for 48 cookies.
I wasn't sure if they were worth the trouble at first but in the end these were one of my favorite cookies this year.

BAKER'S ONE BOWL Raspberry-Coconut Bars
from the internet
1-1/4 cups flour
1/4 tsp. salt
1/2 cup (1 stick) cold butter or margarine, cut up
3 Tbsp. cold water
2 eggs
1/2 cup sugar
1 pkg. (7 oz.) BAKER'S ANGEL FLAKE Coconut
1/3 cup red raspberry preserves
Heat oven to 425°F. Mix flour and salt in medium bowl. Cut in butter until mixture resembles coarse crumbs. Gradually stir in water with fork until well blended; press onto bottom of 8-inch square pan.
Bake 20 min. or until lightly browned. Reduce oven temperature to 350°F.
Beat eggs in same bowl with mixer on high speed until frothy. Gradually add sugar, beating until thick and lemon colored. Stir in coconut. Spread preserves over crust to within 1/4 inch of edges; cover with coconut mixture. Bake 25 min. or until golden brown. Cool completely before cutting to serve.
_______________________________
These were definitely good and pretty simple to make too. They just didn't wow me. It very well may have been that they didn't get a fair shake and got lost in the crowd. They may or may not be made again. I really can't say.
Besides these new cookies, I made Welsh cookies, Snickerdoodles, Milk Chocolate Florentines, sugar cookies, spritz, South Seas Cookies, chocolate chip brownies, and gingerbread men. I also made caramel and chocolate covered Lorna Doones and pretzel squares, chocolate covered caramels, peppermint patties, Five-Minute Fudge (with mini marshmallows), and crispy truffles.
I thought everything came out pretty well but my personal stand outs this year were the chocolate covered cherry cookies, the Polish Honey cookies, and the five-minute fudge. As always, I was amazed by how good Snickerdoodles taste a week later.


Subscribe to:
Posts (Atom)


