Friday, December 29, 2006

No Girl Scouts needed


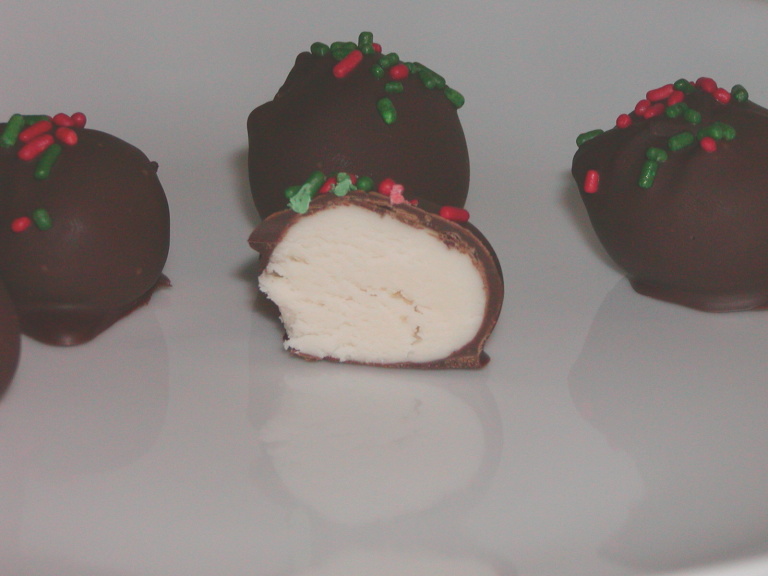
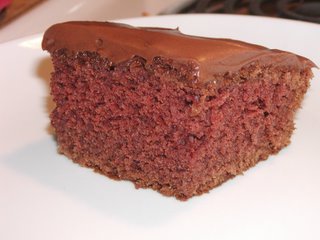
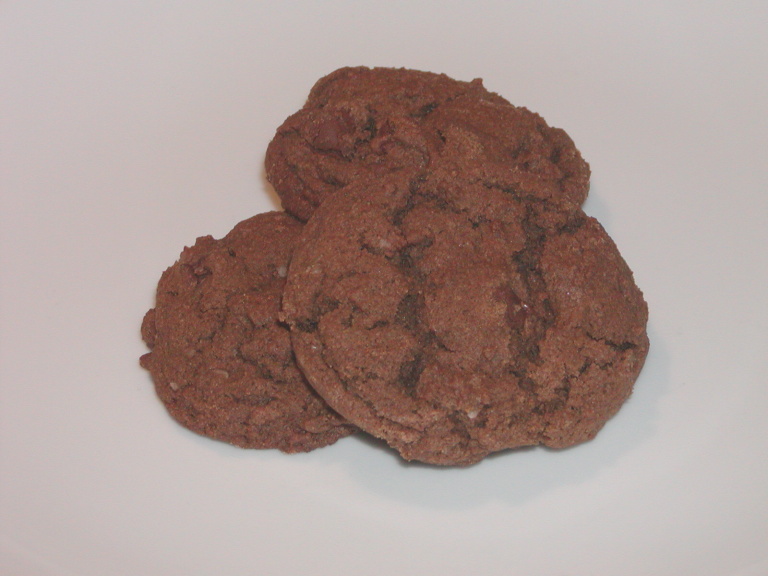
Chocolate-Peppermint Snaps
The King Arthur Flour Cookie Companion Copyright 2004

1 ½ cups unsalted butter
1 cup brown sugar
1 cup granulated sugar
2 large eggs
2 teaspoons vanilla extract
2 teaspoons peppermint extract or 1/8 to ¼ teaspoon peppermint oil, to taste I used the extract
3 cups unbleached all-purpose flour
½ cup unsweetened natural cocoa powder
2 teaspoons baking soda
½ teaspoon salt
2 cup semisweet chocolate chips

Preheat the oven to 350 degrees F. Lightly grease (or line with parchment ) two baking sheets.
In a large bowl, cream together the butter and sugars. Add the eggs one at a time, beating well after each addition. Mix in the vanilla and peppermint extract.
Add the flour, cocoa, baking soda and salt, beating to combine. Stir in the chocolate chips.
Drop the dough by the tablespoonful onto the prepared baking sheets. Bake the cookies for 12 to 15 minutes, until they’re slightly darker around the edges. Remove them from the oven and transfer to a rack to cool.

Yield: 6 dozen cookies.
___________________________________

I've made cookies that were very close to Thin Mints - rolled chocolate dough coated in chocolate mint but these cookies give you the same flavor with much less aggravation (that chocolate dough was a real bitch to work with). Anyone can make a basic chocolate chip cookie.

At least one person mentioned that this was the cookie he gravitated towards the most this year. I'm not sure if I'll make these again next year. They were delicious and easy but if I had the time and energy to do something a little more special, I would. This year, I was just looking for simple recipes to fill out my tins.

I thought I'd review my 2006 Culinary Resolutions and see what I accomplished and what I didn't. (Key: green = success and red = failure)

1. Make my own pizza dough. I make pizza dough almost every Friday in my bread machine.

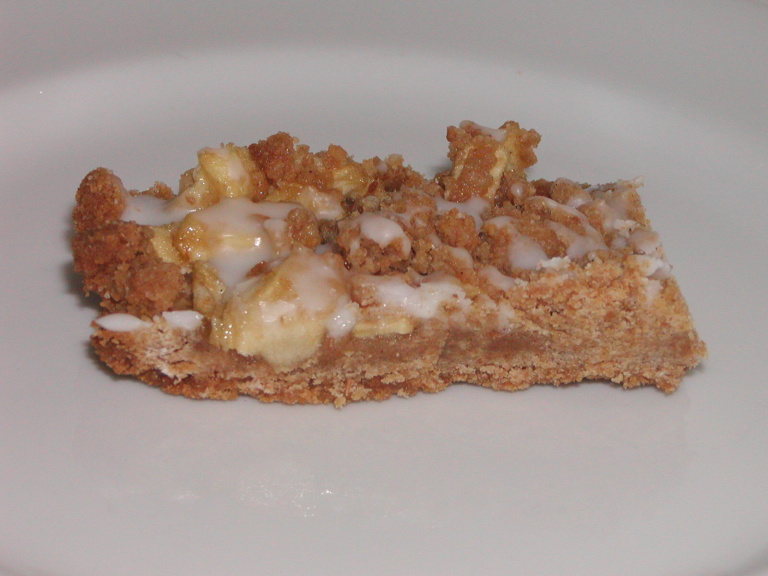
2. Make something in a tart pan. I used it to make this Peach Crumble Tart.

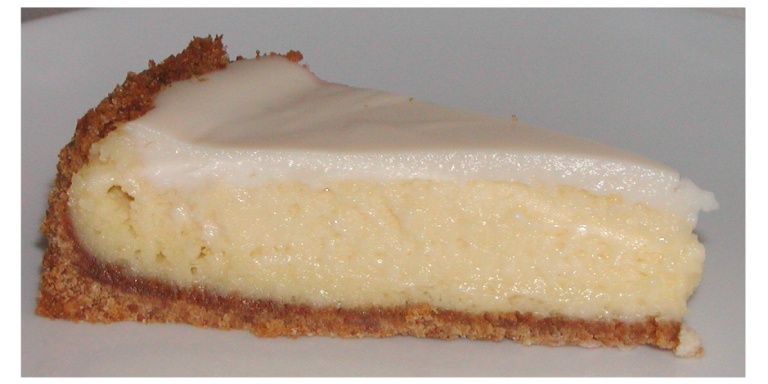
3. Make something in a springform pan. I made a fantastic Cheesecake.

4. Smoke something in an electric smoker. It's still in the box.

5. Use my new bread machine at least 6 times, hopefully many more. I use it to make pizza dough every Friday and I've made bread a couple of times and dinner rolls once.

6. $100 spending limit on new cookbooks. Um, yeah. Didn' t happen.

7. Make homemade marshmallows. I though I might fit this one in but it doesn't look like I'll get to these.

8. Make jam. I didn't get to this. I'd still like to try canning but I realized that we don't really eat jam so there was no real motivation to make it. Pickles might be a better idea.

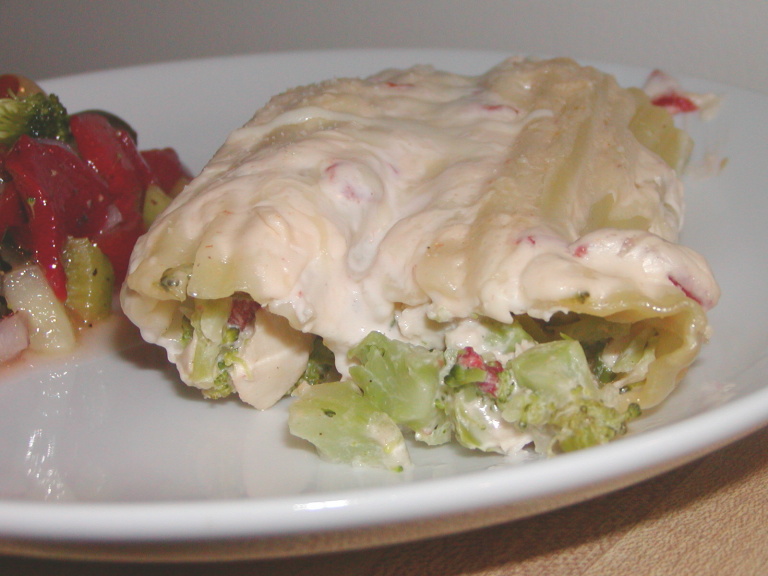
9. Make something with phyllo dough. I never got around to this. Next year.

10. Even out my categories a bit more. I still have too many main dish recipes and too few side dish recipes but I think I made a lot more appetizers and breads this year. I need another green so I'm going to say I accomplished this!

So I accomplished half my culinary resolutions. I'll just roll the ones I didn't accomplish over to next year (except for that $100 limit of cookbooks - who am I kidding?) I'll focus better next year. This year, most of the year was gone before I remembered that this list was out there.

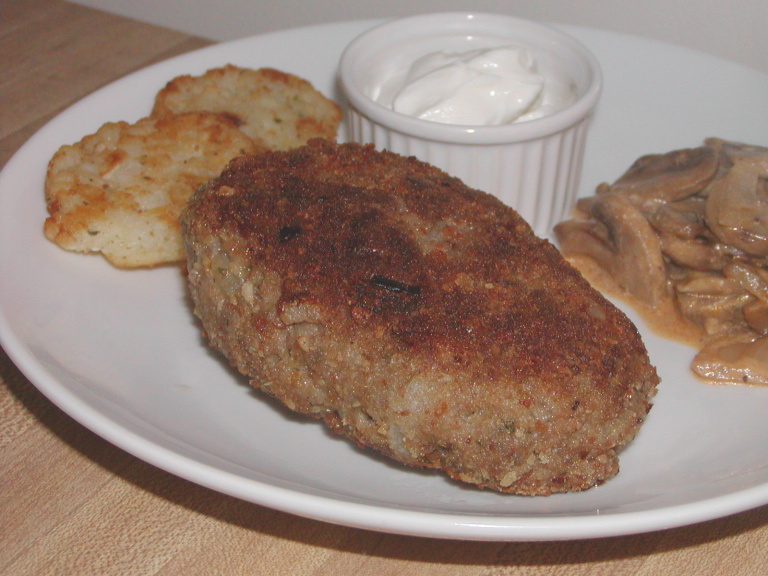
Blast From The Past: Spicy Meatballs with Fiery Chili Sauce from earlier this month. I made them again last night. So good!

Question of the Day: Was 2006 a good year for you?

Wednesday, December 27, 2006

Detoxing


Chinese-Style Broccoli
The South Beach Diet Quick and Easy Cookbook Copyright 2005

1 tablespoon plus 1 teaspoon canola oil
1 ( 1 ½ pound) head broccoli, cut into florets (6 cups)
2 tablespoons low-sodium soy sauce
2 garlic cloves, minced
2 teaspoons fresh lemon juice

Heat oil in a large wok or high-sided skillet over medium-high heat. Add broccoli and stir-fry for 2 minutes. Add soy sauce, garlic and lemon juice; continue to stir-fry until broccoli is crisp-tender, about 5 minutes. Serve hot.

Makes 4 (1-cup) servings. Per serving: 80 calories, 5 g fat, 0 g sat fat, 7 g carbs, 3 g fiber, 300 mg sodium
_____________________________

Christmas is over and I've never been more ready to get back to eating normal meals again. I don't think we've eaten many vegetables over the past two weeks, unless you count frozen french fries.

This recipe is so simple but left to my own devices, I probably would have added the soy sauce or the lemon juice, not both and adding both was a great move. That's why I love cooking from recipes - I find these simple little twists that I might never think of on my own.

Blast From The Past: Crumb-Coated Dijon Chicken from September 2006. That's what I served with the broccoli last night. I think that's one of my favorite chicken recipes.

Speaking of chicken, don't forget to enter this month's cookbook giveaway - you might win my favorite chicken cookbook.

Question of the Day: What are your plans for New Year's Eve?

Something savory for a change


Crispy Herbed Chicken
The Ultimate Southern Living Cookbook Copyright 1999

1/3 cup chopped onion
1/3 cup scraped, diced carrot
1/3 cup diced celery
1 tablespoon chopped fresh parsley
3 tablespoons dry white wine
1 ( 3 to 3 ½ pound) broiler-fryer
¼ cup butter or margarine, melted
2 teaspoons chopped fresh basil I used dried, about 1 teaspoon
2 teaspoons chopped fresh oregano I used dried, about 1 teaspoon
2 teaspoons chopped fresh thyme I used dried, about 1 teaspoon
½ teaspoon salt
¼ teaspoon pepper

Combine first 5 ingredients; toss gently. Set aside. Remove giblets and neck from chicken; reserve for another use. Rinse chicken; pat dry with paper towels. Lightly stuff body cavity with reserved vegetable mixture. If desired, tied ends of legs together with heavy string. Lift wingtips up and over back of chicken, tucking wingtips under chicken. Place chicken, breast side up, on a rack in a shallow roasting pan. Combine butter and next 5 ingredients. Brush chicken with butter mixture. Roast at 365 degrees for 1 hour or until a meat thermometer inserted in thigh registers 180 degrees. Place chicken on serving platter.

Yield: 4 servings
_____________________________

This was actually something I made a couple of weeks before Christmas. It's not all that exciting but at least it's not a sweet. It was very good but I prefer roasting chicken in pieces. It doesn't take as long and it's easier to tell when it's done.

I'm looking forward to getting back into the normal routine. I got one new cookbook for Christmas, a Rachael Ray book which is new for me and I think I'm going to like it.

I also got a couple new appliances - an iced tea maker and a juicer, much better than the electric grater that my husband bought me last year (I returned that). I don't know what he's thinking when he buys Christmas gifts sometimes but the ice tea maker was actually a good choice. I've never been very good at making my own iced tea and the store-bought ones are never quite right, sweetener-wise, for me but I do buy them every now and then. I prefer my iced tea with just a touch of artificial sweetener or not sweetened at all.

The juicer, I considered returning but I think I'll keep it. It doesn't take up much space and it will come in handy if I want to make sorbets or Italian ices this summer. I can't resist a cooking gadget. I would have kept the electric grater last week but I didn't think it would work that well, based on product reviews I found online.

Question of the Day: Did you get anything cooking related for Christmas?

Tuesday, December 26, 2006

There's more!


Cherry Drop Cookies
Southern Living Our Best Recipes Copyright 1970

½ cup butter or margarine I used butter
1 (3-ounce) package cream cheese
1 cup sugar
2 eggs
1 teaspoon vanilla extract
1 teaspoon almost extract
2 ¼ cups all-purpose flour
2 teaspoons baking powder
1 teaspoon soda
½ teaspoon salt
1 (8 ½-ounce) can crushed pineapple, well drained
½ cup chopped maraschino cherries
1 cup chopped pecans (optional) I omitted these

Blend the butter and cream cheese together. Gradually add sugar; cream well. Add eggs one at a time, beating well after each addition. Add flavorings. Add combined dry ingredients gradually; mix thoroughly. Stir in pineapple, chopped cherries, and pecans. Drop by large tablespoonfuls onto unoiled cookie sheets. Bake at 375 degrees F for 12 minutes. I used my small scoop, added a whole cherry on top and baked them on parchment paper. They didn't take as long to cook (I probably overbaked them but they were still good.)

Yield 2 dozen.
_____________________________

Yep, more cookies. You didn't think you were going to see a dinner post today, did you? That may be a while. I'm not sure when I'll be able to afford groceries again, never mind have the energy to plan and prepare real meals.

I took this picture a couple of days after making these cookies, so the cherries weeped a bit but these were one of my favorite cookies this year personally. They were light in texture and I happen to love maraschino cherries in cookies.

BTW, in case you were wondering, almond extract is not made from almonds or any other nut. At least not McCormick's (there may be 'real' almond flavoring out there).

I still have a few loose ends to wrap up, Christmas-wise, but the most stressful part is over. It actually wrapped up pretty smoothly. That 'extra' day helped. I like Christmas on a Monday. Overall, I wasn't that happy with my baking this year. I had higher aspirations but in the end I just muddled through. My cookies weren't festive. I didn't make the Ricotta Cookies this year because I always have trouble with iced or glazed cookies - they get sticky and don't work well on cookie trays. I'm challenged in the area. The sprinkles help and I should have made them but I was just too tired.

Friday, December 22, 2006

It doesn't get much easier than this


Two-Bit Wonders
The King Arthur Flour Cookie Companion Copyright 2004

½ cup (5 ounces, 1 small can) sweetened condensed milk
2 cups ( 6 to 8 ounces) shredded coconut, preferably unsweetened

Preheat the oven to 350 degrees F. Lightly grease (or line with parchment) one large or two small baking sheets. I strongly recommend the parchment paper.

In a medium bowl, combined the sweetened condensed milk and coconut. Drop the mixture by tablespoonfuls onto the prepared baking sheets. Bake for 13 to 14 minutes, until the cookies are set and the coconut is golden brown. Mine were smaller and browned up much faster.

Removed the cookies from the oven, and transfer them to a rack to cool. These were soft so I cooled them right on the parchment. The milk kind of pooled around the cookie but I removed most of that when I took them off the parchment.
______________________________________

I forgot I owned this cookbook. Damn. There are a ton of recipes in this book that I would have made. Isn't that always the way though?

My heart just wasn't in my baking this year. Well, my heart was but my body wasn't. I've been so tired, it's been a struggle to get this baking done. I've been making things up as I go along, because I'm too tired to think straight. These were a last minute decision since I had some unsweetened coconut in the cupboard and an extra can of sweetened condensed milk. I think I tried this recipe years ago and failed and I almost failed again. The milk pooled and the cookies were too soft to move to a rack but after I let them set on the cookie sheet and removed the pooled milk, they were fine.

Well, I may make one more cookie before I make up the tins for my coworkers but so far I made White Fudge, Five-Minute Fudge, Chocolate-Dipped Carmamels, Welsh Cookies, Fruit and Cheese Bread, Snickerdoodles, Coconut Butterballs, Chocolate Chip Brownies (with Christmas Kissables since I was too lazy to make the truffle cookies I had planned on), these Two-Bit Wonders, and Apricot Cream Cheese Thumbprints. I also had a bag of cinnamon chips that I bought a while ago but they were manufactured on a machine that processes peanuts too so I used them to make Cinnamon Fudge, a recipe that I got from Joe at Culinary in the Country. My son doesn't eat fudge. Well, he doesn't eat most of what I've made. That stuff is great.

Thursday, December 21, 2006

Finally, a cookie


Coconut Butterballs
Southern Living Our Best Recipes Copyright 1970

1 cup soft butter or margarine I used butter and wouldn't recommend margarine for a cookie like this
¼ cup sifted powdered sugar
1 teaspoon vanilla extract
2 cups all-purpose flour
1 ½ cups flaked coconut
sifted powdered sugar

Cream butter or margarine until light and fluffy; gradually add sugar and vanilla and mix well. Blend in flour, then coconut. The batter is crumbly until you form it into balls. Roll into 1-inch balls and place on ungreased cookie sheet. Place cookie sheet in refrigerator for about 15 minutes. bake at 350 degrees F about 15 minutes or until delicately browned. While still warm, roll in powdered sugar.

Yield: 4 dozen I made 1 1/2 batches and only got 50 cookies, using my small cookie scoop to measure the dough
___________________________________

Yes, I finally have a cookie recipe to show you. There was a time when I didn't make fudge or candies at all, just a few short years ago. With the frustrations I had this year, I may go back to an all cookie line-up next year.

Way back when, we used to make Moldy Mice for Christmas. They were just a snowball cookie, also known by a myriad of other names but somehow more fun when you call them Moldy Mice. Snowball cookies are usually a real crowd pleaser but almost every recipe I've seen for these cookies calls for some type of nut, strategically ground into the cookie dough. I was pleased to find this nut-free recipe lurking in one of my favorite old cookbooks, a Southern Living compilation from 1970. And no, in case you were wondering, a coconut is not a nut, it's a fruit (I'm seen it called a seed too but it's definitely not a nut).

Damn these are good. When I open the container, the sight and smell of these cookies brings back a lot of memories. It's been a while since I had the nut version but I think these are very close in flavor. The butter and vanilla are the predominant flavors, with a hint of coconut. This cookie has definitely earned a place in the permanent line-up.

Yikes, I've got a lot of baking to do today! I'd better get started.

Wednesday, December 20, 2006

Look ma, no candy thermometer!


Five-Minute Fudge
The Lady & Sons Savannah Country Cookbook Copyright 1997, 1998

1 2/3 cups sugar
2/3 cup evaporated milk
1 tablespoon butter
½ teaspoon salt
one 6-ounce bag of semi-sweet chocolate chips I used baking squares
16 large marshmallows
1 teaspoon vanilla
1 cup chopped pecans I omitted these

Combine sugar, milk, butter and salt in saucepan. Bring to a boil and cook for 5 minutes, stirring constantly. Add chocolate chips and continue to heat until chocolate is melted. Remove from heat and stir in marshmallows, vanilla and nuts; mix well. Pour into a shallow 8-inch square pan to cool; cut into squares.
____________________________

Finally, a fudge recipe that I could handle. This was easy and I really liked the result. I thought it had great flavor and good texture and I really like dealing with marshmallows instead of sticky marshmallow creme. I'm going to make a second batch of this. I don't know if it was as good as Four Chip Fudge but it was very good.

I don't know what is up with my camera. Last year's Four Chip Fudge photographed like a dream. I took about ten pictures of this fudge and this was the best shot. Sorry, I know it's awful.

Last night I did a batch of my signature cookie, Welsh cookies. I need to make a second batch of those too. Luckily, I was able to borrow my MIL's larger griddle so I was able to fry them up in no time. In past years, I've worked with my small electric griddle and a non-stick pan on the stove and it took twice as long.

What have we been eating for dinner? Monday I made Cavatappi with Pepperoni. Last night we just had frozen chicken fingers and fries. Tonight, I'll probably whip up some Beef and Potato Tex-Mex Hash.

I have the next two days off for baking! I'm feeling the pressure now.

Monday, December 18, 2006

Trying a new fudge recipe


White Fudge
Joy of Cooking Copyright 1931, 1936, 1941, 1942, 1943, 1946, 1951, 1952, 1953, 1962, 1963, 1964, 1975

Stir in a large heavy pan over medium heat until dissolved:
2 ½ cups sugar
½ cup cultured sour cream
¼ cup milk
1 tablespoon light corn syrup
¼ teaspoon salt

When the mixture begins to boil cover and cook for 2 to 3 minutes, until the steam washes down any crystals which may have formed on the sides of the pan. Uncover, reduce heat and cook without stirring to the soft-ball stage, 234 degrees. Pour at once into an electric mixture bowl. Do not scrape the pan. While the mixture is cooling float on top:

2 tablespoons butter
1 teaspoon vanilla

In about 1 hour, when cool, beat until the mixture begins to lose it’s gloss. Quickly beat in

¾ cups broken nutmeats (optional)
¼ cup finely cut dried apricots (optional)

Let harden in an 8x8-inch buttered pan. Cut into squares. Store tightly covered.
_________________________________

I had two great, practically fool-proof, fudge recipes (Four Chip Fudge and Peanut Butter Fudge) that needed to be retired due to the nuts and peanuts in them. I could have tried to rework the Four Chip Fudge but if it didn't turn out well, I would have had a huge 13x9-inch pan of bad fudge since that recipe makes a huge batch. I decided to look for all-new recipes.

Let me tell you, it's hard to find nut-free and peanut-free recipes. This recipe for white fudge did call for nuts as an optional ingredient but I didn't use them. I do think this fudge would be better with nuts but it's not bad plain. My original plan was to use dried cherries but they're rather tart and the fudge itself has a bit of tartness from the sour cream so I decided against that at the last minute. Candied cherries might have worked and they would have been pretty but I didn't have any to spare.

Yesterday I told you about the caramel (near) disaster. I wasn't taking a chance with that candy thermometer again so I pulled out the cheapo one and the first batch of this fudge turned out pretty good, albeit a bit skimpy since I didn't add anything to it. It was good enough that I decided to make a second batch. Well, it wasn't until I went to make batch two that I realized I had left the corn syrup and salt out of batch one. I added it to batch two. Batch two turned out too soft. Was it the corn syrup and salt? Did I read the thermometer wrong? Was there a sudden drop in barometric pressure? Do the candy-making gods hate me?

My best guess is that I misread the thermometer. It wasn't soupy or anything, just a bit softer than I think fudge should be. I decided to make dipped vanilla fudge balls out of this batch and as it turns out, I think I preferred the fudge balls to the plain fudge. They were a bit more festive.


From now on, I stick to fudge recipes that use marshmallow creme or marshmallows. My fudge making skills just aren't advanced enough for the old-fashioned recipes.

I also made a (half) batch of Chocolate Chip Brownies for the daycare providers. I like to give them a little something along with a gift card. It's a large center so I try to keep gifts consumable. I used Christmas colored Hershey's Kissables on top, along with the semi-sweet and white chocolate chips, to make them more festive. The great thing about this brownie recipe is that they're not too gooey or too cakey so they can be stacked and transported safely. I used some wax bakery bags I found in the dollar store. Six brownies fit in perfectly.

Ouch


Chocolate-Dipped Caramels
The All-New Ultimate Southern Living Cookbook Copyright 2006

1 cup sugar
1 cup butter
1 cup dark corn syrup
1 (14-ounce) can sweetened condensed milk
1 teaspoon vanilla extract
2 ½ cups semisweet chocolate morsels
2 tablespoons shortening

Bring first 3 ingredients to a boil in a saucepan over medium heat; cook 7 minutes, without stirring. Stir in condensed milk, and bring to a boil; cook stirring constantly, 10 minutes or until a candy thermometer reaches 245 degrees. I think my thermometer was wonky because after more than 20 minutes I still was only at about 240 degrees.

Remove from heat and stir in vanilla. Pour into a lightly greased aluminum foil-lined 8x8-inch dish. Let stand 8 hours at room temperature. I moved on to the next step after only about 3-4 hours.

Cut caramel into ½-inch squares, and shape into balls.

Melt chocolate and shortening in a saucepan over medium heat. Remove from heat. Dip balls into melted chocolate mixture; place on wax paper. Chill 8 hours.

Yield: 10 dozen
______________________________

Yesterday marked the start of the Christmas baking/candy making season. I planned, I scheduled, I organized but one thing I couldn't control is the raging case of PMS I'm dealing with right now. Not only has every ounce of energy been sapped out of my body, everything seems to be going wrong too.

I started with this new recipe. Candy thermometers have always been a thorn in my side but I dove in, hoping for the best. Everything was going smoothly but I could not get the temperature above 240 degreees. Finally, I had to face the fact that my candy thermometer, although a newer, more expensive model than the cheapo dollar stores ones that I've used in the past, was not accurate. Although when I tested it in boiling water afterwards it actually read higher than it should have so I really don't know what was going on with it.

So, the caramel was overcooked, but the disasters didn't stop there. After I took out the thermometer, it fell off the counter and took the 16-ounce bottle of vanilla with it. I wasn't sure if I had closed the top of the vanilla bottle completely so I quickly reached for it, but I grabbed the thermometer instead, getting a few fingers covered with hot caramel in the process. That really hurt. A lot.

Until later, when I got such nasty blisters while cutting through the stiff caramel that the word blisters doesn't really do them justice. At least I forgot about the caramel burns which were a mere annoyance compared to the blisters. (And to really top things off, I got an earful from my son for using his Spongebob band-aids.)

The caramel was still chewable, just a bit firmer than I would have liked. The firmness really made the cutting and rolling into balls much more difficult than it should have been. I actually gave up on rolling it into balls after a while and instead made little squares.

Would I make these again? Yes, actually. After all that, I was pleased with the results. Hopefully next time I make these the caramel will be a bit softer but I guess if I had to err, it was best to go in the direction of too firm since if they had been too soft, I don't know what I would have done.

Stayed tuned tomorrow for disasters in fudge making. Things just aren't going very well this year. Damn PMS.

(I'm going to put Blast From The Past and the Question of the Day on hold until after Christmas.)

Thursday, December 14, 2006

The calm before the Christmas baking storm


Chicken Fingers
Better Homes and Gardens New Dieter’s Cookbook Copyright 2003

12 ounces skinless, boneless chicken breasts
1 slightly beaten egg
1 tablespoon honey
1 teaspoon prepared mustard
1 cup packaged cornflake crumbs or 2 cups cornflakes, finely crushed
dash black pepper
purchased dipping sauce (optional)

1. Cut chicken into 3 x ¼-inch strips. In a shallow dish combine the egg, honey and mustard. In another shallow dish stir together the cornflake crumbs and pepper. Dip chicken strips into the egg mixture; roll in crumb mixture to coat.
2. Arrange chicken strips on an ungreased baking sheet. (I was a little nervous that they would stick so I put them on foil that I sprayed with a little bit of canola oil.) Bake in a 450 degree oven about 12 minutes or until golden and chicken is no longer pink. If desired, serve with your favorite dipping sauce.

Make 4 servings.
_________________________

This was my first time using cornflakes as a coating for meat or poultry. I was really impressed with how crispy they turned out. You could easily pick these up and dip them as you could a deep-fried chicken finger. I wasn't sure about the flavor. I didn't not like it, however it was a different flavor than I'm used to on chicken, a bit sweeter (from the cornflakes and the honey) than other oven-fried chicken recipes. The pepper gave it a nice bite though. I used a chipotle barbecue sauce for dipping. I really wanted honey mustard but I didn't have any ready-made on hand and I was too lazy to make it.

Well, next week you should see all Christmas treats. I bought my supplies last night and I do have to say that there is one advantage to not being able to bake with nuts anymore - my grocery bill was quite reasonable. I'm used to spending a small fortune on baking supplies at Christmas time but my grocery bill wasn't all that much higher than usual last night. Of course, I didn't buy much else. I'll be scrounging up quick dinners next week. Also, I picked up a few things like the fruit for my fruitcake, earlier in the month.

Blast From The Past: Bobbie's Bars from September 2005. I'm not making these for Christmas but I did think about it. However, unwrapping all those damn caramels again doesn't appeal to me.

Question of the Day: What's your favorite dipping sauce?

Attack Of The Giant Kotlety


Kotlety
The Russian Heritage Cookbook Copyright 1998

1 lb. ground beef
1 ½ cups bread crumbs
1 small onion, peeled and chopped
1 Tbsp. butter
½ tsp. salt
pinch pepper
1 Tbsp. chopped dill I assumed they meant fresh but I used about 1 teaspoon of dried
1 egg
¾ cup very cold water
½ cup small chips of ice
butter for frying

Fry onion in butter until golden. Combine beef, ¾ cup bread crumbs, fried onion, salt, pepper, dill and slightly beaten egg. Work in the cold water by tablespoon until it is all absorbed and mixture is light and fluffy. Form into small oval-shaped patties (about 2 inches across.) In the center of each put a small chip or two of ice and fold meat around it to squeeze kotlety back into oval shape. Roll in remaining breadcrumbs and fry in hot butter until browned (about 12-15 minutes). Serve with sour cream.

Makes 12-14 kotlety. I only made 4 LOL!
______________________________

It wasn't until I was typing out this recipe that I realized these were supposed to be much smaller. That one large patty you see should have been about four smaller ones. Oh well, no harm done. I did have to finish them off in the oven, to make sure they were cooked through.

Kotlety is a Russian meat patty that has many, many variations. A brief internet search brings up variations using other meats, such as pork and chicken, too.

As versatile as ground beef is, I still have trouble coming up with uses for it. Sometimes lean ground beef can be tough in patties, meatballs or meatloaves but these were very tender due to the breadcrumbs and water. I shouldn't have been surprised since I've found that adding a lot of liquid and a good amount of bread makes the best meatballs.

I got this book from the library. My family is Polish and my husband's family is Russian so I've been looking for some good Russian and Eastern European cookbooks. This was definitely one of the best ones I've come across, although I don't know how authentic the recipes are since I have nothing to compare them to. Both of our families have been here for a couple of generations and have only carried on a few recipes. And, I have to assume that when our ancestors arrived they might have had to change recipes right off, since they probably didn't have access to the same ingredients.

Blast From the Past: Russian-Style Chicken Cutlets from August 2006 which I now know were just another variation of kotlety. That recipe was from the cookbook I'm giving away this month. Don't forget to enter to win if you haven't already.

Question of the Day: What are three things you make with ground beef (or any other ground meat)?

P.S. I still can't comment on beta blogs. It's been days which is a long time for something to be broken, even for Blogger.

Tuesday, December 12, 2006

Cookbooks - they're everywhere!


Overnight Three-Grain Waffles
Better Homes and Gardens Test Kitchen Favorites Copyright 2003

1 ¼ cups all-purpose flour
1 cup yellow cornmeal
½ cup oat bran
3 tablespoons sugar
1 package active dry yeast
½ teaspoon salt
2 cups milk
2 eggs
1/3 cup cooking oil

1. In large mixing bowl combine the flour, cornmeal, bran, sugar, yeast and salt. Add the milk, eggs, and oil; beat with a rotary beater or electric mixture for 1 minute on medium speed until thoroughly combined, Cover loosely and let stand for 1 hour at room temperature or for 2 to 24 hours in the refrigerator until mixture is bubble and slightly thickened.
2. Stir batter. Pour batter into a preheated, lightly greased waffle baker. (Check manufacturer’s directions for amount of batter to use.) Close lid quickly; do not open during baking. Bake according to manufacturer’s directions. Use a fork to remove the baked waffle iron from the grid. Keep hot. Repeat with remaining batter. Serve immediately.

Makes 6 (4-inch waffles) ?? I made 19 standard-sized waffles
________________________________

I know what you're thinking - Why doesn't she just pick a waffle recipe and stick with it already? It's true, I could have stopped at any of the waffle recipes I've tried. They've all been very good. There is definitely a difference in texture between the recipes that use whipped egg whites folded in and those that don't, but otherwise whether they're apple, banana, bran, etc, there isn't all that much difference between waffles.

Since this recipe doesn't require whipping the egg whites, the waffles aren't as 'light' but frankly I prefer the sturdier waffles. I like that this recipe includes a bit of oat bran which makes the waffles seem healthier than if it didn't. The really nice thing about this recipe is that you can mix the batter together the night before you make them. That's great for a busy morning or a holiday or brunch, when you really don't want to spend too much time or make too much of a mess in the kitchen.

I found this cookbook in Dollar General of all places. I ran in on a mission to find a cheap snow globe for my son, so he would stop asking to play with my good snow globes. I spied this cookbook for only $2, out of the corner of my eye. I've seen cookbooks in Dollar General before but nothing worth buying. This was a hardcover book that presented the favorite recipes from the Better Homes and Gardens test kitchen, organized by decade (30s-90s), with a showstopper section too. This recipe was from the 80s. They also included pictures of magazine and cookbook covers for each decade, as well as a picture of a typical kitchen from each decade, although I take issue with the 80s kitchen. It looked very 70s to me - dark wood with doorknocker handles, orange or red countertops, a wicker topped table, carpeting as flooring. Shouldn't it have been mauve and country blue with pickled cabinets?

BTW, if you have a Beta Blog, I haven't been ignoring you. I wasn't able to post comments on any beta blogs yesterday. Hopefully that has been fixed.

Blast From The Past: Sour Cream Banana Bread from December 2005. This is the bread I usually give the daycare caregivers (along with gift cards) but I may switch things up this year and give them something else.

Question of the Day: What decade is your kitchen from?

Macaroni and a meme


Macaroni and Cheese
Better Homes and Gardens New Dieter’s Cookbook Copyright 2003

2 ½ cup dried radiatore, rotelle, or elbow macaroni (8 ounces) I used Dreamfiled rotini
2 cups reduced-fat milk I used super skim
2 tablespoons all-purpose flour
½ teaspoon dry mustard
¼ teaspoon salt
1/8 teaspoon black pepper
½ cup shredded cheddar cheese (2 ounces)
2 ounces American cheese, cubed (about ½ cup)
½ cup coarsely crushed purchased seasoned croutons
2 tablespoons finely shredded Parmesan cheese

1. Cook pasta according to package directions; drain and return to pan.
2. Meanwhile, in a large screw-top jar combine 1 cup of the milk, the flour, mustard, salt, and pepper; cover and shake until combined. Pour into a medium saucepan. Stir in remaining 1 cup milk. Cook and stir over medium heat just until bubbly. Reduce heat to low. Add cheddar cheese and American cheese, stirring until melted. Pour sauce over pasta, stirring until combined. spoon into 1 ½ quart casserole.
3. Bake, covered, in a 350 degree oven for 15 minutes. In a small bowl stir together the croutons and Parmesan cheese; sprinkle over casserole. Bake, uncovered, about 5 minutes more until heated through. Let stand 5 minutes before serving.
_________________________

This was not the world's best macaroni and cheese but for a lighter version it wasn't bad. This recipe doesn't use any butter and only uses 1 cup of cheese but it was still satisfying. I served it as a side dish along side ham and carrots.

This wasn't terribly exciting but, if you haven't heard, there are less than two weeks until Christmas! Dinner is that last thing I need to be spending time on. I'll throw in a Christmas Meme here to spice this post up. I was tagged by both Claire from Cooking Is Medicine and VeuveClicquot from Sugar Delirium.

1. Egg Nog or Hot Chocolate? I like both but don't drink too much of either.

2. Does Santa wrap presents or just sit them under the tree? He sits them unwrapped, each person has their own pile.

3. Colored lights on tree/house or white? White on the tree inside and white, red and green on house and trees outside (some trees are green, some are red, the house is white, etc - the strands aren't multi-colored.)

4. Do you hang mistletoe? No.

5. When do you put your decorations up? As soon as I get to it after Thanksgiving.

6. What is your favorite holiday dish (excluding dessert)? There isn't one dish in particular. I enjoy the traditional Christmas Eve meal of pierogis, fish, cabbage (or sauerkraut), etc that both my family and my husband's family serves.

7. Favorite Holiday memory as a child: I could never pick a favorite. I've always loved Christmas Eve more than Christmas Day. I loved when Santa came on the firetruck on Christmas Eve - still do.

8. When and how did you learn the truth about Santa? I don't remember exactly when but I picked up on various clues (such as toy boxes in the trash) and figured it out myself.

9. Do you open a gift on Christmas Eve? Not anymore but I did when I was younger.

10. How do you decorate your Christmas Tree? White lights and an eclectic array of ornaments I've acquired over the years.

11. Snow! Love it or Dread it? I love it on it's own but mixed with travel, I despise it.

12. Can you ice skate? Nope.

13. Do you remember your favorite gift? I've enjoyed many gifts over the years. No one gift stands out as a favorite.

14. What’s the most important thing about the Holidays for you? Celebrating with family.

15. What is your favorite Holiday Dessert? Cookies and my mom's rice pudding (a baked custard, really) which I don't get very often anymore since that was a Christmas Eve thing and I spend Christmas Eve with my husband's family now.

16. What tops your tree? A cheap metallic red star with sparkles that I bought in Wal-Mart for about 99 cents when we first started putting up a tree a few years ago. I can't bring myself to replace it with anything else.

17. Which do you prefer giving or Receiving? Neither anymore. Except for my son (whom I can't stop buying for!), I'd rather not have to exchange gifts with anyone anymore. It's the most stressful part of the holiday - trying to find appropriate gifts.

18. What is your favorite Christmas Song? Gosh, I can't think of just one right now. Someone burned me a CD of Christmas music a couple of years and that's about all I listen to around the house at Christmastime anymore.

19. Candy Canes! Yuck or Yum? Nice to look at but not to eat.

20. What do you serve for Christmas dinner? Nothing - one of my sisters cooks Christmas dinner. It's usually a spiral ham (or is that Easter? - I can't remember but it's always something good.)

Blast From the Past: Horn and Hardart's Baked Macaroni and Cheese from November 2005. Only a bit more decadent than today's recipe and probably my favorite macaroni and cheese recipe that I've tried so far.

Question of the Day: Where will you be on Christmas Eve and Christmas Day?

Monday, December 11, 2006

Easier than pie


Cinnamony Apple Streusel Bars
Favorite Brand Name Gifts From The Christmas Kitchen Copyright 1998

1 ¼ cups graham cracker crumbs
1 ¼ cups all-purpose flour
¾ cup packed brown sugar, divided
¼ cup granulated sugar
1 teaspoon ground cinnamon
¾ cup butter or margarine, melted
2 cups chopped apples (2 medium apples, cored and peeled)
Glaze

Preheat oven to 350 degrees F. Grease 13x9-inch baking pan. Combine graham cracker crumbs, flour, ½ cup brown sugar, granulated sugar and cinnamon in large bowl. Stir in melted butter until well-blended; reserve 1 cup. Press remaining crumb mixture into bottom of prepared pan.

Bake 8 minutes. Remove from oven; set aside. Toss apples with remaining ¼ cup brown sugar in medium bowl until brown sugar is dissolved; arrange apples over baked crust. Sprinkle reserved 1 cup crumb mixture over filling. Bake 30 to 35 minutes or until apples are tender. Remove pan to wire rack; cool completely. Drizzle with Glaze. Cut into bars.

Glaze:
Combine ½ cup powdered sugar and 1 tablespoon milk in small bowl until well blended.

Makes 3 dozen bars.
_____________________________

It's been a while since I baked on the weekends. I had some time to kill on Sunday so I started flipping through my cookbooks, focusing on bar recipes. This one caught my eye first. I had everything on hand and they were so simple to put together. The most difficult step was peeling and chopping the apples but it only called for two apples so that took no time at all.

I enjoyed these quite a bit. My only complaint is that they were slightly flat-tasting. I like a bit of saltiness in my baked goods. I used salted butter for the crust but I think these could have used a pinch of salt too, maybe with the apples. I used Golden Delicious apples, maybe with a tart Granny Smith, I wouldn't have missed the salt. Otherwise, I'd rate these pretty high when you consider the little bit of effort these took to put together. You can serve the bars plain, cut into small squares, as you would a cookie or cut the bars larger and add some ice cream and serve this as you would apple pie. Even though there's a good bit of butter in these, the bars are very thin so you don't feel as if you've eaten something too extravagant.

I'd definitely make these again, maybe with a bit of caramel drizzled over top, instead of the glaze. Then they would remind me a little bit of one of my all-time favorite treats, Caramel Apple Granny Bars, that I would sometimes buy from the supermarket bakery section as a huge treat (because two large triangles came in the package and I would eat them both). These bars don't really compare but they're much less guilt-inducing.

Just two weeks until Christmas! You know, I'm still dealing with that allergic reaction and I think maybe the stress of the season isn't helping. I'm not going crazy with the Christmas baking this year but I'll probably have a few things to blog about. I have to replace the peanut butter and nut treats with something else. It was while baking the salted peanut cookies last year that I realized that my son was allergic to peanuts.

Blast From the Past: Check out last year's holiday treats for some inspiration.

Question of the Day: What's your favorite 'bought' dessert?

Friday, December 08, 2006

Meh


One-Dish Chicken and Kielbasa Rice
Cooking Light Annual Recipes 2007 Copyright 2006

2 cups fat-free, less-sodium chicken broth
1/8 teaspoon ground turmeric
8 ounce turkey kielbasa, cut into ½-inch pieces
2 cups long-grain parboiled rice (such as Uncle Ben’s)
2 teaspoon olive oil
8 ounces skinless, boneless chicken thighs, cut into bite-sized pieces I used white meat (tenders)
1 cup prechopped onion I chopped my own
1 cup prechopped green bell pepper I chopped my own
½ cup frozen green peas
¼ cup sliced, pitted manzanilla (or green) olives
1 tablespoon bottled minced garlic I chopped my own


1. Combine first 3 ingredients in a medium saucepan; bring to a boil. Stir in rice. Cover, reduce heat and simmer 5 minutes. Remove from heat, and let stand 5 minutes.
2. Heat oil in a large skillet over high heat. Add chicken; cook 2 minutes or until browned, stirring occasionally. Add onion and bell pepper; sauté 4 minutes or until tender. Stir in peas, olives, and garlic; sauté 1 minute. Add rice mixture; cook 1 minute or until thoroughly heated, stirring constantly.

Yield: 4 servings.
_______________________________

This were neither here nor there. There was nothing wrong with it, it just wasn't very exciting. I basically made it because I had everything but the rice on hand.

Maybe it was just me. My hives started coming back yesterday afternoon. Wednesday morning I was still itchy so I took a 24-hour allergy pill and I guess it finally wore off. I took another one and the hives went away so we'll see. I just feel compromised - my immune system is something I've taken for granted for so many years and now it's turning on me. My body is definitely in fight mode. My son has a cold and two co-workers sound like they should be home in bed too. I picked up some Airborne yesterday. Hopefully that helps. I've had good experience with Zicam.

This is one of the two cookbooks that Oxmoor House foisted on me. Yeah, they got me. I really would have eventually bought this one anyway but this is the last time. Now that I'm on to them I'll mark future books refused. Coincidentally, just a couple of days after I received this, I was in a meeting and during a break, the woman two seats next to me pulled out this cookbook and was looking through it. I thought I was a cookbook junkie but I don't carry them around with me!

Blast From The Past: Bourbon Chicken from December 2006. Exactly one year ago today, actually. I really liked this dish but I think thigh meat is key to it and I hate working with boneless thigh meat. By the time you trim it, you end up with only a fraction of what you started with.

Question of the Day: How do you avoid and/or deal with colds?

Wednesday, December 06, 2006

I wish these were more photogenic


Chicken Manicotti with Red Pepper Cream Sauce
Better Homes and Gardens Low-Fat & Luscious Italian Copyright 1997

12 manicotti or 18 jumbo shells
1 8-ounce package reduced-fat cream cheese, cut up
¾ cup skim milk
½ of a 7-ounce jar roasted red sweet peppers (about ½ cup), drained and chopped or one 4-ounce jar diced pimiento, drained I used the roasted peppers
3 tablespoons grated Parmesan cheese
1 9-ounce package (2 cups) frozen diced cooked chicken I used poached chicken tenders
1 10-ounce package frozen chopped broccoli, thawed and drained
2 tablespoons thinly sliced green onions
¼ teaspoon ground black pepper

Cook pasta according to package directions. Rinse with cold water; drain well.

Meanwhile, for sauce, in heavy saucepan stir cream cheese and ¼ cup of the milk over medium-low heat until smooth. Stir in remaining milk. Stir in sweet peppers or pimiento and Parmesan cheese; heat through. I added a bit of salt.

For filling, in a large bowl stir together ¾ cup of the sauce (set remaining sauce aside), the chicken, broccoli, onion and black pepper. Using a small spoon, stuff each manicotti with about ¼ cup of the filling or each jumbo shell with 2 to 3 tablespoons filling. Bake, covered, in a 350 degree oven for 30 minutes or until through.

To serve, cook and stir remaining sauce over low heat until heated through. Place 2 manicotti or 3 shells on each serving plate. Spoon sauce over shells. I put the sauce over the manicotti before baking. I also had about 2 tablespoons of mozzarella/provolone blend that I sprinkled over them with some additional Parmesan.

Makes 6 servings.
____________________________

I should have put more effort into getting a nice picture of these manicotti because they were really good and they deserve a better picture. I just love the combination of chicken, broccoli and cheese. I would definitely make these again. I made them the night before and they held up great. Honestly, I was hesitant to make these. I just wasn't sure they would be good but I took a chance and I'm glad I did.

Blast From The Past: Sausage Stuff Shells with Chunky Tomato Sauce from April 2006. The sauce wasn't that good (the canned tomatoes I used were awful), but the stuffing was great. However it was very rich. After making last night's manicotti, I'm picturing a lighter version of the sausage stuffed shells using turkey sausage and a low-fat cream cheese sauce.

Question of the Day: Did you know that Christmas is less than 3 weeks away??? Arghhhh!!!!!

Getting old sucks


Pumpkin Cream Pie
The All-New Ultimate Southern Living Cookbook Copyright 2006

25 (2-inch) gingersnap cookies, finely crushed
¼ cup butter or margarine , melted
1 (8-ounce) package cream cheese, softened
1 (15-ounce) can pumpkin
1 teaspoon ground cinnamon
½ teaspoon ground allspice
½ teaspoon ground ginger
¼ teaspoon ground nutmeg
½ cup heavy whipping cream
1 ½ cups powdered sugar
Garnishes: whipped cream, gingersnaps

Stir together crushed gingersnaps and butter; press into a greased 9-inch pieplate. Bake at 350 degrees for 8 minutes. Cool completely on a wire rack.

Beat cream cheese in a large bowl at medium speed with an electric mixer until creamy. Add pumpkin and next 4 ingredients; beat until blended.

Beat whipping cream until foamy; gradually add powdered sugar, beating until stiff peaks form. (Mixture will be very thick.) Fold whipped cream into pumpkin filling until blended. Spoon into crust. Cover and chill pie at least 8 hours. Garnish, if desired.
_____________________________

I made this for Thanksgiving and to be honest, I didn't think it was very good. Something was off. Well, I thought several things were off. First of all, it was very soft. I prefer a pie that cuts cleanly. I could have forgiven that but the spices and level of sweetness seemed off too. I'm not sure what went wrong but I won't be making this again. I'm only telling you about it because I don't have anything else (recipe-wise) to tell you about today.

I had a freaky experience yesterday. We went out for our Christmas lunch and I had an allergic reaction to something I ate (at least I'm reasonably sure it was something that I ate). First my ears got itchy, then I got hives on my wrists and the back of my neck. Then I felt warm all over. After that, it got sticky. Knowing as much as I do about anaphylactic shock due to my son's allergies, I think I was starting to have an anxiety attack so it was hard to tell what was what. I stayed (relatively) calm, helped by the knowing I was only 2 blocks from the ER, had two epi JRs in my purse and Benadryl. I didn't want to take Benadryl because I had a long drive home.

I have no idea what could have caused it. I mean, it could be anything. Your immune system can turn on you at any time in life, so I could have reacted to something I've eaten every day of my life. The only thing I (knowingly) ate that I had rarely or perhaps never ingested before was saffron. As much as I wish that were the culprit, I can't be sure.

The worst of it passed, although some itchiness stuck around. I was feeling a bit itchy even before I ate lunch so who knows? I hate feeling as if my body is turning on me. I used to have the most robust immune system that anyone could ask for but things sure do change when you start getting older. It's possible I've had mild reactions in the past and just never noticed but nothing like yesterday. One or two hives aren't really that noticeable if you aren't looking for them but you can't ignore clusters of them.

I still haven't heard from the two November cookbook giveaway winners - Laura's Mom and Wendyb532. Yoo hoo - you two need to check your e-mail!

Blast From The Past: Easy Tacos from just last month. I had some of the spice blend and half of a box of taco shells leftover so last night I made nachos. I split the shells in two and layered them with the meat, cheese, black olives and green onions. Less messy to eat than tacos.

Question of the Day: Have you ever had hives?

Tuesday, December 05, 2006

December 2006 Cookbook Giveaway

I scored three different Food and Wine Quick From Scratch cookbooks - my favorite cookbook series. This month the chicken version is up for grabs.

Food and Wine's Quick From Scratch Chicken contains the following recipes you've seen on this blog:

Baked Buffalo Chicken Wings
Chicken Provençal
Chicken Souvlaki
Mushroom and Chicken Risotto
Russian-Style Chicken Cutlets
Stir-Fried Chicken with Chinese Cabbage

This book isn't used but it does have some minors flaws - slight indentations on the covers and the glossy hardcover is slightly dull. Trust me, you won't care. This is my favorite chicken cookbook. There are pictures of every recipe too.

This is how it works - leave a comment on this post. I just need an e-mail address (if your profile links to an e-mail, you don't need to type it out, I'll find it). Entry is open until the last day of the month. First chance I get after that, I'll draw the winner. Then I'll contact the winner for a mailing address and then I mail the book. I'll pay the shipping, of course.

I'm being generous and opening this up to everyone, only because I'm feeling the Christmas spirit. It's not a thick book but it is a hardcover. If I have to send this package internationally, I can tell you this - it's going by the cheapest shipping method even if it involves a camel and the book takes a year to arrive!

***************The winner is Hilary******************

A surprise hit


Chicken Souvlaki
Food and Wine Magazine’s Quick From Scratch Chicken Cookbook Copyright 197, 2001, 2004
2 cups plain yogurt
1 cucumber, halved lengthwise, peeled, seeded, and grated
1 ¼ teaspoons salt
1 clove garlic, minced
fresh ground black pepper
¼ teaspoon dried dill
2 tablespoons olive oil
1 ½ teaspoons lemon juice
1 tablespoon dried oregano
1 1/3 pounds boneless, skinless chicken breasts (about 4) cut into 1-inch cubes I used tenders
4 pocketless pitas
6 tablespoons butter, at room temperature I used less
1 small onion, cut into thin wedges
2 tomatoes, cut into thin wedges I used grape tomatoes
1/3 cup black olives, such as Kalamata, halved and pitted

1. Put the yogurt in a strainer lined with cheesecloth, a coffee filter or a paper towel and set it over a bowl. Let drain in the refrigerator for 15 minutes. I drained in it a yogurt strainer for about 10 hours. In a medium glass or stainless stainless-steel bowl, combine the cucumber with 1 teaspoon of the salt; let sit for about 15 minutes. Squeeze the cucumber to remove the liquid. Put the cucumber back in the bowl and stir in the drained yogurt, the garlic, 1/8 teaspoon of pepper and the dill. *I added sour cream and some white vinegar.
2. Light the grill or heat the broiler. In a small glass or stainless-steel bowl, combine the oil, lemon juice, oregano, the remaining ¼ teaspoon salt, and ¼ teaspoon pepper. Toss the chicken cubes in the oil mixture and thread them onto skewers. I didn't use skewers (to save time). Grill the chicken over high heat or broil, turning once, until done, about 5 minutes in all. I broiled the chicken. Transfer the chicken to a plate.
3. Spread both sides of the pitas with the butter and grill or broil, turning once, until golden, about 4 minutes in all. Cut into quarters.
4. To serve, put the pitas on plates and top with the onion, tomatoes, and chicken skewers with any accumulated juices. Serve with tzatziki and olives.
____________________________

I thought this recipe was going to be a miss, but it turned out to be a hit. Once you put all the elements together, it was really delicious. Even my husband commented that it was really good.

I had to tinker with the tzatziki because I'm not a huge fan of plain yogurt. I can't get good Greek yogurt around here either. I added a bit of white vinegar (after looking at another tzatziki recipe) and some sour cream. That did the trick. I don't think there's anything wrong with the recipe as they presented it - I just changed it due to personal preferences.

I was going to skip the butter on the pita but I'm glad I didn't. Buttered, grilled pita is great! Why should I be surprised - butter makes everything taste better.

This is one of my favorite cookbooks. If you think you might enjoy it too, stay tuned for the December cookbook giveaway announcement. Yep, I scored a copy for some lucky person.

This isn't the most veggie packed dish for Sweetnick's ARF/5-A-Day Tuesday but it's the closest I've come in weeks so I'm going to submit it.

I'm going out for our Christmas lunch today. I can't wait. It's a restaurant run by a cooking school. Should be interesting. Seems early for a holiday luncheon though.

Blast From the Past: Baked Buffalo Chicken Wings from February 2006. Another great recipe (especially the blue cheese dip) from this book.

Question of the Day: Do you have many holiday related parties or events planned?

Monday, December 04, 2006

Auntie Em, Auntie Em!


Waffles
The Joy of Cooking Copyright 1931, 1936, 1941, 1942, 1943, 1946, 1951, 1952, 1953, 1962, 1963, 1964, 1975

Sift together:
1 ¾ cups cake flour
2 teaspoons double-acting baking powder
½ teaspoon salt
1 tablespoon sugar

Beat well:
3 egg yolks

Add:
2 to 7 tablespoons melted butter or vegetable oil I used about 4 T of melted butter
1 ½ cups milk

Make a whole in the center of the dry ingredients. Pour in the liquid ingredients and combine.

Beat until stiff but not dry:
3 egg whites

Fold them into the batter until they are barely blended. Cook waffles according to your waffle iron’s manufacturer’s instructions.
_____________________________

Our town was hit by a tornado Friday. Everyone is quite shocked- this isn't Kansas afterall. I had just driven through the area it hit. A woman was killed by a tree while she was sitting at a red light that I had driven through only minutes earlier. I didn't even know anything had happened until I turned on the news later. We had no phone service and my husband was stuck on the other side of the damage, aware that someone had been killed, but unable to call home. When I heard the news, I got out my cell phone but even that wouldn't go through the first few times I tried. Eventually I got through and my husband was sufficiently relieved to hear my voice so I thought he deserved some waffles this weekend. I didn't make them for him the last two weeks, just because I was busy with other things.

The Joy of Cooking really bores me for some reason but these were really good waffles - very light and airy. I paraphrased the recipe, which I don't normally do but if you've seen Joy of Cooking, you know they throw a lot of extra suggestions into the text of the recipe. I know this is a very good cookbook, very in-depth and a veritable bible of cooking to many people but like I said, it just bores me and I rarely look at it.

Blast From The Past: Hamburger Special from June 2006. Rebel just made these and I remembered how much I enjoyed them. And, this is almost unbelievable, ground beef was on sale for 69 cents a pound last week. It was 75%, so much fattier than I usually buy but for 69 cents a pound, I couldn't resist. Fattier ground beef makes better hamburgers and in recipes that call for browning the ground beef, it can be rinsed in hot water after it's browned, before you proceed with the rest of the recipe. Since you only eat a bit of the sauce with Hamburger special, the fat wasn't too much of a problem but for something like meatballs in pasta sauce, I wouldn't use the fattier beef because the grease ends up in the sauce.

By the way, I originally got this Hamburger Special recipe from a small VFW pamphlet cookbook but I recently found the same recipe in an old Southern Living Annual, word for word.

Question of the Day: Do you own The Joy of Cooking?

Friday, December 01, 2006

Another winner from the Biggest Loser


Spicy Meatballs with Fiery Chili Sauce
The Biggest Loser Cookbook Copyright 2006

¼ pound 96% lean ground beef I used the lean beef
from Costco which I think is 88%
2 tablespoons cooked brown rice
¼ teaspoon dried parsley
¼ teaspoon Italian seasoning
¼ teaspoon fennel seeds
1/8 teaspoon garlic powder
1/8 teaspoon red-pepper flakes
1/8 teaspoon dried minced onion
pinch of salt
pinch of black pepper
2 ½ tablespoons of chili sauce
1/8 teaspoon hot-pepper sauce, or more to taste I didn't
add too much because I'm not sure what my son's heat
tolerance is

Preheat oven to 400 degrees F.

In a medium bowl, combine the beef, rice, parsley, Italian seasoning, fennel, garlic powder, red-pepper flakes, onion, salt, and pepper. With clean hands or a fork, mix well. With a 1” cookie scoop or a spoon and your hands, form the mixture into eight 1” meatballs. Place the meatballs in a single layer on a small nonstick baking sheet. Bake for about 7 minutes or until the meatballs are just barely pink inside. Transfer to a medium bowl and set aside.

Meanwhile, in a small bowl, combine the chili sauce with the hot pepper sauce. Pour the sauce over the meatballs. Toss to coat with sauce. Serve immediately.

Makes 1 serving. Per serving: 206 calories, 23 g protein,
17 g carbs, 5 g fat, 60 mg chol, less than 1 g fiber,
678 mg sodium.

____________________________

I picked up fennel seeds just last week so when I saw this recipe, I figured it was meant to be. I generally keep everything it takes to make these meatballs on hand (now that I own fennel seeds). We had brown rice with the picante chicken on Tuesday so I just made extra and saved it for this recipe.

These were sooooo good. They were very flavorful, not really 'hot' since I didn't add too much hot sauce. I made the meatballs in the morning, before work, which I think is a good idea. You don't want to cook these too long (especially if you use the 96% beef) so making them ahead of time gives the seasoning time to permeate the meatballs. These would be good as an appetizer too, a lighter version of the famous chili sauce and grape jelly sauced meatballs.

I quadrupled the recipe. This book is all over the place with serving sizes. I'm not sure why this one is just for 1 serving. Although, since one of the biggest problems that dieters have is portion control, it's nice to see recipes for one, for single people or anyone who is dieting alone. I don't think anyone, dieting or not, would feel deprived eating these meatballs.

Blast From The Past: Sweet-Sour Meatballs from November 2005. These were a favorite of my husband's and similar to the recipe above.

Question of the Day: How many people are you cooking for on daily basis?

Thursday, November 30, 2006

Great pork chops


Memphis-Style Pork Chops
Better Homes and Gardens New Dieter’s Cookbook Copyright 2003

½ cup bottled chili sauce
2 tablespoons molasses
2 tablespoons cider vinegar
1 teaspoon chili powder
4 boneless pork loin chops, cut ¾ to 1 inch thick (1 ¼ pounds total)
1 teaspoon dried basil, crushed
½ teaspoon paprika
¼ teaspoon salt
¼ teaspoon onion powder
¼ teaspoon cayenne pepper
Purchased coleslaw (optional)

1. In a small saucepan stir together chili sauce, molasses, vinegar, and chili powder. Bring to boiling; reduce heat. Simmer, uncovered, for 3 minutes. Remove from heat.
2. Trim fat from chops. In a small bowl stir together basil, paprika, salt, onion powder and cayenne pepper. Sprinkle evenly over both sides of each chop; rub in with your fingers.
3. Place chops on the rack of an uncovered grill directly over medium coals. Grill for 12 to 15 minutes or until pork juices run clear (160 degrees F), turning once and brushing with chili sauce mixture during the last 5 minutes of grilling. (I broiled mine.) If desired, serve with coleslaw.

Makes 4 servings. Per serving: 260 cal, 7 g fat, 83 mg chol, 623 mg sodium, 16 g carbs, 2 g fiber, 31 g pro
______________________________

Sometimes pork chops turn out so good and other times they're just so-so. This was one of those times when they were really good. I didn't grill them since it was gloomy and damp outside. I considered the George Foreman grill but I decided to broil them and that was a smart decision. I cut these chops from the fattier end of the pork loin. They weren't all that fatty - pork is pretty lean these days - but that little bit of extra fat helps a lot. The were perfectly cooked and a bit crispy from being broiled (the contact grill tends to almost steam the chops making them rubbery instead of crispy). I hardly ever use the broiler but I think I'll be using it more often from now on.

The sauce was great. It had the perfect blend of tanginess, sweetness and smokiness. Even my son liked the sauce. I almost kept his plain but he ate an entire sauced chop and asked for more.

Hey, it's the last day to sign up for the November cookbook giveaway. Tomorrow is December! Guess I can start thinking about Christmas baking.

Speaking of cookbooks, here's a little advice. Do not order anything directly from Oxmoor House (Cooking Light Annuals, Southern Living books, etc) unless you want them to keep sending you more books and more bills. I ordered one CL annual from them, paid for it, and then a Southern Living cookbook came. I remember getting the solicitation for the Southern Living book but I didn't think I replied. When it arrived, I thought, well, maybe I had. Now that a third book has arrived that I'm sure I didn't order, I did a little research and found out that this is how they operate. Most people will just pay rather than return the book. Making a simple purchase can have so many strings attached anymore. Apparently they have been doing this for many years and have already been fined by the FTC so I'm sure the fine print was there, I just didn't read it. Live and learn.

Blast From the Past: Honeyed Pork Chops from October 2005. Why haven't I made them again. They were so good.

Question of the Day: How often do you broil food?

Wednesday, November 29, 2006

Cutting back


Dari’s Picante Chicken
The Biggest Loser Cookbook Copyright 2006

1/3 cup plus ½ cup mild, medium or hot picante sauce
4 medium (4-ounce) boneless, skinless chicken breasts, trimmed of visible fat I used tenders
6 tablespoons light cream cheese from a block, softened
½ cup (1 ounce) finely shredded Cabot 75% Light Cheddar Cheese

Preheat oven to 350 degrees F. Spread 1/3 cup of the picante sauce in the bottom of a 13x9-inch baking dish. Set aside.

Lay chicken breasts on a cutting board. Use the flat side of a meat mallet to pound the chicken breasts to a uniform thickness.

Spread the chicken evenly with the cream cheese. Lay the chicken, cream cheese side up, in a single layer in the prepared baking dish. Spoon the remaining ½ cup picante sauce evenly over the breasts. Cover the dish with aluminum foil. Because I used tenders and they didn't need to cook as long, I didn't cover them.

Bake for 15 minutes. Remove the aluminum foil. Sprinkle the Cheddar cheese evenly over the breasts. Bake, uncovered, for 15 minutes, or until no longer pink. Serve immediately.

Makes 4 servings
________________________

I got this book from the library. It was the perfect choice to select recipes from the week after eating two Thanksgiving meals. I wasn't expecting that much from this cookbook but I was pleasantly surprised. I'll be picking up my own copy. I didn't really know much about the Biggest Loser Diet, even though I've been watching all this season. It's basically a restricted carb, low-fat, high protein diet. You can have four or more servings of veggies or fruits (at least half have to be veggies), 3 servings of protein, 2 servings of whole grain and 200 extra calories. It sounded really restrictive until I saw that a protein serving was 8 ounces and a whole-grain serving was 1 cup (or 2 slices of bread). I still don't understand how anyone can continually lose 20 pounds each week without having surgery as one contestant has been doing.

This was good and relatively effortless to put together. I'm usually tempted to add more cheese than a light recipe calls for but since the 75% Light Cabot Cheddar costs twice as much as the 50% Light Cabot Cheddar, I was able to control myself. The cheese melted fine but did get a slightly weird crinkly texture on top.

I think Costco changed providers, when it comes to their frozen chicken tenders (unless they carry more than one brand but I doubt that). I thought Tyson used to provide them under the Kirkland brand but I noticed this last bag was Purdue. The tenders are much, much smaller. Coincidentally, I had almost finished a bag of Purdue tenders I picked up in the supermarket when I bought these in Costco and the supermarket tenders had a 15% solution added, while the Costco ones only have an 8% solution. I'm not sure but I thought the ones I used to buy had an even lower percentage. I hate change.

Blast From The Past: Balsamic Chicken from January 2006. An unattractive but good chicken recipe.

Question of the Day: Do you watch reality shows?

Tuesday, November 28, 2006

Baba's cheesecake, sort of


Cheesecake
The Lady & Sons Savannah Country Cookbook Copyright 1997, 1998

CRUST:
1 cup graham cracker crumbs
¼ cup sugar
4 tablespoons (1/2 stick) butter, melted

Preheat oven to 350 degrees. Mix ingredients together and pat onto bottom and sides of an 8-inch springform cake pan. Prepare filling.

FILLING:
2 eggs
12 ounces cream cheese, softened
1 cup sugar
½ teaspoon vanilla

Beat eggs and softened cream cheese together. Add sugar and vanilla. Beat until well blended. Pour into prepared crust. Bake for 25 to 30 minutes. Let cool for 10 minutes. Add topping.

TOPPING:
½ cup sugar
1 cup sour cream I used lite because that's what I had
½ teaspoon vanilla

Combine ingredients and put on top of cake; return to oven for 10 minutes.
_______________________________

My husband's grandmother has several recipes that she seems reluctant to part with. I've had no luck at all figuring them out on my own, except for her cheesecake. This recipe was extremely close, if it had been cooked another 5 minutes and I left out the crust. Personally, I like a crust with my cheesecake.

Funnily enough, I made this cheesecake for my family on Thursday and on Saturday, when I had Thanksgiving with my husband's family, Baba made her cheesecake and somehow we (me, my sister-in-law and my mother-in-law) actually pried her cheesecake recipe out of her. It was very close to this one, same ingredients but different amounts (and no crust). I just found it kind of ironic that she gave it up as soon as I figured it out on my own. And no, I did not get the macaroni salad recipe but now I at least have hope that I might someday.

By the way, this is a great cheesecake. I think it just needed another 5 minutes in the oven to be perfect. I think fancy, flavored cheesecakes are great but plain cheesecake is best. Paula Deen did include a fruit topping recipe with this in the cookbook but I didn't use it.

I don't think I have any more Thanksgiving recipes. Maybe I'll blog about the pie I made that wasn't that spectacular. I'm not sure yet. The dinner rolls came out good for a first try but I never got a picture. I brought home a few leftover rolls to photograph but the cat chewed through the ziploc bag and ate them.

A Blast From The Past: Sausage and Mushroom Pasta from February 2006. We had this last night. It goes over very well in our house. I used turkey kielbas and Dreamfield penne last night.

Question of the Day: Do you like cheesecake? Plain or fancy?

Sunday, November 26, 2006

Outed


French Silk Chocolate Pie
Easy Pies With Pillsbury Pie Crust Copyright 2004

1 Pillsbury refrigerated pie crust, softened as directed on box
3 oz unsweetened baking chocolate, cut into pieces
1 cup butter, softened (do not use margarine)
1 cup sugar
½ teaspoon vanilla
4 pasteurized eggs or 1 cup fat-free egg product I used the egg product
½ cup sweetened whipping cream

Chocolate curls, if desired

1. Heat oven to 450 degrees F. Make pie crust as directed on box for one-crust baked shell using 9-inch glass pie pan. Bake 9 to 11 minutes or until lightly browned. Cool completely, about 30 minutes.
2. In 1-quart saucepan, melt chocolate over low heat; cool. In small bowl, beat butter with electric mixer on medium speed until fluffy. Gradually add sugar, beating until light and fluffy. Beat in cooled chocolate and vanilla.
3. Add eggs 1 at a time, beating on high speed 2 minutes after each addition; beat until mixture is smooth and fluffy. Pour into cooled baked pie shell. Refrigerate at least 2 hours before serving. Serve topped with whipped cream and chocolate curls. Store in refrigerator.
_________________________

While I was eating this I kept thinking it reminded me of something but I couldn't pinpoint what it was. It wasn't until I was copying the recipe that I figured out that it tasted like chocolate frosting. I only tasted it after eating a full Thanksgiving meal so it's hard for me to judge this fairly. Something so rich would stand better on it's own, not on a table full of other pies after a heavy meal.

So my sister found my blog. What the big deal, right? This isn't dooce.com after all, it's just a bunch of recipes. I would have shared it with my family except they have a history of mocking my hobbies. I know a lot of my readers are also food bloggers and you're probably scratching your head and wondering what's so embarassing about a food blog - there are probably thousands of them all over the world afterall. Well, I didn't think polymer clay was a ridiculous hobby either but I believe the phrase 'you really need to get a life' came up when I dabbled in that.

It wasn't as if I heard 'I found your blog, it's great' or anything like that. It was more of a whisper and then as soon as I left the get-together and then walked right back in for something I forgot, they were already talking about it. My other sister had that scrunched up face that signals she about to say something I don't want to hear (such as, 'you really need to get a life') so I just high-tailed it out of there.

I hope they got a good laugh and moved on. For the first time in almost 15 months, I'm not excited about blogging. I feel a little self-conscious right now. Every sentence I type suddenly looks silly. But I don't want to be one of those bloggers that disappears into thin air so I'll keep going.

Wednesday, November 22, 2006

One of those so-so dishes


Chicken Dijon
The All-New Ultimate Southern Living Cookbook Copyright 2006

3 tablespoons butter
6 skinned and boned chicken breasts I used tenderloins
1 (14-ounce) can chicken broth
1 medium-size sweet onion, diced
3 tablespoons all-purpose flour
3 tablespoons Dijon mustard

Melt butter in a large skillet over medium-high heat; add chicken, and cook 2 minutes on each side or until golden. My chicken was still sort of frozen so it didn't brown - too much liquid. Whisk together broth and remaining ingredients; pour over chicken. Cover, reduce heat to low, and simmer 20 minutes.

Yield: 6 servings
_________________________________

This was one of those dishes that was fine, not awful, but not that special either. It would have been better if I had good Dijon mustard in the house but when I went to make this I realized I had a brand that is okay for adding a tablespoon here and there but not my favorite for starring in a recipe. It was a simple recipe that I made out of ingredients I keep on hand so it scored extra points for that.

It's pie and dinner roll making day. I won't start until later. I want everything to be as fresh as possible. Grocery stores are open tomorrow if the rolls don't turn out that well!

Have a Happy Thanksgiving (or a Happy Thursday, if you're not in the states)!

Tuesday, November 21, 2006

A simple sandwich, no stumps needed


Iowa-Style Loosemeat Sandwiches
American Sandwich Copyright 2004

Loosemeat:
1 pound twice-ground beef I used the regular grind
1 tablespoon dried onion flakes
1 teaspoon ground black pepper
½ teaspoon salt
1 teaspoon sugar
2 teaspoons prepared yellow mustard
1 (12-ounce) can or bottle of beer (do not use light beer)

In a medium frying pan, brown the beef over medium-high heat, then drain it in a colander. Return beef to the pan and stir in the onion flakes, pepper, salt, sugar, mustard, and beer. Simmer, partially covered, over medium heat until liquid is evaporated, about 30 minutes.

Sandwich:
Loosemeat
4 hamburger buns I used whole-wheat buns
fresh onion, chopped
prepared yellow mustard
pickles

Spoon beef into buns and serve immediately with condiments. Be sure to give everyone a spoon so they can scoop up any stray beef that escapes.

Yield: 4 sandwiches
____________________________

This week is all about convenience and nothing seemed simpler than these loosemeat sandwiches. I've never had a loosemeat sandwich before so I have no idea how authentic these were but they were good. The meat mixture was more understated than the 'barbecue' sandwiches that are the typical ground beef sandwich of this area, but the condiments added punch.

I got this cookbook from the library and it's actually quite nice, for a cookbook with a schtick. The book includes one sandwich for every state. I actually flipped to Iowa expecting to see the pork tenderloin sandwich, but Indiana claimed the pork sandwich.

The book also contains the anecdotal history of the sandwiches in it. For instance, the pork tenderloin sandwiches were supposedly originally made by a guy who had most of his fingers cut off in an accident, and the stumps were perfect from tenderizing the meat. I know, I know, your mouth is watering now, isn't it?

Blast From the Past: Barbecue from September 2005. This is how we make our loosemeat sandwiches 'round here.

Question of the Day: If you live in the U.S., can you guess what your state's sandwich is, according to this cookbook?

Sunday, November 19, 2006

Blech!


Healthy Breakfast Muffins
Cakes 1,001 Classic Recipes From Around The World Copyright 2003

1 cup whole-wheat flour
2 teaspoons baking powder
1 ½ teaspoons ground cinnamon
½ teaspoon baking soda
1 ½ cups wheat bran
¾ cup milk
¾ cup apple juice I used cider
1 large egg, lightly beaten
2 tablespoons honey
1 tablespoon vegetable oil
¾ cup raisins
2 tablespoons coarsely chopped crystallized ginger

Preheat the oven to 375 degrees F. Butter and flour a 12-cup muffin pan or line with foil or paper baking cups. Sift the flour, baking powder, cinnamon, and baking soda into a large bowl. Stir in the bran. Beat in the milk, juice, egg, honey and oil. Stir in the raisins and crystallized ginger. Spoon the batter into the prepared cups. Bake for 15-20 minutes, or until springy to the touch. Cool the muffins on racks.
____________________________

These were disgusting, so why I am blogging about them? Because they were fine (in a healthy, fiber-filled kind of way) except for the crystallized ginger, which apparently I don't like (REALLY don't like). I tried eating around the ginger but tiny pieces kept sneaking up on me. I like ginger in other forms, even ginger candy, but crystallized ginger is just not for me. I can file it with goat cheese under 'yuck'.

I should have gone with my gut instinct and made these without the ginger. They would have made for a nice, guilt-free breakfast muffin but I had to ditch them.

Thanks for the comments letting me know there are still people around. I wasn't just fishing for comments, I know people get busy this time of year and I was just curious who was still around. I don't know what my schedule will be like this week. I won't be posting Thursday. I still haven't planned this week's meals yet and it's Monday morning. I know I'll have a few pies to post about after Thanksgiving.

I went to Costco Sunday. I planned on going Wednesday morning but I got it out of the way. Now I can spend Wednesday making pies.

Blast From The Past: Sour Cream-Bran Muffins from June 2006. These were incredibly delicious but not very healthy.

Question of the Day: I'm making rolls for Thanksgiving. Should I make them Wednesday night or get up super early on Thursday? We have to travel 2 hours, so making them just before dinner is not an option. I have no idea how long homemade rolls stay fresh.