Thursday, March 30, 2006

Being lazy


Pizza Crust (from Pizza Margherita recipe)
Martha Stewart’s Baking Handbook Copyright 2005

1 cup warm water (about 110 degrees)
¼ teaspoon sugar
1 envelope ( 2 ¼ teaspoons) active dry yeast
14 ounces (about 2 ¾ cups) unbleached all-purpose flour
1 teaspoon table salt
1 1/2 tablespoons olive oil

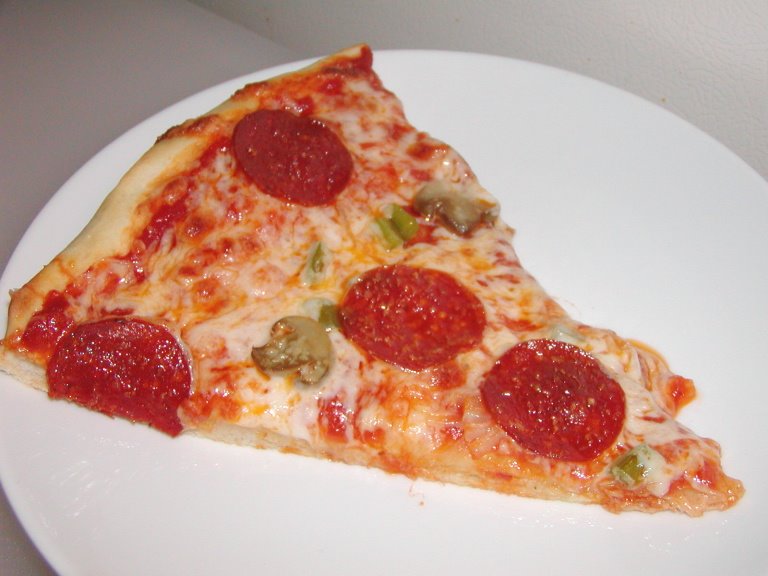
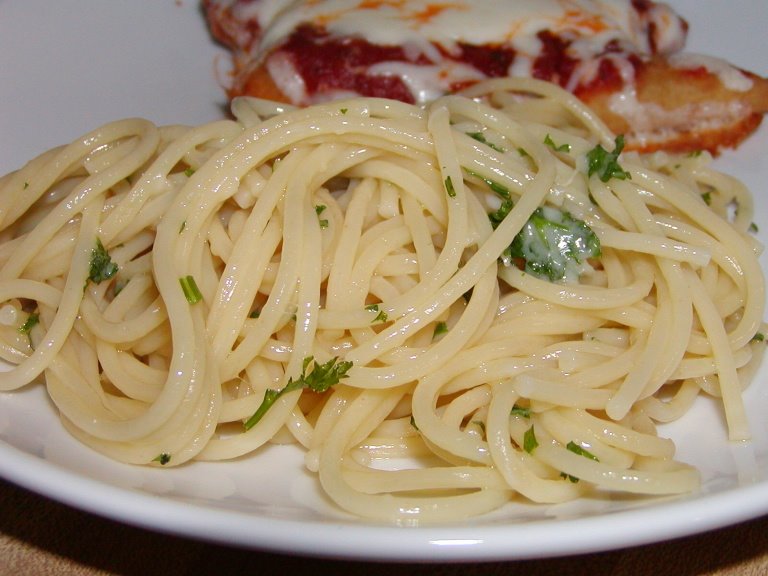
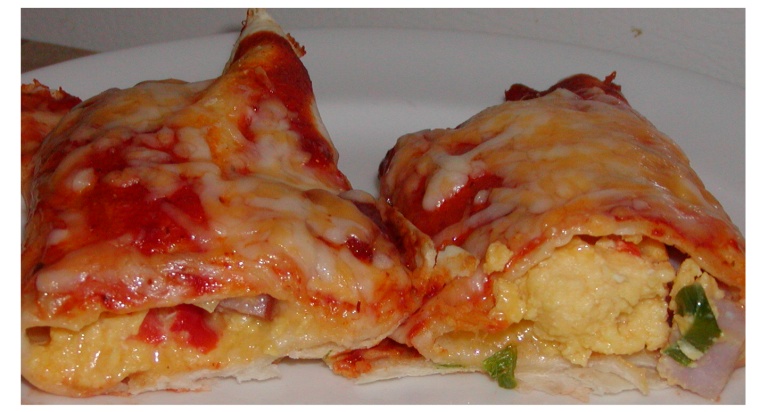
I've been making the pizza crust recipes (regular and whole wheat) from my bread machine manual but a few weeks ago I started making this recipe from Martha Stewart's Baking Handbook, which I checked out of the library. This recipe really tested the limits of my bread machine. Since it's a dual machine, each pan only makes a 1 pound loaf. This dough rises to the very top of the machine, just a fraction of an inch below the lid.

This recipe was actually part of Martha's Pizza Margherita recipe but I only made the crust and used my own choice of toppings. I was going to copy the entire recipe proper but I was too tired last night and since I didn't really make the recipe, I didn't see the point. This book is widely available for anyone who's interested in the entire recipe. The proper recipe I believe has two rises but I just threw this all in my bread machine (in the order that I use with the other bread machine recipes) and let her rip. It only has one rise but I was pleased with the results. More bread-y than the other recipes, which are chewier than this. It's not that one was better than the other, it's just nice to have a change every now and then since I make pizza every Friday.

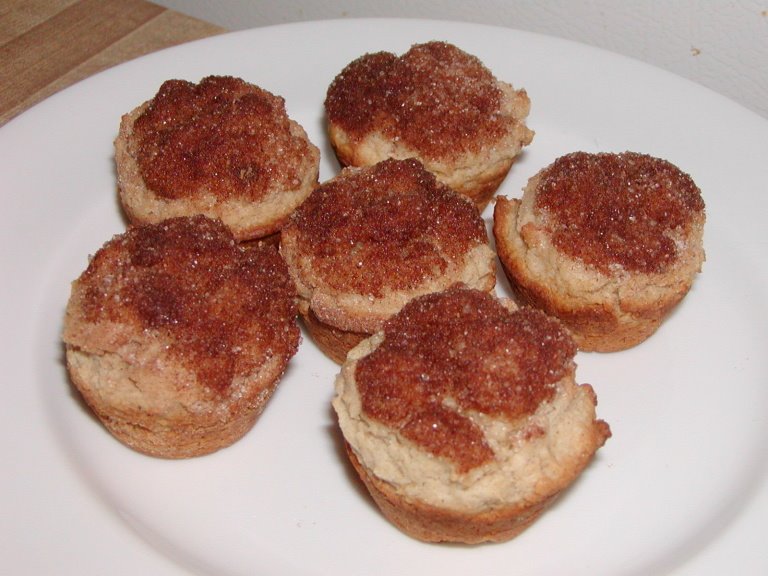
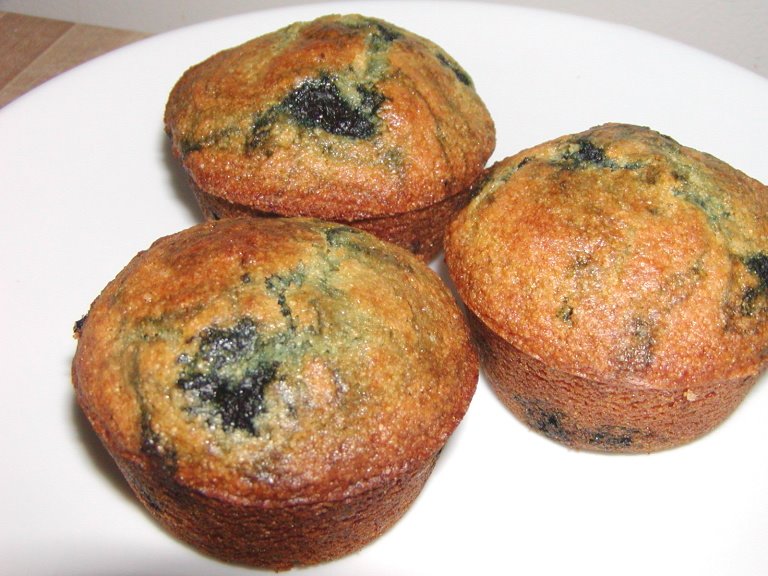
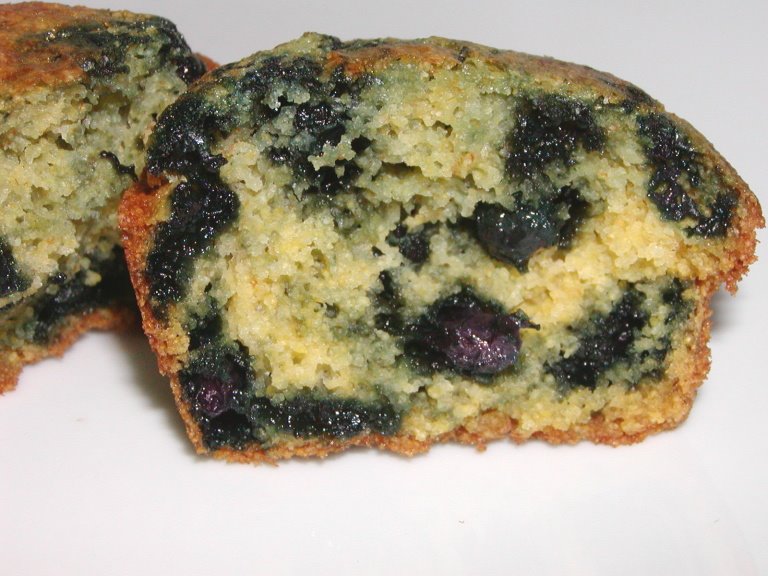
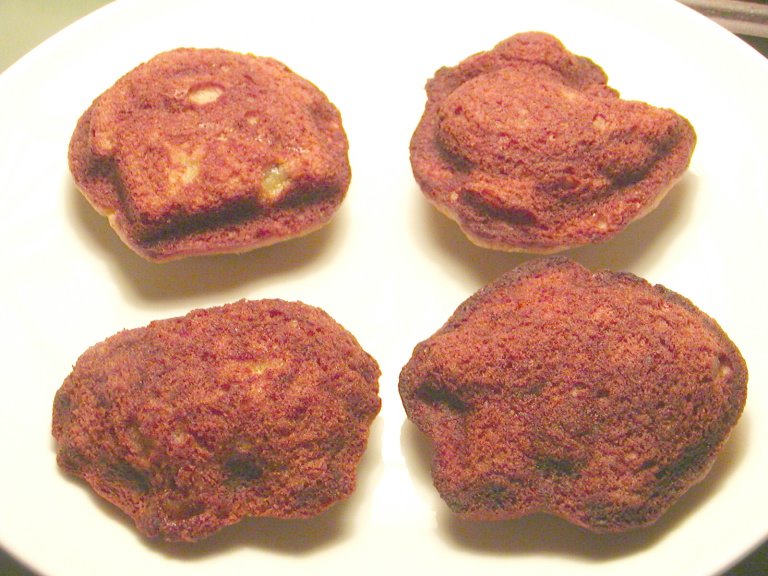
I really like this cookbook. The recipes seem so much more attractive to me than those in the other Martha cookbooks I own. I only own two others - this was a library book. I do have to amend what I said about her muffin recipe earlier this week. We actually polished them off pretty quickly. I threw them in the fridge and they were rather dense but strangely addicting, to be honest. I may just make them again.

Question of the Day: Do you sometimes change your opinion about a recipe, after a bit of time has passed after making it?

Wednesday, March 29, 2006

A bit of a disappointment


Cod Steaks (Tilapia Filets) Sicilian-Style
Prevention’s Ultimate Quick and Healthy Cookbook Copyright 1998

1 tablespoon plus 1 teaspoon extra-virgin olive oil
1 medium onion, halved and thinly sliced
1 cup thinly sliced fennel
3 garlic cloves, minced
½ teaspoon dried thyme, crumbled
¼ teaspoon salt
¼ teaspoon freshly ground black pepper
1 tablespoon honey
1 ¼ teaspoons grated orange zest
1 tablespoon balsamic vinegar
1 can (16 ounces) crushed tomatoes I used organic diced tomatoes
½ cup fresh orange juice
3 tablespoons golden raisins
1 ¼ pounds cod steaks I used tilapia filets
chopped fresh parsley , for garnish (optional)

1. Preheat oven to 425 degrees.
2. In a large, heavy no-stick skillet, warm the oil over medium-high heat until hot but not smoking. Add the onions, fennel, garlic, thyme, salt and black pepper, and sauté, reducing the heat slightly if necessary to keep the vegetables from sticking, for 3 to 4 minutes or until the vegetables are just tender and lightly browned.
3. Stir in the honey and orange zest and cook, stirring, for 30 seconds. Add the vinegar and simmer for 30 seconds, or until the vinegar is nearly evaporated and the vegetables are glazed.
4. Stir in the tomatoes, orange juice and raisins, and bring to a boil. Reduce the heat to medium-low and simmer for 5 minutes or until the sauce is slightly thickened.
5. Place the cod steaks in a 9x9-inch nonreactive baking dish. Spoon the sauce over the fish. Bake, uncovered, for 12 to 15 minutes, or until the fish flakes easily when tested with a fork.
6. Transfer the fish and sauce to 4 plates. Sprinkle with chopped parsley if desired.

Makes 4 servings. Per serving: 240 calories, 5.9 g fat, 54 mg chol, 418 mg sodium, 2.3 g fiber, 87 mg calcium, 2 mg iron

I've had some frozen tilapia filets in my freezer for quite a while but it hasn't been easy finding a recipe for them in any of my cookbooks. I knew it could be substituted for other mild white fishes so I finally decided to go ahead and substitute it for cod in this recipes.

There are many tilapia critics who believe tilapia is a tasteless fish and I became one of those critics last night. The topping on this fish was delicious but it did absoutely nothing for the fish itself. I actually ate very little of the tilapia but I ate all of the topping. I fed some of the tilapia to my cat and even he didn't seem all that thrilled with it. I didn't consider this a total failure since the topping was so good but I was very disappointed in the fish. This was my first time cooking with fresh fennel and I was surprised by how mild it was after it was cooked. It wasn't very licorice-y at all after it's been sautéed.

All I needed to buy to make this was the fennel so at least I didn't spend a fortune on ingredients. I also got to use the lonely orange in my produce bin that I bought a couple of weeks ago but I was never able to remember why I bought it.

I really like this cookbook, even though the two recipes I've made from it so far haven't been stand-outs. In both cases I chose the recipes based on using up ingredients I had on hand, not because they were the most exciting recipes in the book, so I haven't given up hope.

Question of the Day: How much fish do you eat?

Tuesday, March 28, 2006

Caper-less Chicken Piccata


Chicken Piccata
The Ugly Binder, from Taste of Home's Light and Tasty Magazine Sept 2004

8 boneless skinless chicken breast halves
½ cup egg substitute I used real eggs
2 tablespoons plus ¼ cup dry white wine or chicken broth, divided I used wine
5 tablespoons lemon juice, divided
3 garlic cloves, minced
1/8 teaspoon hot pepper sauce
½ cup all-purpose flour
½ cup grated Parmesan cheese
¼ cup minced fresh parsley I used dried
½ teaspoon salt
3 tablespoons olive oil, divided
2 tablespoons butter

Flatten chicken to ¼-inch thickness. In a shallow dish, combine the egg substitute, 2 tablespoons wine or broth, 2 tablespoons lemon juice, garlic and hot pepper sauce. In another shallow dish, combine flour, Parmesan cheese, parsley and salt. Coat chicken with flour mixture, dip in egg mixture, then coat again with flour mixture.

In a large non-stick skillet, brown half the chicken breasts in 1 ½ tablespoons oil for 3-5 minutes on each side or until juices run clear. Remove chicken and keep warm. Drain drippings. Repeat with remaining chicken and oil. Remove chicken and keep warm.

In the same pan, melt the butter. Add the remaining wine or broth and lemon juice. Bring to a boil. Boil, uncovered, until reduced by a fourth. Drizzle over chicken.

Makes 8 servings. Per serving: 246 calories, 8 g fat, 79 mg chol, 398 mg sodium, 8 g carbs, trace fiber, 32 g protein.

What I liked about this recipe is that it didn't use capers, like many Chicken Piccata recipes. Not that I don't like capers but two weeks ago I bought a bottle of them and it never made it into the cupboard. The jar crashed onto the floor while I was putting my groceries away. Capers aren't cheap and it's going to be a while before I forget the sting of losing that bottle and recover enough emotionally to replace it.

This was really tasty. I didn't even need much sauce on it since the coating had so much flavor. It was kind of a PITA to make after work - pounding chicken, grating cheese, juicing lemons, mincing garlic, all while a cat and a 2-year old were vying for my attention. I don't multi-task very well.

Question of the Day: Are you an 'organized' cook or chaotic cook?

Monday, March 27, 2006

3 down, 362 to go


Elbows with Sausage and Mushrooms, Carbonara Style
365 Ways to Cook Pasta Copyright 1988

8 ounces sweet Italian sausage, removed from casing and crumbled
2 tablespoons olive oil
½ cup chopped onion
½ cup chopped red or green bell pepper
2 cups diced (1/2-inch) trimmed mushrooms (about 6 ounces)
2 garlic cloves, crushed
½ teaspoon salt
¼ teaspoon coarsely ground black pepper
3 eggs
¼ cup grated Romano cheese
2 cups elbow macaroni
2 tablespoons chopped Italian flat-leaf parsley I used dried since my fresh parsley looked past it's prime

1. Brown sausage in medium skillet, about 8 minutes; transfer to a sieve to drain off the fat; reserve sausage.
2. Add olive oil to the skillet; heat over medium heat. Sauté the onion, red or green bell pepper and mushrooms in the oil, stirring frequently until vegetables are tender and lightly browned. Add the garlic; sauté 1 minute. Add the sausage; season with salt and pepper. Keep warm over low heat.
3. Beat the eggs and the cheese in a large serving bowl; set aside.
4. Cook the elbows in plenty of boiling salted water until al dente, or firm to the bite, about 12 minutes. Drain.
5. Add the hot elbows, the sausage mixture, and the parsley to the beaten eggs. Stir slowly until blended and creamy. Serve with extra cheese to sprinkle on each serving.

This wasn't bad but it definitely was not as good as the Linguine Carbonara I made last month. I made this because I had everything on hand to make this dish but now that I look at that other recipe, I realize I could have made that too, if I had picked up a box of linguine.

My contributions to Sweetnick's ARF/5-A-Day Tuesdays have been weak, due to poor planning. But once again, even though this didn't look like a nutritional powerhouse to me, a little bit of research shows me that mushrooms are actually quite nutritious. They're rich is selenium and some B-vitamins. Red peppers, onions and garlic all have benefits too.

This is the third recipe I've tried from this cookbook. It's really is a nice little book. I'd love to get my hands on the chicken version someday.

Question of the Day: How often do you eat pasta?

Sunday, March 26, 2006

So-so muffins from Martha


Cinnamon-Sugar Mini Muffins
Martha Stewart Living Annual Recipes 2003 Copyright 2002

10 tablespoons (1 ½ sticks) unsalted butter, melted, plus more for pan
1 cup sugar
1 tablespoon plus 1 teaspoon cinnamon
1 ½ cups all-purpose flour
2 teaspoons baking powder
½ teaspoon salt
½ cup buttermilk
1 large egg

1. Preheat oven to 375 degrees F. Butter a mini-muffin tin, and set aside. In a small bowl, combine ½ cup sugar and 1 tablespoon sugar; set aside. (I made half the amount of cinnamon sugar and it was still way too much.)
2. In a large bowl, combine flour, baking powder, salt and remaining one teaspoon cinnamon; whisk to combine. In a small bowl , combine 6 tablespoons butter, remaining ½ cup sugar, buttermilk and egg; whisk to combine. Using a large rubber spatula, fold butter mixture into flour mixture; use no more than 10 strokes. The mixture should be lumpy. Lumpy? It was thicker than cookie dough!
3. Spoon 1 tablespoon batter into each prepared cup and bake until tops are nicely golden, about 8 minutes. Remove from oven; let cool in pan 10 minutes before transferring to a wire rack.
4. Dip tops of muffins in remaining melted 4 tablespoon melted butter, and dip in reserved cinnamon mixture. Serve warm or at room temperature.

Makes 2 dozen.

I wasn't thrilled with these. The batter was super thick. I went over the recipe several times and I don't think I messed up but it's always possible. These reminded me of a boxed coffee cake mix my mom used to buy and I would make, when I was young. Not bad but not overly moist or flavorful.

I have a couple of Martha Stewart cookbooks but her recipes just don't thrill me for some reason. Well, it's the idea of making the recipes that doesn't thrill me. I like looking through the books but I never get around to actually making anything. The recipes are either overly complicated or ridiculously simple. The exception is her baking book which I have checked out of the library right now. For some reason I really like the recipes in that one and I've been making her pizza dough recipe (which I'll be blogging about soon) from that book with great success.

Question of the Day: Are you a Martha Stewart fan?

Thursday, March 23, 2006

The perfect pot roast


Slow-Cooker Pot Roast with Caramelized Onion Gravy
The Essential Eating Well Cookbook Copyright 2004

1 4-pound boneless top or bottom round beef roast, trimmed of fat, twine on
(I didn't trim or tie my roast)
salt and freshly ground pepper to taste
1 tablespoon extra-virgin olive oil, divided
2 large onions, thinly sliced
4 cloves garlic, minced
1 teaspoon dried thyme leaves
½ cup brewed coffee or 1 teaspoon instant coffee granules dissolved in ½ cup boiling water
I used brewed coffee
2 tablespoons balsamic vinegar
2 tablespoons cornstarch, mixed with 2 tablespoons water

1. Season beef with salt and pepper. Heat ½ tablespoon oil in a large, heavy skillet over medium-high heat. Add beef and sear until well browned on all sides, about 5 minutes. Transfer to a 4-quart slow cooker.
2. Add remaining ½ tablespoon oil to skillet; reduce heat to medium. Add onions and cook, stirring, until softened and golden, 5 to 7 minutes. Add garlic and thyme; cook, stirring, for 1 minute more. Stir in coffee and vinegar; pour onion mixture over beef.
3. Cover and cook on high until beef is tender but not falling apart, about 4 ½ hours. Transfer beef to a cutting board, tent with foil and let rest for about 10 minutes.
4. Meanwhile, pour juices from slow cooker into a medium saucepan. Skim off fat. Bring to a boil over medium-high heat. Add the cornstarch mixture to the pan. Cook, whisking constantly, until gravy has thickened slightly, about 1 minute. Season with salt and pepper.
5. Remove twine from beef and carve. Serve with gravy.

Makes about 12 servings, with 4 cups gravy. Per serving: 174 calories, 6 G fat, 67 mg chol,
4 G carbs, 32 G protein, 0 G fiber, 99 mg sodium

I was skeptical about this recipe. I was sure the meat would be tough since the roast I used (I can't remember if it was bottom round or some kind of rump roast or is there even a difference?) is one without a lot of fat running through it. I usually roast it at a high temperature and serve it medium-rare. But this meat was perfect. Tender but not stringy. I've never had such a perfectly cooked piece of beef come out of the slow cooker. I cooked this the night before and when it was time to serve it, I heated and thickened the gravy on the stovetop and I sliced the beef and wrapped it in foil and heated that in the oven.

I couldn't make my mind up about the gravy. When I took it out of the slow cooker I wasn't thrilled with it (I didn't season it with salt and pepper until I reheated it). But I was congested and my taste buds weren't performing at their peak so it was hard for me to judge it. When I ate it with the beef, I felt like it should be sweeter but that's only because I'm used to sweet gravies since most of the stews I've been making have some brown sugar added to them. In the end, I decided I really did like the gravy, it was just more 'sophisticated' than I'm used to but that's a good thing. We really need to get away from the sweet stuff.

This is one of my new cookbooks, from Eating Well. I think I'm going to like it. It's a bit fancy, but not over the top.

Question of the Day: Do you own a slow cooker? How often do you use it?

Wednesday, March 22, 2006

Oven Fried Chicken - take two


Oven-Fried Chicken
Cooking Light Annual Recipes 2003 Copyright 2002

¾ cup low-fat buttermilk
2 chicken breast halves (about 1 pound), skinned
2 chicken drumsticks (about ½ pound), skinned
2 chicken thighs (about ½ pound), skinned
I used some thighs and drumsticks and I forgot to skin them
½ cup all-purpose flour
1 teaspoon salt I would use less next time
½ teaspoon ground red pepper
¼ teaspoon white pepper
¼ teaspoon ground cumin
Cooking spray

1. Combine first 4 ingredients in a large zip-top plastic bag; seal. Marinate in refrigerator 1 hour, turning occasionally.
2. Preheat oven to 450 degrees.
3. Combine flour, salt, peppers, and cumin in a large zip-top plastic bag. Remove chicken from first bag, discarding marinade. Add chicken, one piece at a time, to flour mixture, shaking bag to coat chicken. Remove chicken from bag, shaking off excess flour; lightly coat each chicken piece with cooking spray. Return chicken to flour mixture, shaking bag to coat chicken. Remove chicken from bag, shaking off excess flour.
4. Place chicken on a baking sheet lined with parchment paper. Lightly coat chicken with cooking spray. Bake at 450 degress for 35 minutes or until done, turning after 20 minutes.

Yield: 4 servings Per serving: 263 cal, 4.4 gms fat, 38.4 gms protein, 14.9 gms carbs. .8 gms fiber, 110 mg chol, 2.2 mg iron, , 754 mg sodium, 73 mg calcium

I've made Oven Fried Chicken before but this method was much better. Only I forgot to skin my chicken. It was fine with the skin on, but it would have been healthier with it off. This method definitely works with the skin on, though, if you prefer it that way.

Cumin has not been my favorite spice lately (it happened to be present in the last two of my cooking disasters) but I added it anyway since it was a small amount. Next time I might play around with the seasonings, definitely using less salt as I found the coating to be slightly too salty.

Question of the Day: Do you eat a lot of chicken? Are you worried about the bird flu?

Tuesday, March 21, 2006

Chili cheese dogs!


A&W Coney Island Chili Dog Sauce
The Ugly Binder - from somewhere on the internet

1 pound ground chuck I used ground venison
1 six ounce can tomato paste
1 cup water
1 tablespoon sugar
1 tablespoon prepared yellow mustard
1 tablespoon dried, minced onion
2 teaspoons chili powder
1 teaspoon Worcestershire sauce
1 teaspoon salt
½ teaspoon celery seed
½ teaspoon ground cumin (heaping)
¼ teaspoon ground black pepper

1. In a 2-qt saucepan, brown the ground chuck, breaking into very small pieces. Salt and pepper lightly while cooking. Do not drain fat. (I always use very lean meat so this is not an issue for me.)
2. Add the remaining ingredients. Simmer, uncovered, 30-45 minutes until it thickens. Stir occasionally.

I've made this recipe several times over the years. There are probably thousands of different hot dog chili recipes out there but once I tried this one, I stopped looking for any others. You can definitely make this ahead of time and it freezes great. I usually make it with beef but all I had on hand was ground venison, which worked great here, especially since it was more finely ground than ground beef usually is.

I wasn't planning on making hot dogs last night but this meal used up some ground venison from the freezer (and I have enough frozen for 3 more nights of chili dogs sometime in the future) and the hot dogs and hot dog buns I planned on us eating this past weekend but we never got around to having them. Everything else was a pantry item. I always keep a bag of frozen french fries on hand too. Hubby ate four chili dogs!

Question of the Day: Do you eat hot dogs? What do you like on them?

Monday, March 20, 2006

Even better than croutons


Barbecued-Pork Burritos with Chopped Salad
Food and Wine Magazine’s Quick From Scratch One-Dish Meals Cookbook Copyright 1997, 2002, 2004

2 ½ tablespoons wine vinegar
¼ teaspoon dried thyme
1 ¼ teaspoons salt
Fresh-ground black pepper
¼ cup olive oil
1 pound pork tenderloin
2 tablespoons cooking oil
1 cup bottled barbecue sauce
½ teaspoon ground cumin I added this but it wasn't necessary
6 ounces cheddar or Montery jack, shredded (about 1 ½ cups) I used cheddar
4 9-inch tortillas
½ head romaine lettuce, chopped (about 2 cups)
3 tomatoes, diced
2 green bell peppers, diced
1 cucumber, peeled, halved lengthwise, seeded and diced

1. In a medium bowl, whisk 1 ½ tablespoons of the vinegar, the thyme, ¾ teaspoon of the salt and 1/8 teaspoon pepper. Add the olive oil slowly, whisking.
2. Heat the oven to 350 degrees. Cut the pork into ¼-inch slices and then cut the slices into ¼-inch strips. In a large frying pan, heat 1 tablespoon of the cooking oil over high heat. Add half the pork, sprinkle with ¼ teaspoon of the salt, and sauté until cooked through and just beginning to brown, 3 to 4 minutes. Remove. Heat the remaining 1 tablespoon cooking oil and cook the rest of the pork, seasoning it with the remaining ¼ teaspoon salt.
3. Return all the pork to the pan. Stir in the barbecue sauce, cumin, the remaining 1 tablespoon vinegar, and tow thirds (about 1 cup) of the cheese. Spread some of the pork mixture in a line just below the center of each tortilla. Roll up the burritos and put them seam-side down in a small baking dish. Bake for 10 minutes, sprinkle with the remaining cheese, and bake until the cheese melts and the filling is hot, about 2 minutes longer.
4. Meanwhile, put the lettuce, tomatoes, bell peppers and cucumber into the bowl and toss. Put the salad on plates and top with burritos.

I'm not a huge fan of salads. I like them when I'm in the mood but that mood seems to come around less often than it used to. When I do have a salad, I like 'stuff' on it - croutons, cheese, olives, some sort of meat. This salad is topped with Barbecued-Pork Burritos. Genius! These should be on every salad bar.

I know this cookbook is supposed to be on hiatus but I had to bring it back into action for this one recipe. A few weeks ago I bought a package of marinated pork tenderloin on sale and tossed it right into the freezer, not realizing there were two tenderloins in the package. So I had to thaw and cook them both at the same time. I froze one of them, cooked, and I thought this recipe would be perfect for it and it was. I just heated the strips of cooked tenderloin in a small amount of oil before proceeding.

I wasn't sure if this was nutrient-packed enough for Sweetnick's ARF/5-A-Day Tuesday but I believe it is. Romaine lettuce is actually not too bad for a lettuce, especially when you compare the nutrients to the calories (only 15 calories in 2 cups!). It's high in Vitamin A, Vitamin C, and folate amount other things. It's not too shabby of a source of fiber either. So along with the bell peppers, tomatoes and cucumbers, the salad part of this meal at least can be offered to Sweetnick's without shame.

Hubby ate 3 out of 4 of these so I guess he liked them. My son enjoyed the salad and few bites of my burrito.

Question of the Day: When did you last eat a salad and what was in it?

Sunday, March 19, 2006

Muffin Monday


Blueberry-Corn Muffins
Good Housekeeping Baking Copyright 1999

1 cup all-purpose flour
1 cup cornmeal
½ cup sugar
2 teaspoons baking powder
1 teaspoon baking soda
½ teaspoon salt
1 cup buttermilk
¼ cup vegetable oil
2 teaspoons vanilla extract
1 large egg
1 ½ cups blueberries or fresh raspberries I used frozen blueberries

1. Preheat oven to 400 degrees. Grease twelve 2 ½” by 1 ¼” muffin-pan cups or line with baking liners. In large bowl, stir together flour, cornmeal, baking powder, baking soda and salt.
2. In small bowl, with wire whisk or fork, beat buttermilk, oil, vanilla and egg until blended. Stir egg mixture into flour mixture just until flour is moistened (batter will be lumpy). Fold in berries.
3. Spoon batter into prepared muffin-pan cups. Bake 20 to 25 minutes, until toothpick inserted in center of muffin comes out clean. Immediately remove muffins from pan; serve warm. Or cool on wire rack to serve later.

Make 1 dozen muffins. Per muffin: 190cal, 3 g protein, 29 g carbs, 7 g fat, 1 g fiber, 19 mg chol, 310 mg sodium

A couple of weeks ago I found a bag of frozen blueberries squished way to the back of the freezer. While searching out a muffin recipe for these, I noticed that there were quite a few recipes with this blueberry-corn combination. The combination didn't seem odd to me, but it was odd that I had never noticed this pairing before now. It works really well. I'm a big fan of sweet cornbread or corn muffins and the blueberries only added to my enjoyment here. My son wouldn't even taste one and he normally loves my muffins so I may be making another type of muffin this week, just for him. He likes a muffin with some cinnamon in it. He's asking for more animal muffins and I knew this recipe wouldn't work in that pan.

This is the same cookbook as the Lemon Ricotta Muffins I made a while back. If you missed those, check them out now - they're fabulous!

Question of the Day: When did you last eat a muffin and what kind of muffin was it?

Thursday, March 16, 2006

Sometimes simple is best ... sometimes it isn't


Pan-Seared Salmon
Weight Watchers Five Ingredient 15 Minute Cookbook Copyright 2005

4 (6-ounce) salmon fillets
½ teaspoon kosher salt
1/8 teaspoon pepper
1 ½ teaspoons olive oil
1 teaspoon light butter

Sprinkle fish with salt and pepper. Add oil and butter to a large nonstick skillet, and place over medium-high heat until hot. Add fish; cook 6 minutes, turning and browning evenly on all sides. Reduce heat to medium and cook 2 to 3 minutes or just until fish flakes easily when tested with a fork.

Makes 4 servings. Per serving: 7 points, 292 cal, 15.3 gms fat, 36.3 gms protein, 0 gms carbs, 0 gms fiber, 88 mg chol, .6 mg iron, 321 mg sodium, 21 mg calcium

I had this salmon defrosted so I had to make it last night although I wasn't really in the mood to cook. Hubby was having deer steak so I only needed to make one serving of salmon, as usual, but I wasn't in the mood to do the complicated math required to reduce most of the salmon recipes I have. I should have made the Maple-Glazed Salmon or the Seared Salmon With Balsamic Glaze but I was looking for the simplest recipe possible and I found it in the Weight Watchers Cookbook. This can hardly be called a recipe but it was in there.

I managed to destroy the beautiful fillet by trying to flip it with tongs. This wasn't bad and the salmon is good enough to stand on it's own but I prefer a bit of glaze on my salmon. I also prefer to broil it because there's less stink that way. The house reeked of fish last night.

Maybe next week I'll get my groove back. I'm still trying to clean out my pantry and freezer but I managed to select some good recipes, I hope.

Question of the Day: Do you get burned out on cooking and need to recharge every now and then?

Wednesday, March 15, 2006

A no-brainer


Spaghetti With Butter And Parmesan
365 Ways To Cook Pasta Copyright 1988

12 ounces spaghetti, spaghettini, vermicelli, or capellini
¼ pound butter I'm not Paula Deen - I used a little bit less butter than this
½ cup grated Parmesan cheese
2 tablespoons finely chopped parsley (optional)

1. Cook spaghetti in plenty of boiling salted water until al dente, or firm to the bite, about 7 to 10 minutes; drain.
2. Melt butter in a small skillet. I just melted it in the pot I cooked the pasta in - DUH!
3. Toss spaghetti with melted butter, cheese, and parsley, if using. Serve hot.

I just haven't been excited about cooking this week, mainly because I've been very tired. I didn't have anything planned for last night. Not a thing! So I took some of the chicken strips I buy for my son and turned those into Chicken Parmesan, using a small container of leftover jarred pasta sauce I had in the freezer and a chunk of mozzarella that was leftover from making pizza last week. Add a box of spaghetti (Barilla, not Dreamfields this time) and butter, Parmesan cheese and parsley and we had a meal.

It wasn't bad at all. Those chicken strips are processed chicken but they're not too bad, for a processed chicken strip. I wouldn't want to eat them all of the time but every once and a while I'm desperate enough to make a meal out of them for all of us. My son gets them for lunch once a week. I want to make him my own but it's a time-consuming process (I do the flour/egg/breadcrumb method, then pan-fry and finish them off in the oven) and I never get around to it.

I'm sure I could have found a more exciting recipe for my spaghetti in this cookbook but I was in a rush and made the first one I saw that I had all the ingredients for. I have to take a closer look at this book though. I've had it forever but it gets lost in the crowd on my bookshelf.

Question of the Day: How far ahead do you plan your meals?

Tuesday, March 14, 2006

More enchiladas


Family-Friendly Chicken Enchiladas
101 Things To Do With a Casserole Copyright 2005

3 cups cooked and shredded chicken
2 cans (10.75 ounces each) cream of chicken soup*
1 cup sour cream
1 can (4 ounces) diced green chiles, drained
¼ cup dried minced onion
2 ½ cups grated cheddar cheese, divided
10 medium flour tortillas I used corn tortillas
1/3 cup milk*

Preheat oven to 350 degrees. Combine chicken, 1 can soup, sour cream, chiles, onion and 1 ½ cups cheese. Fill tortillas with 1/3 to ½ cup chicken mixture. Roll filled tortillas and place seam side down in a greased 9x13-inch pan. combine remaining soup with milk and spread over tortilla rolls. Sprinkle remaining cheese over top. Cover and bake 25 minutes. Uncover and bake 5-10 minutes more, or until heated through.

Makes 6-8 servings.

*Variation: 1 can (10 ounces) enchilada sauce can be used to top enchiladas in place of soup-and-milk mixture. I used the enchilada sauce instead of the second can of soup and milk.

I had a can of cream of chicken soup, a container of sour cream, chicken and corn tortillas already on hand when I decided to make this. I only needed to pick up the enchilada sauce, chiles and cheese. I'm not sure if the soup adds anything to this - the Chicken Enchiladas I made without it were just as good. The dried minced onion was slightly overpowering, reminding me of onion soup mix but it didn't ruin the dish for me. I think less onion and some added spices would have perked up the filling. I used basic mild cheddar here and I wish I had used a colby/jack blend.

I served this with rice I freestyled - I sautéed (in Promise margarine - something else I'm trying to use up) some green onion and some of the marked down jalepeños that I had frozen, added some cooked white rice and a bit of taco sauce for flavor.

Everyone is this family liked these but I'm not sure why these are any more 'family-friendly' than any other enchiladas. The soup? I don't know. I don't name these recipes, I just make them.

Question of the Day: Do you shop at a warehouse store? If you do, do you do it to save money or just because it's fun?

A pot pie for ARF/5-A-Day Tuesday


Bayou-Style Pot Pie
Favorite Brand Name Slow Cooker Casseroles and More Copyright 2002

1 tablespoon olive oil
1 large onion, chopped
1 green bell pepper, chopped
1 ½ teaspoons minced garlic
8 ounces boneless, skinless chicken thighs, cut into 1-inch pieces
1 can (14 ½ ounces) stewed tomatoes, undrained
8 ounces fully cooked smoked sausage or kielbasa, thinly sliced
¾ teaspoon hot pepper sauce or to taste
2 ¼ cups buttermilk baking mix
¾ teaspoon dried thyme leaves
1/8 teaspoon black pepper
2/3 cup milk

1. Preheat oven to 450 degrees F. Heat oil in medium ovenproof skillet over medium-high until hot. Add onion, bell pepper and garlic. Cook 3 minutes, stirring occasionally.
2. Add chicken and cook 1 minute. Add tomatoes with juice, sausage and hot pepper sauce. Cook, uncovered, over medium-low heat 5 minutes.
3. While chicken is cooking, combine baking mix, thyme and black pepper. Stir in milk. Drop batter by heaping tablespoonfuls in mounds over chicken mixture. Bake 14 minutes or until biscuits are golden brown and cooked through and chicken mixture is bubbly.

Makes 4 servings.

This is another recipe I made as a result of cleaning out the freezer. I had one small package of boneless chicken thighs I needed to get rid of and there wasn't enough meat in there for it to go it alone. I knew I wasn't going to buy more of them either. Although I loved the Bourbon Chicken I made with boneless chicken thighs, they're just too much trouble to work with, since they have so much 'yuck-yuck' running through them.

This recipe was okay. My son loved picking out the green peppers and eating them. My husband ate plenty of it but seemed suspicious of it. I thought it was okay, a little lacking in flavor and not quite what I was in the mood for, but it was satisfying enough. The peppers were bought marked down, both meats were already in my freezer, and the Bisquick was on sale for a buck so it was a frugal meal. It also had enough veggies in it to include it in Sweetnick's ARF/5-A-Day Tuesday.

Question of the Day: Are you cooking anything special for St. Patty's Day?

Sunday, March 12, 2006

What the hell are these things???


Banana Muffins

The Ultimate Muffin Book Copyright 2004

Nonstick spray or paper muffin cups
2 cups all-purpose flour
2 teaspoons baking soda
½ teaspoon salt
½ teaspoon ground cinnamon
8 tablespoons (1 stick) unsalted butter, at room temperature
1 cup sugar
2 large eggs, at room temperature
3 large, ripe bananas
2 tablespoons milk or half-and-half
1 teaspoon vanilla extract
½ teaspoon vinegar

1. Position the rack in the center of the oven and preheat the oven to 400 degrees F. To prepare the muffin tins, spray the indentations and rims around them with nonstick cooking spray, or line the indentations with paper muffin cups. If using silicon muffin tins, spray as directed, then place them on a baking sheet.
2. Whisk the flour, baking soda, salt, and cinnamon in a medium bowl until uniform. Set aside.
3. In a large bowl, cream the butter and sugar with a wooden spoon until smooth, about 2 minutes. Add the eggs, one at a time, mixing each until well incorporated.
4. Peel the bananas and mash them into the butter mixture using a potato masher. If the bananas are not soft, squeeze them through a potato ricer. Stir in the milk or half-and-half, the vanilla, and vinegar until mixture is smooth and creamy. Add the prepared flour mixture; stir until moistened.
5. Fill the prepared tins three-quarters full. Use additional greased tins or small oven-safe greased ramekins for any leftover batter, or reserve the batter for a second baking. Bake for 18 minutes, or until pale brown with rounded nubbly tops. A toothpick inserted in the center of one muffin should come out with a few moist crumbs attached.
6. Set the pan on a wire rack to cook for 10 minutes. Gently rock each muffin back and forth to release it. Remove the muffins from the pan and cool them for 5 minutes more on the rack before serving. If storing or freezing the muffins, cool them completely before sealing in an airtight container or freezer-safe plastic bags. The muffins will stay fresh up to 24 hours at room temperature or up to one month in the freezer.

You're probably looking at this picture trying to figure out what you're looking at. Well, you're looking at banana muffins that were cooked at too high of a temperature in my new farm cookie pan. It was an experimental run and it's hard to make out the figures but the muffins themselves were quite good, even if the outsides were a little too dark. They were very moist and banana-y. And if you tell my two-year old that he's eating a cow, he'll believe you no matter what it looks like and he'll proudly state after every bite that he's eating a cow.

I've been coveting this pan for a while but I always talked myself out of buying it. Last week my son was diagnosed with a peanut allergy which means I'll be making most of the treats he consumes. I do make most of what he eats but now it seems more important to make his treats more fun so that he doesn't feel deprived. So I bought this pan and the cakesicle pan.

A food allergy is a hard thing for me to handle. I've never seen food as the enemy and it pains me that I'll need to teach my son that it can be, in certain circumstances. I have an older nephew with a peanut allergy but it doesn't seem to affect him very much since food has always been the enemy in their house. My sister-in-law's thighs are about the size of my upper arms.

But that's the thing about parenthood - things rarely go smoothly and I'm very grateful he doesn't have any other serious food allergies (just very minor egg white and milk) and that I'm fighting an external enemy, not cancer or something awful like that.

This muffin book is from my library. It bugs me that a cookbook calls itself the 'ultimate' and there aren't any pictures in it. It were the 'ultimate', there would be pictures and fresh baked samples of each muffin included. There are a lot of muffin recipes in this book (but most of the 600+ recipes it boasts of are variations of the more basic recipes printed in the book).

Question of the Day: Do you deal with any food allergies?

Thursday, March 09, 2006

Worth the stink


Maple-Glazed Salmon
Weight Watchers Five Ingredient 15 Minute Cookbook Copyright 2005

1 tablespoon maple syrup
1 tablespoon hoisin sauce
1 teaspoon Dijon mustard
¼ teaspoon coarsely ground black pepper
2 (6-ounce) salmon fillets (about 1-inch thick)
Cooking spray

1. Preheat broiler
2. Combine first 4 ingredients in a small bowl; stir with a whisk.
3. Place fish, skin side down, on a broiler pan coated with cooking spray. Brush with maple syrup mixture. Broil 10 to 12 minutes or until fish flakes easily when tested with a fork, brushing with maple syrup mixture every 5 minutes.

Makes 2 servings. Per serving: 7 points, 320 calories, 13.6 gms fat, 36.6 gms protein, 10.7 gms carbs, .3 gms fiber, 87 mg cholesterol, 273 mg sodium, 34 mg calcium

This salmon was absolutely delicious but it came with the fish stink I can't stand. My husband had requested deer steak so the house had a lovely aroma last night. Fortunately, it was a warm (for this time of the year) evening and I was able to keep the doors open and air the place out for a while.

I buy the individually frozen skinless salmon fillets from Costco and they're defintely the best way to buy salmon, as far as I'm concerned. You can pull them out of the freezer in the morning and they're thawed out by dinner time.

It's been awfully quiet around here. I have to admit I'm starting to bore myself a bit but in the past few months I've learned that there are highs and lows in blogging. Right now, I'm just trying to find recipes that fit the ingredients I have on hand, which is somewhat limiting. It is paying off, though. Last night I spent less on groceries than I have in months.

Question of the Day: When do you shop for your groceries?

Another version of cheeseburger macaroni


Cheeseburger Macaroni
Favorite Brand Name 100 Best Hamburger Recipes Copyright 2003

1 cup mostaccioli or elbow macaroni, uncooked I used Dreamfields penne and I used more than 1 cup
1 pound ground beef
1 medium onion, chopped
1 can (14 ½ ounces) diced tomatoes with basil, garlic and oregano
¼ cup tomato ketchup
1 cup (4 ounces) shredded cheddar cheese I used my leftover odds and ends - a cheddar and mozzarella blend and I think the other one was just cheddar

1. Cook pasta according to package directions; drain.
2. Brown meat with onion in large skillet; drain. Season with salt and pepper, if desired. Stir in undrained tomatoes, ketchup and pasta heat through.
3. Top with cheese. Garnish if desired.

Makes 4 servings.

I've made Cheeseburger Macaroni previously but this version, although very similar, packs a lot more flavor since it uses flavored tomatoes and some ketchup. The cheese isn't stirred into this one but you could stir it in if you wanted to. I like cooking the pasta separately. I cooked more than one cup of pasta (probably closer to two) and there was easily enough sauce to handle the extra pasta. I would make this again.

This recipe is actually something we had last week. Last night we had hot dogs and smiles. I'm really trying to cut back on our grocery bill and use up what we have on hand. I planned next week's menu last night and I'm making progress on emptying out the freezer. It's kind of fun trying to use up what I already have but we'll see if that makes for interesting food blogging or not.

I'm a big fan of all the Favorite Brand Name cookbooks. Unfortunately there's a lot of overlap of recipes but that's pretty common in the cookbook industry, I've found. A publisher will rework the same recipes into several different cookbooks.

Question of the Day: Do you make it a point to clear out your pantry/freezer/fridge every so often?

Monday, March 06, 2006

Something good was hiding in the freezer


Milwaukee Pork Stew
Favorite Brand Name Slow Cooker Casseroles and More Copyright 2002

2 pounds boneless pork shoulder or sirloin, cut into ½-inch cubes
1/3 cup all-purpose flour
1 ½ teaspoons salt
¼ teaspoon black pepper
2 tablespoons vegetable oil
4 large onions, sliced ½-inch thick
1 clove garlic, minced
1 can (14 ½ ounces) chicken broth
1 can (12 ounces) beer
¼ cup chopped fresh parsley
2 tablespoons red wine vinegar
1 tablespoon packed brown sugar
1 teaspoon caraway seeds
1 bay leaf

Coat pork with combined flour, salt and pepper. Heat oil in Dutch oven; brown meat over medium-high heat. Add onions and garlic. Cook and stir 5 minutes. Pour off drippings. Stir in remaining ingredients. Bring to a boil. Cover; cook over medium-low heat 1 to 1 ¼ hours or until meat is very tender. Stir occasionally.

Makes 8 servings.

I'm really making an effort to be more frugal since my grocery bills are getting out of hand. I haven't been to Costco in ages because I'm spending too much in the regular grocery stores. I miss Costco! So I'm trying to cut back a bit, which is difficult because I don't feel as if I'm buying excessively. So this week I pulled out this stew (and I have enough for another meal) even though I wasn't feeling excited about it but I was pleasantly surprised how much we enjoyed it.

I made this a couple of weeks ago but I ended up freezing it after we had a crazy day and we ended up eating McD's that night. Freezing didn't seem to hurt this at all. While I didn't like it as much as the similar beef stew I made recently, it was still pretty good. I love the taste of caraway seeds. My two year old really enjoyed this too which shocked me because he hasn't show much interest in beef or pork that isn't filled with nitrates. (Why or why do they love the bad stuff?)

I had to put this cookbook aside at one point because I love it and I didn't want to rely on it too heavily (same with the Food and Wine books which are on vacation right now). I'm enjoying getting reacquainted with it. I also made Ham and Egg Enchiladas again this week (a brunch recipe I like to serve for dinner).

I used the red peppers that I bought marked down and then froze. They worked well in this recipe. They let out a lot of moisture but I just cooked that all out and then added the green onions and ham. This is one of our favorites.

Question of the Day: Do you feel that fast food is a treat or a cop-out?

A different slaw for ARF/5-A-Day Tuesday


Broccoli Slaw
The Ugly Binder,
from Taste of Home’s Light and Tasty Magazine 2004


4 cups broccoli coleslaw mix
1 can (11 ounces) Mexicorn, drained
½ cup salsa
2 tablespoons reduced-fat mayonnaise
2 teaspoons sugar
½ teaspoon salt
1/8 teaspoon coarsely ground pepper
3 tablespoons cider vinegar

In a bowl, combine the coleslaw mix, corn and salsa. In a small bowl, combine the mayonnaise, sugar, salt and pepper. Gradually mix in vinegar. Pour over coleslaw mixture; toss to coat evenly. Cover and refrigerate at least 2 hours.

Yield 6 servings. Per serving: 92 calories, 2 gms fat, 2 mg cholesterol,
621 mg sodium, 17 gms carbs, 4 gms fiber, 4 gms protein


I had a copy of Taste of Home's Light and Tasty magazine stuck in my ugly binder. I actually like Taste of Home, which is not fashionable to admit among certain crowds but there, I said it. I like that the recipes are from 'real' people and there are lots of pretty pictures for me to drool over.

This slaw caught my eye because it was a bit different. They usually isn't anything particularly unusual in Taste of Home. I knew I was going to have salsa leftover from another recipe this week so I decided to try this. I'm always on the lookout for sides to serve with Mexican food. I thought it was a good sign that the broccoli coleslaw mix was marked down to 49 cents. Woo hoo!

I almost didn't get to make this in time for Sweetnick's ARF/5-A-Day Tuesday since I had a bit of a stomach bug at the end of the week and over the weekend and the last thing I needed was roughage but I'm feeling better now.

I really liked this. The corn is sweet and crunchy, the salsa adds flavor but isn't overpowering. There isn't much added sugar or fat. I have to admit, we're big fans of slaws - especially the ramen noodle version but this recipe is much lighter. A great recipe for ARF/5-A-Day Tuesday, it has broccoli, red cabbage, carrots, corn, and tomatoes - also apple cider vinegar which some believe is a miracle food product. I'll definitely make this again.

Question of the Day: What do you usually serve with Mexican food (or Tex-Mex - quesadillas, enchiladas, etc)?

Sunday, March 05, 2006

A pretty pink mousse


Cream Cheese Strawberry Mousse
Weight Watchers Five Ingredient 15 Minute
Cookbook Copyright 2006

1 ½ cups fresh strawberries
1 (8-ounce) tub light cream cheese
½ cup powdered sugar
1 ¾ cups frozen fat-free whipped topping, thawed

1. Process first 3 ingredients in a food processor until smooth.
Transfer strawberry mixture to a large bowl; fold in whipped
topping.
2. Spoon into 6 (6-ounce) dessert dishes. Cover and chill at
least 4 hours.

Yield 6 servings. Per serving 4 points, 170 calories, 6 gms fat,
3.8 gms protein, 22.5 gms carbs, .8 gms fiber, 18 mg cholesterol,
189 mg sodium, 54 mg calcium


The stomach bug hit our house and even though I wasn't hit very hard (knock on wood), my appetite hasn't been that strong the past few days. I had planned on making this mousse for a while so I really needed to get it made while the strawberries were still fresh. I didn't think this was bad but I probably would
have enjoyed it more had I been feeling 100 percent. The mousse was a bit soft
even after chilling it for quite a while - I might have used too many
strawberries. I would have like this more with real cream cheese and real
whipped cream but who wouldn't? More in keeping with it's intentions, I think a sprinkle of graham
cracker crumbs might have perked this up too.

Question of the Day: Have you been enjoying more fresh fruit than usual
this winter?

Wednesday, March 01, 2006

A slightly different way to prepare chicken breasts


Brenda Theune’s Cheesy Chicken
500 More Low-Carb Recipes Copyright 2004

2 boneless, skinless frozen chicken breasts I used 5 smaller breasts and they were thawed
4 ounces cream cheese, softened
2 tablespoons butter, softened
2 tablespoons cream I omitted this
1 tablespoon minced onion
¼ teaspoon pepper
¼ teaspoon seasoned salt I used regular salt and I added too much
½ cup shredded cheese I used 2% colby/jack

Preheat oven to 375 degrees F. Place the chicken breasts on a 9”x9” baking pan spray with nonstick cooking spray. Mix together the cream cheese, butter, cream, onion, and spices. Spread the mixture evenly over the breasts. Put the cheese on top of the sauce. (Oops! I blended the shredded cheese into the cream cheese but I recommend doing it that way since I think the cheese would burn otherwise.) Bake for about 45 minutes or until done.

This would have been really good had I not oversalted the cheese mixture. There's a similar recipes in one of my Food and Wine Quick From Scratch books that only uses cream cheese mixed with veggies that I've been meaning to try but I was worried it might be too bland. I think the shredded cheese added a lot the flavor here. You could really play around with this - adding more veggies for color and flavor and varying the type of cheese you use. You can even use flavored cream cheese. Overall, a good concept. A little bit of the cheese mixture slid off the chicken but enough of it stayed on.

I picked up both 500 Low-Carb Recipes and 500 More Low-Carb Recipes after sampling the first book from the library. This second book actually includes calories in the nutritional information, and it can be a bit scary. This particular recipe was quite scary although I don't know what size chicken breast they assume in their calculations. I used small ones and spread the cheese mixture over 5 breasts instead of 2 breasts (that would be ridiculous no matter how big they were), and I omitted the cream and used 2% cheese. Some of the cheese mixture slid off too so hopefully I can in under the 600+ calories that they book listed (I told you it was scary!) I will say, I served this only with a simple side salad and I never even thought about eating the rest of the evening (unusual for me).

Question of the Day: Would you like to see nutritional information with every recipe in every cookbook?