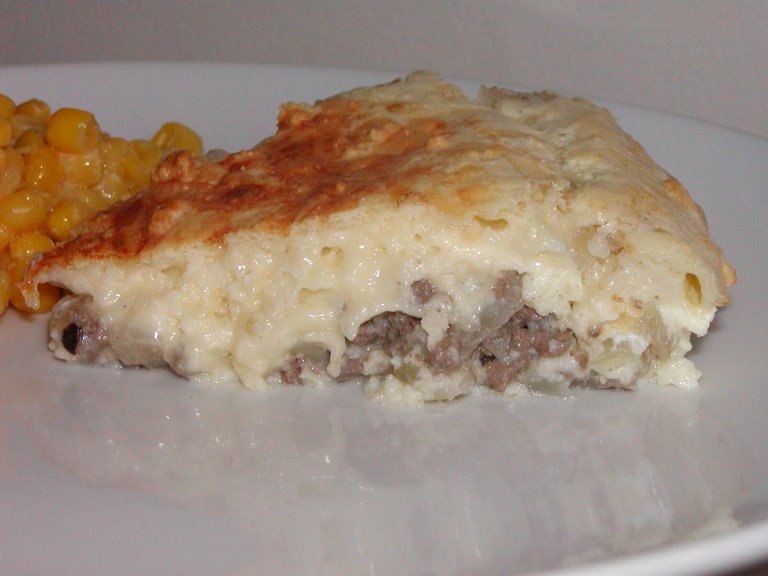
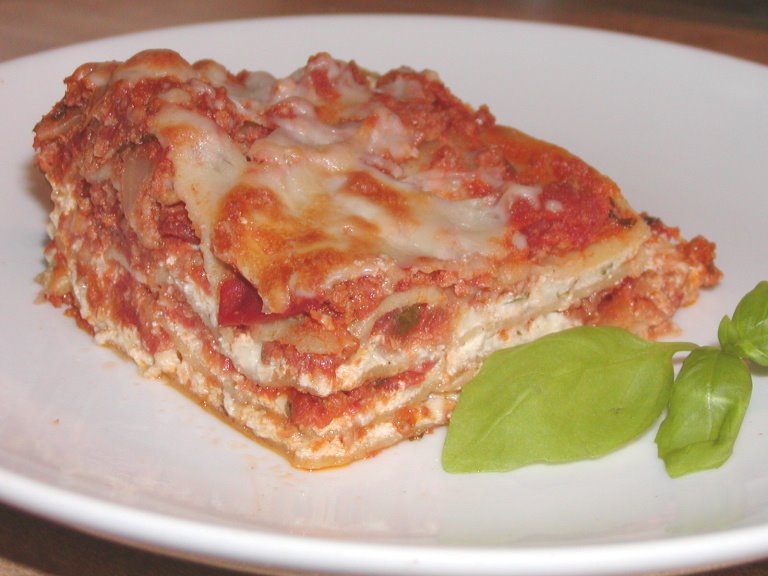
Tuesday, October 31, 2006

This was supposed to be something else


Balsamic Vinaigrette
The America’s Test Kitchen’s Family Cookbook Copyright 2006

¾ cup extra-virgin olive oil
3 tablespoons balsamic vinegar
2 teaspoons minced shallot or red onion I used shallots
2 teaspoons Dijon mustard (optional)
½ teaspoons fresh oregano or ½ teaspoon dried oregano I added 1 1/2 teaspoons of dried (oops!)
½ garlic clove, minced
½ teaspoon salt
¼ teaspoon pepper

Shake all ingredients together in a jar with a tight-fitting lid. The dressing can be refrigerated for up tp 7 days; bring to room temperature, then shake vigorously to recombine before using.
___________________________________

I've really been enjoying a basic free-styled balsamic-canola oil- salt-pepper-honey dressing on our salads lately but I had shallots I needed to use for something. I bought them after seeing them at a decent price, and thinking they were an option in a recipe I had planned but they weren't.

I messed up and added too much oregano but since I had made the dressing ahead of time, the taste wasn't too strong by the time we ate it.

I had a couple of other posts lined up but I lost my head and completely forgot to load them into blogger last night. I hope I get a chance tonight because this morning I discovered that my dishwasher is not working and I have a ton of dishes to wash tonight. That dishwasher is only a couple of years old and I'm very PO'd right now. The old dishwasher was 20 years old and worked fine up until the end when it sprung a leak. I would have just had it repaired had I known how much better it was than a new dishwasher. This is what I don't understand - the old dishwasher never needed 'additives' (like Jet Dry) but the newer, supposedly advanced dishwasher, needs this stuff all of the time. Is this progress? I probably spend $50 a year on additives.

A Blast From The Past: Honey French Dressing from April 2006 - another simple dressing that we loved.

Question of the Day: How old is your oldest major appliance?

Monday, October 30, 2006

More waffles


Banana Waffles
Better Homes and Gardens New Dieter’s Cookbook Copyright 2003

nonstick cooking spray
1 ¾ cups all-purpose flour I used 1 cup AP flour and 3/4 cup ww flour
1 tablespoon sugar
1 tablespoon baking powder
¼ teaspoon salt
¼ teaspoon ground cinnamon
1 ½ cups fat-free milk
2/3 cup mashed ripe bananas (2 medium)
1 slightly beaten egg
2 tablespoons cooking oil

1. Lightly coat the grids of a waffle baked with nonstick cooking spray. Preheat waffle baker according to manufacturer’s directions. Meanwhile, in a large bowl stir together the flour, sugar, baking powder, salt and cinnamon; set aside. In a medium bowl stir together the milk, mashed bananas, egg, and oil. Add to flour mixture and stir until combined (batter should be slightly lumpy).
2. Pour about 1 cup of the batter onto grids of the prepared waffle baker. Bake and serve.

Makes 6 servings.
______________________________

First of all, excuse the blurry picture but it's hard to take an enticing picture of a waffle anyway. Second of all, why did I wait so long to get a waffle iron? Turns out that my husband really likes waffles. I haven't had any waffles go to waste so far.

Not having a waffle iron for so long, I've been passing right by waffle recipes. I'm having a hard time finding them in my cookbook collection, especially 'healthy' ones. I modified this one a bit and substituted some whole wheat flour for some of the all-purpose and it worked out really well. I'm still having trouble adding the right amount of batter to the iron as you can see (these should be square).

Don't forget, only 2 more days to sign up for the October cookbook giveaway.

A Blast From The Past: Banana Cake VI from July 2006 - a fantastic banana cake recipe.

Question of the Day: Are there any small appliances you don't have that you wish you did?

Friday, October 27, 2006

Don't look at the picture


Classic Beef Stew
Delicious and Dependable Slow Cooker Recipes Copyright 2002

1 tbsp vegetable oil
2 lbs stewing beef, cut into 1-inch cubes and patted dry
2 large onions, finely chopped
4 stalks celery, peeled and diced
2 large carrots, peeled and diced
2 cloves garlic, minced
1 tsp dried thyme leaves
1 tsp salt
½ tsp cracked black peppercorns
¼ cup all-purpose flour
1 can (10 oz) condensed beef broth, undiluted
½ cup dry red wine or water I used red wine
2 bay leaves
finely chopped fresh parsley I omitted this

1. In a nonstick skillet, heat oil over medium-high heat. Add beef, in batches, and brown on all sides. Using a slotted spoon, transfer to slow cooker stoneware.
2. Reduce heat to medium. Add onion, celery and carrots and cook, stirring, until vegetables are softened. Add garlic, thyme, salt and peppercorns and cook, stirring, for 1 minute. Add flour and cook, stirring, for 1 minute. Add beef broth and wine and cook, stirring, until thickened. Add bay leaves.
3. Transfer mixture to slow cooker stoneware and stir thoroughly to combine ingredients. Cover and cook on LOW for 8 to 10 hours or on HIGH for 4 to 5 hours, until beef is very tender. Discard bay leaves. Just before serving, garnish liberally with parsley
____________________________

This stew was actually very good, albeit a bit too salty, so please forgive the horrible picture. There are some things that just don't photograph well (at least in the hands of an amateur like me). Quite frankly, I'll only fuss with a picture so much before giving up because I'm more interested in eating my dinner than getting a great picture.

This had good flavor but, as I mentioned, it was too salty, probably because I used cooking wine and forgot to leave out the salt, although the condensed broth might be what put this over the top. But I'll take too salty over flavorless, which is how a lot of beef stew I've had has been. I like a more robustly flavored stew.

This is a great slow cooker cookbook. You know how you can tell a good crockpot cookbook? There are no recipes using boneless chicken breasts. Boneless poultry should not be slow cooked.

I didn't get to go grocery shopping last night. I hate when my schedule gets thrown off.

A Blast From The Past: Classic Yellow Cake and Creamy Frosting from October 2005. I brought these to my son's Halloween party last year. This year (today) I brought the crackers! I just didn't have time for anything else this year and homemade treats are officially not allowed, although they unofficially don't have a problem with it for these parties which I always attend. Personally, from the allergy aspect, it doesn't matter to me since my son can't eat most of either safely. As long as the homemade treats aren't served to my son without my consent, I'm fine with the treats being allowed since they do enforce the no peanuts or nuts rule so contact reactions would be unlikely. At least I know he can eat the stuff I make when I actually get around to making something for these parties and I do send in a homemade cupcake for him when they have bakery cupcakes to celebrate birthdays.

Question of the Day: Did/will you make any Halloween treats this year?

Wednesday, October 25, 2006

This isn't beef stew


Creamy Coleslaw
Betty Crocker Cookbook New Edition Copyright 2005

½ cup mayonnaise or salad dressing
¼ cup sour cream
1 tablespoon sugar
2 teaspoons lemon juice
2 teaspoons Dijon mustard
½ teaspoon celery seed
¼ teaspoon salt
¼ teaspoon pepper
½ medium head cabbage, thinly sliced or chopped (4 cups)
1 small carrot, shredded (1/2 cup)
1 small onion, chopped (1/4 cup) I used red onion

1. In large glass or plastic bowl, mix all ingredients except cabbage, carrot and onion. Add remaining ingredients; toss until evenly coated.
2. Cover and refrigerate at least 1 hour to blend flavors. Store covered in refrigerator.

Makes 8 servings.
__________________________

Today's post was supposed to be about last night's beef stew but Blogger wasn't cooperating with the picture load so have some cole slaw instead.

This was actually a good slaw. I loved the Dijon mustard in this. It gave it a bit of heat. This was definitely one of the better cole slaws I've made.

This is going to be short today. I had a crazy morning and my head is pounding. A simple flu shot turned into a big to-do since my son tested slightly positive for an egg allergy since his last flu shot (he did have the flu shot today, he didn't have a reaction).

A Blast From the Past: Cabbage Slaw from July 2006. Another great slaw with a different texture.

Question of the Day: What do you do or take for a headache?

Damn these were good


Chicken Enchiladas
Living The G.I. Diet Copyright 2004

2 tablespoons canola oil
2 teaspoons chili powder
1 teaspoon ground cumin
1 teaspoon dried oregano
¼ teaspoon salt
¼ teaspoon pepper
4 boneless, skinless chicken breasts, cut into bite-size pieces
2 onions, sliced
1 red bell pepper, stemmed seeded and thinly sliced I used 1/2 red, 1/2 orange
1 green bell pepper, stemmed seeded and thinly sliced
1 jalapeño pepper, stemmed seeded and minced
1 cup diced tomatoes I used canned organic diced tomatoes
½ cup shredded light-style Cheddar or Monterey Jack cheese I used Cabot's Light Pepperjack
8 large whole-wheat tortillas I used multi-grain

Toppings:
½ cup shredded light-style Cheddar or Monterey Jack cheese I used Cabot's Light Pepperjack
½ cup light sour cream

1. Combine 1 tablespoon of the oil, the chili powder, cumin, oregano, salt and black pepper in a medium-size bowl. Add the chicken and toss to coat it with the mixture. Heat the remaining oil in a large nonstick skillet over medium-high heat. Add the chicken and cook until no longer pink inside, about 10 minutes. Remove to a plate.
2. Preheat the oven to 400 degrees F.
3. In the same skillet over medium heat, cook the onions, bell peppers, and jalapeño pepper until tender, about 10 minutes. Set aside.
4. Add the chicken, tomatoes and cheese to the pepper mixture and stir to combine. Divide the filling among the tortillas and roll each of them up. Place them in a shallow 9x13-inch greased baking dish. At this point I refrigerated them overnight. Cover with aluminum foil and bake until the filling is hot, about 15 minutes. Remove the foil and bake for another 5 minutes, or until the tortillas are crisp.
5. Sprinkle with cheese and dollop with sour cream before serving.
__________________________

This recipe is basically the same as my freestyle quesadillas. So why did these blow me away? I have no idea. Maybe because all the effort was expended the previous evening. When I make quesadillas, I make the filling the night before but I put the quesadillas together the night we eat them. I'm always in a rush since I can only make about 2 at a time on the GF grill. I only needed to pop these in the oven after work. The tortillas got nice and crispy and they had a sweetness to them (I used Mission whole grain tortillas). The flavors in the filling had melded together nicely overnight. I was really in heaven, and I have leftovers for lunch today. Yay!

This is from a GI diet cookbook. I don't follow any certain diet but I am aiming to add more good carbs and less fat so I find that the cookbooks from a lot of the popular diets are very helpful to have around. The particular low-carb books I own tend to have recipes very high in fat and calories but the GI-diet, South Beach diet, carb addict's diet, etc seem to suit us rather well.

A Blast From the Past: Chicken Enchiladas from September 2005 - one of the first recipes I blogged. They were very good too, but definitely not as healthy. They could be lightened up though, if you like a creamy enchilada.

Question of the Day: Have you ever tried a 'name-brand' diet (Weight Watchers, Atkins, South Beach, etc)?

Tuesday, October 24, 2006

They hit the spot


Pumpkin Muffins
Cooking Light Annual Recipes 2006 Copyright 2005

1 cup all-purpose flour
½ cup whole wheat flour
½ cup granulated sugar I used Splenda
½ cup packed brown sugar
1 ¼ teaspoons pumpkin-pie spice
1 teaspoon baking soda
¼ teaspoon baking powder
¼ teaspoon salt
1 cup canned pumpkin
½ cup fat-free buttermilk I think I used 1%
½ cup egg substitute
¼ cup canola oil
¼ cup applesauce
Cooking spray

1. Preheat oven to 375 degrees.
2. Lightly spoon flours into dry measuring cups; level with a knife. Combine flours, granulated sugar, and next 5 ingredients in a large bowl, stirring with a whisk.
3. Combine pumpkin and next 4 ingredients in a medium bowl, stirring with a whisk. Add pumpkin mixture to flour mixture, stirring just until moist. Spoon batter into 16 muffin cups coated with cooking spray. I didn't want to dirty two pans so I made 12 larger muffins. Bake at 375 degrees for 20 minutes or until muffins spring back lightly when touched in center. cool muffins in pans 5 minutes on a wire rack; remove from pans. Cool completely on wire rack.

Yield 16 muffins. Per muffin: 145 cal, 4.6 g fat, 2.6 g pro, 24.1 g carbs, 1.2 g fiber, 0 mg chol, 149 mg sodium, 33 mg calcium
_______________________________

I've been craving pumpkin bars with cream cheese frosting but these muffins made a nice, less caloric, substitute. I used Splenda in place of the white sugar and they turned out great. Still a slight Splenda aftertaste but the texture was wonderful. You can fancy these up with fruit, nuts, chocolate, etc but I really enjoyed them plain.

These are my contribution to Sweetnick's ARF/5-A-Day Tuesdays. At first, I didn't think pumpkin was included as one of The World's Healthiest Foods but then I found it lumped in with the winter squash.

What a busy night I had. Due to poor planning, I worked on three meals last night. I made last night's dinner, then I prepped tonight's dinner so I can just toss it in the oven tonight. That is pretty much my normal routine (I always try to do as much prep work for the next night as I can). But I also looked at the weekly menu and realized I needed to prep Wednesday's dinner too since it needs to be cooked in the crockpot tonight. So I practically cooked dinner three times last night. Yikes! That was a little too much, even for me.

A reminder: Only one more week left to sign up for the October cookbook giveaway.

A Blast From the Past: Spaghetti Alla Bolognese from May 2006. I think I'm putting that on next's week's menu. I have practically everything I need to make it and it was really good.

Question of the Day: What have you been craving?

Monday, October 23, 2006

Not what I was expecting


Sinfully Chocolate Waffles
Best of the Best From America Cookbook Copyright 2005

2 cups all-purpose flour
4 teaspoons baking powder
1 teaspoon salt
3 tablespoons sugar
3 teaspoons cocoa
2 eggs, separated
1 ½ cups low-fat milk I used Super Skim
1 teaspoon maple flavoring
4 tablespoons vegetable oil

In a large mixing bowl, add the dry ingredients and stir to mix well. Add egg yolks, milk, maple flavoring, and oil. Mix well. Beat egg whites until soft peaks form; add to batter mixture. Bake in waffle iron as you would any other waffle.

Serve with Mapeline Syrup or other syrup if your choice. Yields 6-8 waffles.

Mapeline Syrup:
2 cups granulated sugar
1 cup water
½ teaspoon maple flavoring

Mix together and bring to a boil. Serve warm with waffles.
___________________________

These waffles weren't what I thought they would be. I pictured dark, chocolatey waffles but as you can see that isn't how they turned out. As soon as I saw that they only called for 3 teaspoons of cocoa, I knew they wouldn't be very chocolatey but it was too late to turn back. And the lead-in raved that these were the best waffles ever, so I was curious.

It turns out that these were very good waffles. Crispy on the outside, light and fluffy on the inside. I loved the hint of chocolate and maple flavor in the waffles. Hubby ate two large stacks of them, reheated, over the weekend. My son ate part of one. I'd say there were a success.

The syrup though, was not. I only made it because I was out of maple syrup but later I remembered I had some Mrs. Butterworth's Lite in the cupboard. Thank God because the Mapeline syrup was pretty flat. A bit of salt and a pat of butter might have perked it up if I didn't have any other options.

Next time I want chocolate waffles, I'm going to try the chocolate waffle recipe from Joy of Cooking that was mentioned in the comments last time I made waffles.

This cookbook is rather interesting. Two women travelled the country for years, compiling 'best of' cookbooks for every state (sometimes a few states were combined into one book). This book highlights a few recipes from every state (these waffles are from Montana). The interesting thing is that it seems as if almost all of the recipes are from other cookbooks (regional cookbooks). Dang! I missed my calling.

By the way, this was my 300th recipe, from 122 cookbooks!

A Blast From The Past: Meatballs Stroganoff from November 2005. I'm making these again tonight but I tweaked the meatballs a bit. I didn't think they were tender and flavorful enough last time so I added some soaked bread and more seasoning this time.

Question of the Day: What kind of syrup do you use on pancakes or waffles? Or do you like something besides syrup on pancakes and waffles?

Friday, October 20, 2006

Easy but only so-so


Impossibly Easy Cheeseburger Pie
Betty Crocker Cookbook New Edition Copyright 2005

1 lb. lean ground beef
1 large onion chopped (1 cup)
½ teaspoon salt
1 cup shredded Cheddar cheese (4 oz.) I used Cabot 50% Light Cheddar
½ cup original Bisquick mix
1 cup milk I used Super Skim
2 large eggs

1. Heat oven to 400 degrees F. Spray 9-inch glass pie plate with cooking spray.
2. In 10-inch skillet, cook beef and onion over medium heat 8 to 10 minutes, stirring occasionally, until beef is brown; drain. Stir in salt (I added pepper too.) Spread in pie plate. Sprinkle with cheese.
3. In small bowl, stir remaining ingredients with fork or wire whisk until blended. Pour into pie plate.
4. Bake about 25 minutes or until knife inserted in center comes out clean.

Makes 6 servings.
______________________________

I know I've made 'impossible pies' in the past but it had been a very long time. I had some Bisquick in the cupboard so I decided to make one again. It was a bit bland but not bad. Not something I would rush to make again but not something I regret making or eating either.

The Betty Crocker Cookbook is a classic. I like the way they give optional measurements for things like onions, cheese, etc. I hate when a recipe calls for a small, medium or large onion - just tell me how much onion! I usually use sweet onions which are much bigger than yellow onions so it gets confusing for me.

I did my grocery shopping last night. Can someone tell me, when did celery get so expensive? I paid well over $2 for it last night, and it wasn't organic. Ouch!

Hey, don't forget this month's cookbook giveaway (US addresses only again, sorry). It's a good one.

Blast From the Past: Grilled Chicken Marinade from January 2006. I made this again this week and it's a really good marinade.

Question of the Day: Have you ever made an 'impossible' (Bisquick) pie?

Thursday, October 19, 2006

Mmmm, creamy pasta


Fettucine (Spaghetti) with Chicken and Mushroom Sauce
The Essential Pasta Cookbook Copyright 1998

13 oz fettucine I used Dreamfields spaghetti
2 large chicken breast fillets
1 tablespoon olive oil
1 oz butter
2 bacon rashers, chopped
2 cloves garlic, crushed
8 oz button mushrooms, sliced
1/3 cup white wine
2/3 cup cream I used fat-free half and half
4 spring onions, chopped
1 tablespoon plain flour
2 tablespoons water
1/3 cup freshly grated Parmesan, for serving

1. Cook the fettucine in a large pan of rapidly boiling salted water until al dente. Drain and return to the pan.
2. Trim the chicken of excess fat and cut into thin strips. Heat the oil and butter in a heavy-based frying pan, add the chicken and cook over medium heat for 3 minutes., or until browned. Add the bacon, garlic and mushrooms and cook for 2 minutes, stirring occasionally.
3. Add the wine and cook until the liquid has reduced by half. Add the cream and spring onion and bring to a boil. Blend the flour with the water until smooth, add to the pan and stir until the mixture boils and thickens. Reduce the heat and simmer for 2 minutes. Season with salt and pepper, to taste.
4. Add the sauce to the pasta and stir over low heat until combined. Sprinkle with Parmesan.
_________________________________

I love creamy pasta dishes but I hate the side of guilt that comes with them. I used fat-free half and half in place of the cream in this dish and I thought it did a fine job. I don't think that fat-free half and half thickens like cream does but since this recipe also included a little bit of flour and water as a thickener, I figured it was safe. I enjoyed this quite a bit.

I planned next week's menu last night. I'm trying to eat mindfully since the holidays are coming up but it's so hard. When it comes to regular meals, I'm okay, but there are so many decadent baked goods calling out to me from the pages of my cookbooks. I just tell them, I'll get to you in a few months. Luckily menu planning night coincides with the Biggest Loser. I find that show to be very inspiring.

Blast From the Past: Linguine Carbonara from February 2006 - one of my all-time favorite pasta dishes. I'll have to look for a lighter version.

Question of the Day: What's your favorite pasta dish? (Have I asked that one already?)

Wednesday, October 18, 2006

Guilt-free cheesecakes (almost)


Mini Cocoa Swirl Cheesecakes
The South Beach Diet Quick and Easy Cookbook Copyright 2005

6 ounces reduced-fat cream cheese, at room temperature
½ cup part-skin ricotta cheese
2 tablespoons granular sugar substitute
1 large egg
1 large egg yolk
½ teaspoon vanilla extract
1 ½ teaspoons unsweetened cocoa powder, sifted

Heat oven to 350 degrees F. Line 6 muffin cups with paper or foil liners.
Blend cream cheese and ricotta in a food processor until creamy. Add sugar substitute, egg, egg yolk, and vanilla, process until smooth.
Divide 1 cup of the batter among the muffin cups. Add cocoa powder to the remaining batter and combine. Drop a heaping tablespoon of the cocoa batter into each muffin cup and gently fold to form a swirl.
Place the muffin tin in a large roasting pan and fill the pan with hot water to reach halfway up the tin. Bake until the cakes are puffed and set, 18 to 20 minutes. Remove from the water and cool at room temperature. Refrigerate until chilled, about 2 hours.

Makes 6 servings. Per serving: 130 calories, 8 g fat, 4.5 g sat fat, 7 g pro, 7 g carbs, 0 g fiber, 125 mg sodium
_______________________________

At first, I wasn't sure about these. The batter didn't seem very sweet and I was starting to regret my decision to make a double batch right off (somehow six didn't seem enough knowing how much my husband likes cheesecake). I'm not sure at what point I decided I loved these, but it happened. They aren't overly sweet but they're sweet enough. Even my son loved these. My husband? Oh my, did I 'forget' to tell him that I made cheesecakes? However did I do that?

One advantage of their not being terribly sweet is that the Splenda aftertaste is minimized. I'm not saying that I couldn't detect it at all, but it was probably about as good as it gets, as far as my own Splenda tolerance goes. These aren't exactly low-calorie or low-fat but they are healthier than a full fat, full sugar version. I'm not a South Beacher but these are listed as a Phase 3 recipe which I believe is the maintenance phase (if I'm wrong, someone please correct me).

There was a lot of cracking which was not really a problem for these small mini-cakes but I think all that cracking was because I removed them from the muffin tin a little too soon. I should have thrown the whole shebang in the refrigerator.

Okay, you want to know how sick I am? Last night I put my new bookcase together and I had just enough room to squeeze all of my cookbooks on there. I thought that was a good sign that I should take a break from buying cookbooks. Well, this morning I walked into the building I work in and there was a book sale (new books) today. I bought two more cookbooks. This is a real illness, I tell you.

Blast From The Past: Apricot Cream Cheese Thumbprints from December 2005, another one of my cream cheese favorites.

Question of the Day: Do you use any artificial sweeteners? Which ones?

Monday, October 16, 2006

Welcome to "The Anal Retentive Chef"! I'm Gene ...


Light Meat and Cheese Lasagna
The America's Test Kitchen Family Cookbook Copyright 2005

SAUCE
1 onion, minced
1 teaspoon olive oil
salt
6 garlic cloves, minced
2 tablespoons tomato paste
¼ teaspoon red pepper flakes
1 pound (93 percent lean) ground turkey
1 (28-ounce) can crushed tomatoes
1 (28-ounce) can diced tomatoes
1 cup low-sodium chicken broth
2 bay leaves
½ cup minced fresh basil
pepper

FILLING AND PASTA LAYERS
15 ounces fat-free ricotta cheese (1 ¾ cups)
12 ounces reduced-fat mozzarella , shredded (3 cups) I used part-skim
1 ounce Parmesan cheese, grated (1/2 cup)
½ cup minced fresh basil
1 large egg, lightly beaten
½ teaspoon salt
½ teaspoon pepper
12 no-boil lasagna noodles (one 8- or 9-ounce package) I used whole-wheat no-boil lasagna noodles

1. For the sauce: Combine the onion, oil, and ½ teaspoon salt in a large Dutch oven. Cover and cook over medium-low heat until softened, 8 to 10 minutes. Stir in the garlic, tomato paste, and red pepper flakes and cook until the garlic is fragrant, about 30 seconds. Stir in half of the ground turkey and cook, breaking the meat into small pieces with a wooden spoon, until the meat loses it’s raw color, about 4 minutes. Stir in the crushed tomatoes, diced tomatoes with their juice, broth, and bay leaves. Simmer, stirring occasionally, until the sauce is thickened, about 45 minutes.
2. Stir the remaining turkey into the sauce and continue to simmer, stirring occasionally, until the sauce measures about 6 cups, 20 to 30 minutes. Discard the bay leaves and stir in the basil. Season with salt and pepper to taste.
3. To assemble and bake: Adjust an oven rack to the middle position and heat the oven to 375 degrees. Spray a 9 x 13-inch baking dish with vegetable oil spray. Mix the ricotta, 2 cups of the mozzarella, Parmesan, basil, egg, salt and pepper together until well combined.
4. Spread ¼ cup of the tomato sauce over the bottom of the baking dish. Place 3 noodles on top of the sauce and drop a generous 1/3 cup of the ricotta mixture down the center of each noodle, then spread it to an even thickness. Spoon 1 ½ cups of the sauce evenly over the ricotta. Repeat this layering two more times.
5. For the final layer, place the 3 remaining noodles on top. Spread the remaining 1 ¼ cups sauce evenly over the noodles. Spray a large sheet of foil with vegetable oil spray and cover the lasagna tightly. Bake for 15 minutes.
6. Remove the foil and sprinkle the lasagna with the remaining 1 cup mozzarella. Continue to bake uncovered, until the cheese is bubbling and slightly brown, about 25 minutes longer. Let set for 15 minutes before serving.

Makes 10 servings. Per serving: 340 cal, 10 g fat, 4 g sat fat, 70 mg chol, 31 g carbs, 29 g pro, 1 g fiber, 1110 mg sodium
__________________________________

I find it hard to read any recipe from America's Test Kitchen without hearing the voice of Phil Hartman's Saturday Night Live character, the Anal-Retentive Chef. But if you can get past the fussiness, their recipes are usually pretty good. This was no exception. Of course, it's hard to make a bad lasagna, but I was a little leery of the fat-free ricotta. No worries, it worked really well in this. In fact, I would have no qualms about using fat-free ricotta in any lasagna recipe from now on.

This was time-consuming but it didn't require a lot of work, just cooking time (mostly for the sauce). I made it a day ahead, which I like to do with lasagna because then it cuts neatly out of the fridge and it can be heated up easily in the microwave (or, you can cover it with foil and reheat it slowly in the oven.)

There's a lot of fresh basil in this, so if you're not a fan of it, adjust appropriately. The basil flavor is definitely prominent in the final product (not a problem for me at all). The pasta texture was slightly gummy, which I find is always the case with no-boil noodles but worth it not to have to deal with handling boiled lasagna noodles.

Blast From the Past: Garlic Bread from October 2005. I wish I had made some garlic bread to go with this but that would have cancelled out the lightmess of the lasagna.

Question of the Day: Are you an 'anal-retentive chef' (do you fuss over the details, clean as you go, etc ) or do you not sweat the details?

My first waffles


Whole Wheat Applesauce Waffles
Have Your Cake And Eat It Too Copyright 1993

butter-flavor no stick cooking spray
1 large egg
2 tablespoons canola or safflower oil
3 tablespoons nonfat vanilla or plain yogurt
½ cup unsweetened applesauce
1 tablespoon dark corn syrup or granulated sugar I used the sugar
¼ cup toasted wheat germ
¾ cup 1% milk, or as needed
½ cup unsifted all-purpose flour
½ cup whole wheat flour or buckwheat flour
2 teaspoons baking powder
¼ teaspoon baking soda
1/8 teaspoon salt
½ teaspoon cinnamon
1 cup pure maple syrup, warmed

1. Lightly coat the waffle iron with the cooking spray. Preheat the waffle iron according to the manufacturer’s directions. Before I started, I had already followed the manufacturer's instructions and used a light rub of solid shortening on the iron so I didn't use any spray oil.
2. Meanwhile, in a large bowl, whisk together the egg, oil, and yogurt. Beat in the applesauce, corn syrup or sugar, wheat germ and milk.
3. Set a strainer over the bowl and add both flours, the baking powder, baking soda, salt, and cinnamon, With a spoon, stir and sift the dry ingredients onto the wet ingredients. Mix well. (If the mixture must stand for any length of time, you may need to add a little more milk, a tablespoon at a time.)
4. Spoon the batter onto the bottom panel of the waffle iron, close it gently, and cook for 2 to 3 minutes (models vary in timing), until the jaws can be opened easily. If the iron sticks, the waffle is not yet baked through. When the waffle is done, use a fork to gently pry it up. Repeat until all the batter is used. You should have to regrease the surface only rarely, but if the waffles seem to stick, lightly spray the waffle iron again. Serve the waffles hot, with the warm maple syrup.

Makes 15 4-inch waffles. Per waffle with 1 tablespoon syrup: 133 cal, 3 g pro, 3 g fat, .4 g sat fat, 26 g carbs, 111 mg sodium, 15 mg chol
______________________________

I'd say that my first attempt at homemade waffles was a success, although there were a few hiccups. Well, one hiccup. The batter was too thick, nothing that a bit more milk wouldn't have solved, but being a waffle virgin, I had no idea it was too thick until my waffles came out incomplete (it didn't spread enough) and I didn't get as many waffles as the recipe said I would (I got 8 and had batter for about 2 more but I got lazy and discarded that last bit.) The recipe lead-in said this batter was too moist (I would assume that meant thin) to use for pancakes but this batter was as thick or thicker than most pancake batters.

As for taste, I thought these were really good. My son enjoyed one too. I froze the extras. I can't wait to make waffles again. I already have my next recipe selected.

I'm so excited. My new bookshelf is on the truck, heading to my house today. By next week, you may be able to see my cookbook collection in all it's glory. It's been a long time since it was small enough to keep all in one place so I'm anxious to see it all together myself. It's going to be so much easier to select recipes when I have all of my cookbooks in one place. I'm sure I'll rediscover a few oldie-but-goodies that have been hiding away.

Blast From the Past: Whole Wheat Buttermilk Pancakes from February 2006. Another great breakfast option if you don't have a waffle iron.

Question of the Day: Do you own a waffle iron? Do you use it often?

Friday, October 13, 2006

Messed up again


Cappuccino Muffins
Cakes 1,001 Classic Recipes From Around the World Copyright 2003

2 cups all-purpose flour
1 tablespoon baking powder I goofed and only added 1 teaspoon
½ teaspoon salt
½ cup firmly packed brown sugar
1 large egg, at room temperature
¼ cup heavy cream I used fat-free half and half
1 cup very strong cold black coffee
I also added 1 teaspoon of instant espresso powder
¼ cup confectioner’s sugar, to dust

Preheat the oven to 375 degrees F. Butter and flour a 12-cup muffin pan, or line with foil or paper baking cups. Sift the flour, baking powder and salt into a large bowl. Stir in the sugar and make a well in the center. Beat the egg and cream in a small bowl. Beat the cream mixture and coffee into the dry ingredients with an electric mixer at low speed. Spoon the batter into the prepared cups, filling each 2/3 cup full. Bake for 15-20 minutes, or until a toothpick inserted in the center comes out clean. Cool the muffins on racks. Dust with the confectioner’s sugar.
_______________________________

I realized when I was transcribing this recipe that I only added one teaspoon (instead of one tablespoon) of baking powder to these muffins. They were still quite fluffy, but they had funky tops. Adding baking powder to a recipe that didn't call for it, not reading recipes closely, adding the wrong amounts - earlier this week, I was messing everything up.

I immediately thought to use fat-free half and half in place of the cream for this recipe, since I had fat-free half and half and I had no cream, not thinking that I was taking out the only other fat source besides the egg yolk. At first these were sort of chewy, but I refrigerated them and the next day they were less chewy. They texture wasn't bad for having so little fat in them (and only a third of the amount of baking powder they were supposed to have). The flavor was actually really nice. I threw in some instant espresso powder just to be safe because my coffee was regular strength. The confectioner's sugar eventually sort of melted into the tops just from the moisture but the extra sweetness was still there, which is what counts. It wasn't really necessary, but it was a nice touch.

These were rather plain muffins so I couldn't help but imagine them jazzed up somehow (maybe with hazelnuts, chocolate chips, etc). I wouldn't rank these up there with full-fat muffins, but they weren't bad at all. They satisfied my craving for something sweet, yet I didn't really want to eat more than one at a time. That's perfect when I'm trying to cut back a little on the calories, like I am right now.

A Blast From the Past: Apple Oat Bran Muffins from February 2006 - another great lowfat muffin (healthier than these Cappucino Muffins).

Question of the Day: Are you a coffee drinker? Do you like coffee-flavored foods?

Wednesday, October 11, 2006

Lightening things up around here (and a cookbook miracle)


Simple Sukiyaki
America’s Quick Cuisine Copyright 2004

½ cup condensed consommé
¼ cup dry sherry
¼ cup reduced-sodium soy sauce
1 tablespoon sugar
4 ounces packaged triple-washed baby spinach I omitted this
½ teaspoon vegetable oil
8 ounces lean boneless beef ribeye or sirloin, trimmed of fat and thinly sliced I had closer to a pound
1 tablespoon minced fresh ginger I used jarred grated ginger
1 medium-size onion, thinly sliced
2 cups mushrooms, sliced
4 green onions, cut into 1-inch lengths
hot cooked rice I used brown rice

1. In a small bowl, stir together consommé, sherry, soy sauce and sugar. Set aside. Remove and discard any coarse stems from spinach; set spinach aside.
2. Heat oil in a wide nonstick frying pan over high heat. Add beef and ginger; cook, stirring, until beef is browned (2 to 3 minutes). With a slotted spoon, transfer beef and ginger to a bowl.
3. Add sliced onion and mushrooms to pan; cook, stirring, until onion is soft and mushrooms are tinged with brown (about 3 minutes). Add green onions and spinach; stir until spinach is wilted (about 1 minute). Add consommé mixture, then return beef to pan; bring to a boil, stirring. Serve over rice.

At the end, I added the meat back and cooked it gently for a few minutes (I didn't like the thought of boiling the meat). Then I removed the meat and veggies with a slotted spoon and reduced the liquid. You could thicken it with a slurry too, but I was going for a more intense flavor.

Makes 2 servings.
______________________________

I'm trying to lighten things up since the holidays and all the excesses that go with them are quickly approaching. This dish was light and actually pretty good but the brown rice I made with it just wasn't hitting the spot. I usually enjoy brown rice but perhaps I spoiled myself by making the spanish rice with regular white rice earlier in the week.

I had a close call with this recipe. For some reason, I completely glossed over the ginger in this recipe, probably because it's usually a staple but I've been out of it for a while and it's been really hard to find fresh or jarred grated ginger around here. I only have one grocery store on the way home and historically they have never carried these types of ginger but low and behold they had 3 small jars of it hiding in the corner of the produce section. Score!

Do you want to hear about a little cookbook miracle? My mom has an older cookbook, well pieces of an older cookbook, that I always enjoyed looking through while growing up. I really wanted a complete copy of it but there was no way to identify it - the first 20 pages, last (?) pages and the entire binding was missing. All I had to go on was the approximate number of pages (over 460), the approximate age (around 1970 was my guess) and some of the chapter headings. I thought it might be a BHG book from the layout and typeface but I was wrong.

It took only four days but I tracked down the book - The Complete Everyday Cookbook (1971). I can't wait until it gets here. But like an idiot I e-mailed my mother about it right away when I could have surprised her with an intact copy for her birthday next month. I also picked up an old King Midas cookbook on e-bay that may have a donut recipe that my grandmother used to make, a recipe that my mother has mentioned a few times over the years (but only this weekend mentioned it was a King Midas cookbook). I told my mom about that too. I can't believe I missed out on surprising her with those books. Stupid! Stupid! Stupid!

A Blast From The Past: Spicy Orange Beef from July 2006. That's another great quick beef recipe.

Question of the Day: Did your mother have many cookbooks?

Tuesday, October 10, 2006

Finally something goes right


Creekside Spanish Rice
The All-American Truck Stop Cookbook Copyright 2002

2 cups rice
¼ cup cooking oil
1 ¼ teaspoons chili powder
¼ cup diced onion I used red onion
4 cups water
1 ½ cups tomato juice
I added salt to taste too
½ cup chopped green onion
1 cup canned tomatoes

In a saucepan, cook the rice, oil, chili powder, and onion over medium heat, stirring constantly. Add the water and tomato juice. Cover and cook approximately 35 to 45 minutes. When done, add the green onions and tomatoes.

Yield: 4 to 6 servings

From Creekside Restaurant, Seven Feathers Truck and Travel Center, Canyonville, Oregon
____________________________________

This was a simple recipe but it was the first recipe in several days that I didn't screw up (you haven't heard about some of those goofs yet). I only made half the recipe and it turned out perfect. In the middle of the cooking, I thought it was going to be too oily but in the end it wasn't. I think you could probably safely cut down on the oil though. I served this with some free-styled chicken quesadillas.

This cookbook has recipes from truck stops around the country. It includes pictures and information on these truck stops, their employees, the life of a trucker, etc. I've decided that I really need more cookbooks like this - cookbooks that offer more than just recipes. I love a bit of history mixed in with my food.

One thing about this cookbook that I wasn't crazy about is that many of the recipes have not been scaled down. This is great if you have 70 hungry truckers to feed but since most of us probably don't, I think it would have been wise if they could have scaled those large recipes down for the home cook.

A Blast From The Past: Spanish Rice and Ground Beef from just last month. I think you could use the leftovers from today's recipe to make this - just brown some ground beef, add the leftover rice and some salsa.

Question of the Day: Have you ever eaten at a truckstop?

Monday, October 09, 2006

Eating our veggies


Broccoli and Beef Pasta
365 Favorite Brand Name Hamburger Copyright 1997

1 pound lean ground beef
2 cloves garlic, minced
1 can (14 ½ ounces) beef broth
1 medium onion, thinly sliced
1 cup uncooked rotini pasta I used Dreamfields
½ teaspoon dried basil leaves
½ teaspoon dried oregano leaves
½ teaspoon dried thyme leaves
1 can (145 ½ ounces) Italian-style tomatoes, undrained
2 cups broccoli florets or 1 package (10 ounces) frozen chopped broccoli, thawed I used fresh
3 ounces shredded Cheddar cheese or grated Parmesan cheese I used Cabot 50% Light Cheddar

1. Combine meat and garlic in large nonstick skillet; cook over high heat 6 to 8 minutes or until meat is no longer pink, breaking meat apart with wooden spoon. Pour off drippings. Place meat mixture in large bowl and set aside.
2. Add broth, onion, pasta, basil, oregano and thyme to skillet. Bring to a boil. Reduce heat to medium-high and boil 10 minutes; add tomatoes and their juice. Increase heat to high and bring to a boil; stir in broccoli. Cook, uncovered, 6 to 8 minutes, stirring occasionally, until broccoli is crisp-tender and pasta is tender. Return meat to skillet and stir 3 to 4 minutes or until heated through.
3. With slotted spoon, transfer meat mixture to serving platter. Sprinkle with cheese. Cover with lid or tent with foil several minutes until cheese melts. Meanwhile, bring juice left in skillet to a boil over high heat. Boil until thick and reduce to 3 or 4 tablespoons. Spoon over meat mixture.

I cooked the beef, garlic and onions together. Then I cooked the pasta and herbs in the broth for 10 minutes, added the tomatoes and broccoli and cooked it covered for several minutes. Then I added the meat mixture back and I also added some extra cooked pasta. Then I transferred it to a dish and I sprinkled on the cheese and let it melt on top. I didn't reduce the liquid since I had added the extra pasta.

Makes 4 servings.
_____________________________

I didn't realize until it was too late that the pasta wasn't cooked separately in this recipe. I don't like recipes where the pasta is incorporated, not when only one cup of pasta is called for, because I never know how hungry my husband is going to be. He doesn't really suscribe to 1/2 cup or 1 cup servings of cooked pasta. So I cooked some pasta on the side and added about another 1 1/2 cups cooked pasta to this. I veered from the written recipe a bit but I think the result was probably the same. This is one of those recipes that made a perfectly fine dinner but just isn't worth making again, IMO.

It was a nice way to get some veggies in all of us though, so this is my contribution to Sweetnick's ARF/5-A-Day Tuesdays. This is loaded with broccoli, tomatoes, onions and garlic.

A Blast From The Past: Sour Cream Cake - my son's birthday cake from January 2006. Because today is my birthday and I never get cake on my birthday anymore. Boo hoo.

Question of the Day: Did you have a 3-day weekend?

Saturday, October 07, 2006

Oops! I screwed up again


Whole Wheat Cookies
Amish Cooking Copyright 1980

2 ¼ cups whole wheat flour
1 ½ cups sifted all-purpose flour
1 ½ cups brown sugar
1 ½ teaspoons soda I accidentally also added the same amount of baking powder
1 ½ teaspoons salt
1 ½ cups sour milk
2 eggs
½ cup melted butter
¼ cup molasses
1 ½ teaspoons vanilla
1 cup chocolate bits

Measure out the flours, sugar, soda and salt, and mix them together. Make a well and add the milk, eggs, butter, molasses and vanilla. Beat this mixture well and stir in the chocolate bits. Drop the batter by spoonfuls onto a cookie sheet and bake it at 350 degrees for 6 to 8 minutes or until done.
__________________________________

I'm not sure why but after I added the baking soda to this recipe, I added baking powder. I was making these cookies on the fly and halving the recipe so I guess the situation was ripe for making a mistake. They still turned out very delicious but they had the texture of cake. I thought they smelled great too. Oh, I got 2 dozen cookies out of half of this recipe, using my big scoop.

This is the worst kind of mistake though. I have no idea what the texture of these cookies should be so I'll have to make another batch, doing it right, someday.

I have a few smaller Amish cookbooks but none are as extensive as this one from my local library. This one even has a recipe for homemade grape-nuts! The Amish can make anything.

I scored a few early food-related birthday presents this weekend. I finally got one of the few small appliances that I don't already own, a waffle iron. I'll need to christen that soon. And I got my own personal copy of America's Test Kitchen's Family Cookbook, which I had previously checked out of the local library and enjoyed. I also got a cookbook holder (can you believe I didn't own one?!) but it's defective in it's design so I may take it back.

Everyone can relax - I heard from the September cookbook giveaway winner and I have her address. Don't forget to check out October's giveaway. It's a very heavy book so I'll have to limit it to US mailing addresses again. Next month, I will definitely try to find a book that I can afford to mail internationally.

How about a quick restaurant review? My parents took us to Denny's and I actually liked the food. It's casual food, of course, but they had a nice variety of foods on the menu. The kid's menu was great too. I had a cheesesteak that was pretty awesome (for Denny's). I thought, why don't we go to Denny's more often? Well, probably because the service was horrible! We had to wait for a table even though the restaurant was practically empty (it was around 3pm on a Sunday afternoon). They had signs plastered all over with a space age looking child's cup on it but when I ordered one for my son, I was told they didn't have any in stock. The child's meal came last, several minutes after the adults were served. The waitress never came back until we were done with our food. They had pecan pie and pumpkin pie pictured on all of the placemats but when my husband tried to order a slice of pumpkin pie, the waitress returned from the kitchen and told him that they had the pumpkin pie but it was still frozen. Oh well, for once I didn't have to worry about what a bad tip my dad probably left. (He's not really 'cheap' but he's in his late 70s and he calculates his tips with a rather vintage percentage.)

A Blast From the Past: Remember those flat Whole Wheat Sugar Cookies? Someone told me that they aren't as flat if you use margarine. I think they'll taste great either way. I need to try those again. So many cookies, so little room for cookies in my diet.

Question of the Day: Can you give me a little review of your last restaurant experience?

Urgent Message to the September Cookbook Giveaway Winner!

I accidentally deleted your e-mails when I was clearing out comment notification e-mails. Please send your mailing address again. I sent you another e-mail but in case you miss it, I'm posting here too.

Yikes, I'm messing up on my first giveaway.

Thursday, October 05, 2006

Sometimes your wildest dreams can come true!


Quick Tamale Casserole
365 Favorite Brand Name Hamburger Copyright 1997

1 ½ pounds ground beef
¾ cup sliced green onions
1 can (4 ounces) chopped green chilies, drained and divided
1 can (15 ¼ ounces) whole kernel corn, drained
1 can (10 ¾ ounces) condensed tomato soup
¾ cup salsa
1 can (2 ¼ ounces) chopped pitted ripe olives (optional) I added these
1 tablespoon Worcestershire sauce
1 teaspoon chili powder
¼ teaspoon garlic powder
4 slices (3/4 ounce each) American cheese, halved I used Longhorn cheddar
4 corn muffins, cut into ½-inch cubes I crumbled them
Mexican Sour Cream Topping (recipe follows)(optional)

In skillet, brown ground beef with green onions. Drain. Reserve 2 tablespoons chilies for Mexican Sour Cream Topping, if desired. Stir in remaining chilies, corn, tomato soup, salsa, olives, Worcestershire sauce, chili powder and garlic powder until well blended. Place in 2-quart casserole. Top with cheese, then evenly spread muffin cubes over cheese. Bake at 350 degrees F for 5 to 10 minutes or until cheese is melted. Serve with Mexican Sour Cream Topping, if desired.

Mexican Sour Cream Topping

1 cup sour cream I used lite sour cream
2 tablespoons chopped green chilies, reserved from above
2 teaspoons chopped jalapeño peppers (optional) I added these
2 teaspoons lime juice

Combine all ingredients in small bowl; mix until well blended.
__________________________________

Sometimes I like to take a break from reality and imagine what things would be like in a 'perfect' world. I could eat anything and not gain weight. I'd never have to clean up after myself. I could buy as many groceries as I'd like. People would send me cookbooks out of the blue.

Well, most of that is pure fantasy but my online friend Tammy (Mickey15 to my KT friends), contacted me and asked me if I wanted some cookbooks she was getting rid of, fulfilling at least part of my dream. She sent me this book, a local cookbook, a couple of Pampered Chef cookbooks (I think the stoneware one has the pizza dip recipe that I've been looking for), a couple of Christmas cookbooks. Oh, a crockpot book too. Thank you Tammy!

I have a smaller Favorite Brand Name Hamburger cookbook that only has a small portion of the recipes in this book. This book has recipes for all the ground meats, not just beef. I know this cookbook will be used heavily. I had some Cornmeal Cheddar Muffins in the freezer and a can of condensed tomato soup in the pantry so this recipe caught my eye right away. My son loved it. I loved it too. The sour cream topping was great but not necessary since the casserole isn't very spicy. You could turn up that heat if you'd like to. This could be played around with quite a bit - beans would be great in it too.

A Blast From The Past: Tex-Mex Cavatappi from February 2006. Great stuff.

Question of the Day: I have a single pastry pie crust I need to use up - what should I do with it (what would you do with it)?

October 2006 Cookbook Giveaway

The first cookbook that I gave away, Lidia's Italian-American Kitchen, came to me by way of a mixup in a cookbook order. This time I had to select one on my own. That's not easy since there are so many cookbooks out there. I decided that this month I would give away one of my most used cookbooks, Favorite Brand Name Slow Cooker, Casseroles and More. I was fortunate to pick up a nice new copy of this for one of you.


Now, this isn't a fancy celebrity chef cookbook but I can't imagine that anyone couldn't find a few recipes that suited their tastes in this monster of a book. There are over 500 recipes on almost 400 pages. Lots of photographs too.

Don't let the Favorite Brand Name title fool you - most of the recipes aren't loaded with convenience products. I own quite a few Favorite Brand Name cookbooks but if I could only have one, this would be it. The name is a bit misleading in that I don't think there are any more slow cooker recipes than there are casseroles, skillet dinners, etc. This book would be useful even if you don't own a crockpot.

These are some of the recipes from this book that I've tried so far:

Barbara’s Pork Chop Dinner
Bayou-Style Pot Pie
Chicken and Linguine in Creamy Tomato Sauce
Chicken Enchiladas
Ham and Egg Enchiladas
Jambalaya Stir-Fry on Cajun Rice
Milwaukee Pork Stew
Sausage and Mushroom Pasta
Spanish-Style Couscous
Sweet Jalapeño Mustard Turkey Thighs

This is how it works - just leave a comment on the giveaway post pledging that you'll use the cookbook for your own pleasure (cooking, reading, staring at it on your bookshelf) and you won't turn around and sell it on E-bay, at a yard sale, etc. No, you don't have to write that out - if you comment, I'll assume your motives are pure. I just need an e-mail address (if your profile links to an e-mail, you don't need to type it out, I'll find it). Entry is open until the last day of the month. First chance I get after that, I'll put all the names in a hat and pick two names. The winner will have a week to give me their address after I contact them. If I don't hear from that person, the book goes to the second name I picked. I'll pay the shipping, of course.

As I said, this is a MONSTER of a book so I'll have to limit this to US mailing addresses only again.

*****The winner was Anette********

Wednesday, October 04, 2006

Basic, but good


Sonoma Chicken
The Good Carb Cookbook Copyright 2001

1 pound boneless, skinless chicken breast I used tenders
1 teaspoon dried rosemary
½ teaspoon garlic powder
¼ teaspoon salt
¼ teaspoon ground black pepper
3-4 teaspoons extra-virgin olive oil
1 medium onion, cut into ¼-inch-thick slices, and separated into rings
1 ½ cups sliced fresh mushrooms
1 cup chicken broth
¼ cup dry white wine
3 tablespoons chopped sun-dried tomatoes (not packed in oil)
¼ cup finely chopped fresh parsley

1. Rinse the chicken and pat it dry with paper towels. Cut it crosswise into 8 equal pieces. with the cut side up, use the palm of your hand to flatten each piece to slightly less than ½-inch thickness. I cut my chicken into chunks. Sprinkle both sides of the chicken pieces with some of the rosemary, garlic powder, salt and black pepper, and set aside.
2. Coat a large nonstick skillet with the olive oil and preheat over medium-high heat. Add the chicken and cook for about 2 to 3 minutes on each side or until nicely browned and no longer pink inside. Remove chicken from the skillet and set aside to keep warm.
3. Add the onion rings, mushrooms, and 1 tablespoon of the broth to the skillet. Cover and cook, stirring frequently, for a couple of minutes or until the onions and mushrooms start to brown and begin to soften. Add a little more broth if the skillet becomes too dry, but only enough to prevent scorching.
4. Add the remaining broth, wine and tomatoes to the skillet mixture and bring to a boil. Reduce the heat to medium-low, cover, and cool for about 3 minutes or until the tomatoes have softened. Raise the heat to medium-high and cook uncovered, stirring frequently, for several minutes or until about ¼ to 1/3 cup of the liquid reemains in the skillet. I added the chicken back in and cooked everything together for a while. Then I removed the chicken and veggies and reduced the liquid.
5. To serve, place some of the chicken on each of 4 serving plates. Top each serving with some of the vegetable mixture, pan juices and a sprinkling of parsley. Serve hot. I served it over brown rice.

Yield: 4 servings Per serving: 189 cal, 5 g carbs, 65 mg chol, 4.8 g fat, 1.2 g fiber, 27 g pro, 436 mg sodium, 32 mg calcium
_______________________________

This is one of those dishes that I almost feel silly making, since I used to freestyle dishes like this all of the time and I know I could easily make something like this without a recipe. Nonetheless, it was very good. The sundried tomatoes could be left out if you don't have them on hand. They add a nice bit of tang but don't really blend in with the other flavors. There wasn't anything extraordinary about this dish but it was very flavorful (be sure to let the sauce reduce down quite a bit).

When it gets down to it, I could easily freestyle many of the recipes I follow but then I might miss a little nuance that I would never think of on my own.

It's grocery night! How sad is it that I'm so excited by that? Last week I did end up going back once, but I only spent $12-$13 and that was in lieu of getting takeout for Saturday night (plus a few other things). I've done good, two weeks in a row. I keep putting off a trip to Costco, which is easy to do when your annual membership is due and you know you have to drop $45 before you even make a single purchase.

A Blast From The Past: Chicken and Linguine in Creamy Tomato Sauce from October 2005. At first, I wasn't crazy about this but the leftovers were awesome. Cooking pasta straight in the sauce is dicey.

Question of the Day: If I gave you chicken and rice, what would you whip up based on what you have on hand in your kitchen, right at this very moment?

Turn the heat down, Giada


Braciola
Everyday Italian Copyright 2005

2/3 cup grated Pecorino Romano cheese
1/3 cup grated Provolone
½ cup dried Italian-style bread crumbs
2 tablespoons chopped fresh flat-leaf parsley
1 garlic clove, minced
4 tablespoons olive oil
1 flank steak ( 1 ½ pounds) I used a 'London Broil'
1 teaspoon sea salt
1 teaspoon freshly ground black pepper
1 cup dry white wine
3 ¼ cups Marinara Sauce I used a jar of sauce

In a medium bowl, stir the cheeses, bread crumbs, parsley, and garlic to blend. Stir in 2 tablespoons of the oil and set aside. Lay the flank steak flat on the work surface, and sprinkle with ½ teaspoon each of salt and pepper. Sprinkle the bread-crumb mixture evenly over the steak to cover the top evenly. Starting at one short end, roll up the steak as for a jelly roll and enclose the filling completely. Using kitchen twine, tie the steak roll to secure. Sprinkle the braciola with the remaining salt and pepper. I couldn't find twine anywhere. I had to use toothpicks.

Preheat the oven to 350 degrees F. In a large, heavy ovenproof frying pan, heat the remaining 2 tablespoons of oil over a medium flame. Add the braciola and cook until brown on all sides, about 8 minutes. Add the wine and bring to a boil. Stir in the marinara sauce. Cover partially with foil and bake, turning the braciola and basting with sauce every 30 minutes, until the meat is almost tender, about 1 ½ hours. Uncover and continue baking until the meat is tender, about 30 minutes longer.

Remove the braciola from the sauce. Using a large, sharp knife, remove the kitchen twine and cut the braciola crosswise and diagonally into ½-inch-thick slices. Transfer the slices to plates. Spoon the sauce over and serve.

This can be made ahead and reheated. I sliced it and topped it with the breadcrumb mixture I had leftover before I reheated it.

Make 4 main course servings.
_______________________________

I was trying to use up the meat I had on hand. I thought I had a flank steak but it turned out to be what they call a London Broil here. I'm not sure what that is, it might be a cut of sirloin. I pounded it a bit and figured after the long cooking, it wouldn't matter much. I don't think it did. This was pretty good but I used a jarred sauce and it got really concentrated. I should have added more wine or water. Jarred sauce is saltier and sweeter than homemade and concentrated down, it was just too intense.

I have to a bone to pick with Giada over her cooking temperature. 350 degrees was too high. My sauce started to burn and I had to turn it down. I only cooked mine for about 1 1/2 hours and it was plenty tender.

A Blast From The Past: Cinnamon-Cider Cranberry Cake from November 2005. A great recipe for fall. I remember that it was better after a day or two, once the cranberries mellowed out.

Question of the Day: How often do you eat beef?

Tuesday, October 03, 2006

Not as good as the unhealthy version but still good


Raw Broccoli Salad
Splenda No Calorie Sweetener Copyright 2004

4 cups (about 2 pounds) broccoli florets or broccolini
¼ cup minced red onion
2 tablespoons Splenda Granular
2 tablespoons cider vinegar
2 tablespoons low-fat mayonnaise
2 tablespoons sunflower seeds shelled, roasted and salted I omitted these
3 tablespoons seedless raisins

Chop broccoli or broccolini into florets. Set aside.

Whisk together remaining ingredients in medium bowl. Add broccoli. Toss to coat. Chill until ready to serve.
______________________________

This recipe was on my 'to make' list for quite some time. A few weeks ago, Claire made a version of this and then broccoli went on sale a few days later so I figured that was my cue to make this. I had made a much heavier version of broccoli salad, with cheese and bacon way back when and I'm not going to lie, that version is much, much better. This salad was way too 'dry' for my taste. I had to mix up more dressing to make it passable. But, I still ended up with a decent broccoli salad that is much lighter than the other version.

This is my contribution to Sweetnick's ARF/5-A-Day Tuesday this week.

A Blast From the Past: Broccoli Slaw from March 2006. Another light, broccoli recipe that I've mean meaning to make again.

Question of the Day: When did you last eat broccoli?

Monday, October 02, 2006

Yummy brownies and our first winner!


(Christmas version - I used cookie icing and sprinkles after baking and cooling the brownies. You can also add sprinkles before baking the brownies.)

Chocolate Chip Brownies
Taste of Home Grandma’s Favorites Copyright 2006

1 cup butter, softened
3 cups sugar
6 eggs
1 tablespoon vanilla extract
2 ¼ cups all-purpose flour
½ cup baking cocoa
1 teaspoon baking powder
½ teaspoon salt
1 cup (6 ounces) semisweet chocolate chips I used mini-chips
1 cup (6 ounces) vanilla or white chips
1 cup chopped walnuts I omitted these

In a mixing bowl, cream butter and sugar. Add eggs and vanilla; mix well. Combine flour, cocoa, baking powder and salt; stir into creamed mixture just until blended (do not overmix).

Pour into two greased 9-in. square baking pans. Sprinkle with chocolate and vanilla chips and nuts. Bake at 350 degrees for 35-40 minutes or until a toothpick inserted near the center comes out clean. I halved the recipe and made one pan that was done in under 30 minutes. Cool.

Yield 3-4 dozen.
________________________________

The woman who submitted this recipe to Taste of Home claimed that she always carried copies of the recipe when she brought these brownies anywhere since she was asked for it so often. Many contributers make that claim about their recipes and I fall for it every time. It must be good if the recipe is in such demand, right?

These brownies were actually very, very good for a cocoa brownie. I wasn't crazy about the white chips I had but they didn't manage to ruin these for me. Next time I might do a combination of milk and dark chocolate chips. The yummiest variation (if you are so lucky as to be able to enjoy peanut butter instead of seeing it as an evil poison that has the potential to take away your reason for living) would probably be peanut butter chips. These were so easy to whip together. I only made a half batch so my coworkers really missed out. There weren't enough left over to bring to them.

**update 12/2011 - I have made these brownies so many times. They are great to stack in a treat bag for teachers. I dress them up for the holidays in various ways. I like milk chocolate chips. I never use the white chips anymore.

Okay, here's the moment you've all been waiting for. The winner of the September cookbook giveaway is...................................


Tina! She tells me she's a fellow cookbook addict so I think the book will be in good hands. Stay tuned for the October giveaway announcement.

Speaking of cookbooks, I painted my spare room yesterday. What does that have to do with cookbooks? Well, I painted the room since in a couple of weeks, I'm getting a new bookcase for my cookbooks. My collection has become too unruly and I really need a centralized location for them. I can't wait.

A Blast From The Past: Fudge Drops from October 2005. Another great chocolate recipe.

Question of the Day: Where do you keep your cookbooks?